The Android 5.0 Lollipop, a new bootloader, and a 64-bit Tegra K1 processor – people would go nuts on this combination but it leaves a scary nightmare for the developers. However, Chainfire seems to have taken it as a challenge and announced the root support for the Nexus 9 within 24 hours of its launch. We’ve already covered the root process for the Nexus 9 on Android 5.0 Lollipop which involves unlocking bootloader and flashing few kernel images to attain root. A Nexus user would definitely go nuts on such beefy root procedure, thanks to Google’s new additions to Android Lollipop.
Google’s improvements in the Android Lollipop forces developers to boot the device using a custom boot image to root the device. So the previous Nexus 9 rooting procedure involves booting from a custom boot image and then install a patched boot image to attain SuperSU. The process wasn’t complex and there’s just another step appended to the traditional process, but it’s undigested to many users. Anyway, Chainfire releases a simpler one-click root tool for the Nexus 9 which just requires a single click from the user.
The one-click root tool is compatible with Windows, Mac, and Linux. The root tool is a just a batch script which automates the previous procedure, so just press enter and take a sip of coffee while your Nexus 9 is automagically root. Grab the root tool from the download link below and follow the installation process to root Nexus 9.
Warning
This guide is intended only for the Nexus 9, not for any other device. Be extra cautious when you choose the rooting patches as flashing wrong patches might result in a bricked device. You alone are responsible for any consequences that might occur during the process, we shall not be held responsible for any damage to your device.
Prepare Your Device
- Charge your Nexus 9 above 60% battery level to avoid shutdowns during the process.
- Enable USB Debugging: Link
- Install required USB drivers on your PC.
- Backup your device storage, Contacts, SMS etc. using Google Sync service or any third-party app.
Installation Procedure
- Download the CF one-click root tool for your Nexus 9 → Click here to download
- Enable OEM unlock from Developer options in settings. You can check our previous root process for detailed instructions.
- Reboot your Nexus 9 into bootloader mode using the hardware combo or the adb method.
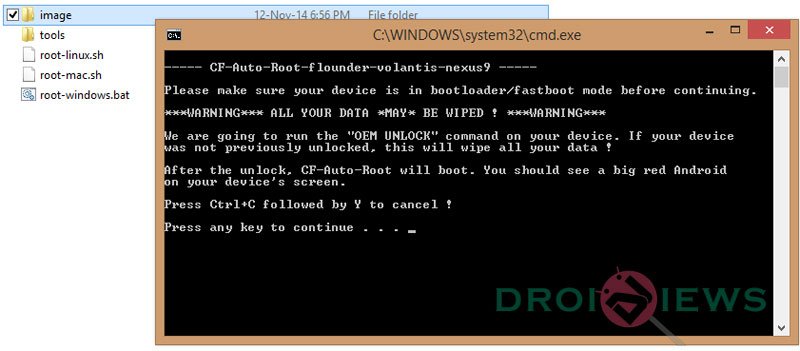
- Extract the CF-Auto-Root-flounder-volantis-nexus9.zip file on your PC.
- Connect your Nexus 9 to your computer with a USB cable and make sure it’s detected.
- Now simply launch the script file based on your desktop OS.

That’s it, sit back and relax while your Nexus 9 reboots once it’s successfully rooted.


Join The Discussion: