The OnePlus One is the flagship killer Android device about which everyone is talking for a while now. It is powered by the Snapdragon 801 chipset, clocked at 2.5 GHz with a Quad-Core processor. It has a whooping 3 GB of RAM. For smartphone gamers, you will be happy to know that the OnePlus One sports the Adreno 330 as its GPU. With all of these beastly specifications, the OnePlus One costs only around $300 for the 16 GB variant, and $350 for the 64GB variant. It is still hard to get a hold on the flagship device still, as you need to pass through the invite system first! But if you’re one of the few lucky people to get a hand on this device, you might want to get those extra and special benefits by rooting it, installing a custom recovery, and unlocking its bootloader!
On many smartphones, you need to unlock the bootloader first in order to gain total access over the device. The OnePlus One sure is one of those many devices. In this article, we’re going to provide you all with the procedures of doing the following to your OnePlus One:
- Unlocking Bootloader
- Flashing Custom Recovery
- Rooting
Although there is a Toolbox available to unlock the bootloader, and install a custom recovery on the OnePlus One, we’re going to follow the safer side, which is to do it all manually. Let us get right into the article!
Prerequisite Knowledge
In order to do the following to your OnePlus One, you’ll first need to understand the concept of it all. Below are the definitions of the three most important things that we are going to do with a OnePlus One today.
- Unlocking Bootloader : By doing so, you will have total access to your OnePlus One’s internal memory, thus enabling access to root and install a custom recovery on it.
- Flashing A Custom Recovery : The stock recovery that comes with your OnePlus One is not powerful enough to install a custom ROM. Thus, you’ll need to install a custom recovery on it. We recommend TWRP, but CWM is also a great choice for beginners.
- Rooting : Rooting your Android device basically means to gain all the access to its root and internal system files. When you root a device, you can use the special benefits which are not available on a non-rooted device.
Once you’ve understood what these terms mean, you may now proceed to the guide.
Downloads
- ADB and fastboot: Download
- Universal ADB Drivers: Download
- TeamWin Recovery: Download
- SuperSU: Download
Requirements
- Basic knowledge about rooting, installing a custom recovery and unlocking the bootloader.
- A PC to work on.
- A OnePlus One.
- ADB drivers installed on your computer.
- The battery on the OnePlus One should be above 60% to prevent any abrupt shutdowns in between the processes.
- Unlocking the bootloader of your OnePlus One will wipe everything. So make sure you backup everything that is important.
Part 1 – Checking If Everything’s Right
- Install the ADB drivers on your computer if you haven’t already.
- Now, download and extract the Android SDK Slimmed Version on your desktop. It is highly recommended that you extract it on your desktop only, as all the codes in this guide refer to the folder which is on the desktop.
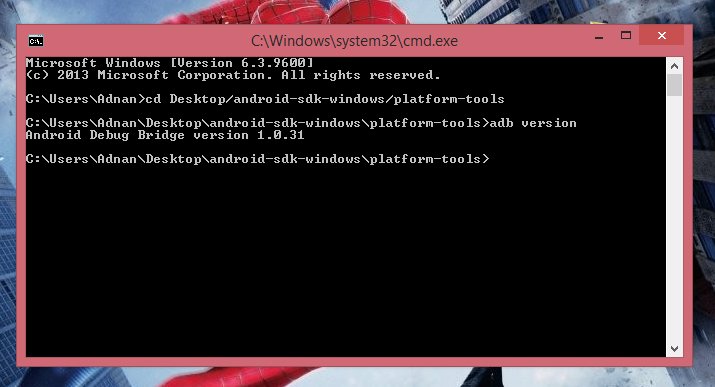
- To confirm that the SDK package is working properly, launch CMD using the Windows + R key, and type in ‘CMD’ without the quotation marks. Now type in the following code:
cd Desktop/android-sdk-windows/platform-toolsadb version
- If the CMD window displays “Android Debug Bridge version x.x.xx“, it is working properly. If it doesn’t, make sure you have installed all the components properly.
Once everything is set up and is perfectly working, you may now proceed.
Part 2 – Unlocking the Bootloader
- Unlocking the bootloader is the only tricky part in this whole guide. But at the same time, it is the most important one. Note that we are not responsible for any bricks on your OnePlus One. Proceed with caution.
- Switch off your OnePlus One, and boot into the fastboot mode which can be accessed by holding down the Power + Volume Up buttons at the same time. Once your device’s screen displays ‘Fastboot’, you are ready to go.
- Now, connect your OnePlus One to the PC, and launch CMD. Then type in the following codes:
cd Desktop/android-sdk-windows/platform-tools
fastboot devices
- The following command will list all the connected devices. If it recognizes your One, go ahead, but if it doesn’t, the drivers might not have installed properly. Reinstall the drivers and try again.
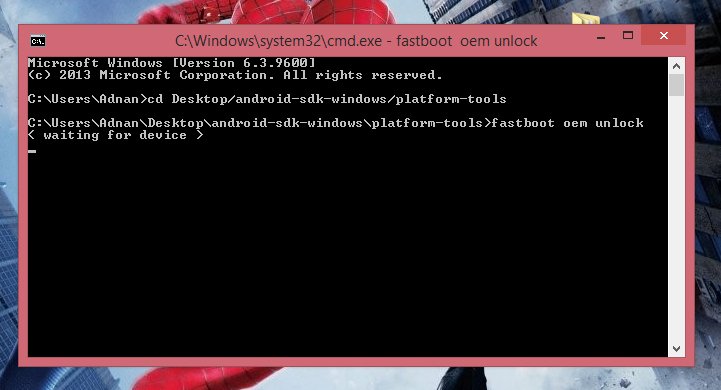
- Now, proceed with unlocking the bootloader by typing in the following command :
fastboot oem unlock
- Your phone should now reboot, and all the data should be deleted. Set up everything on your OnePlus One, and you’ve successfully unlocked its bootloader!
Part 3 – Installing Custom Recovery
Once you have unlocked the bootloader of your OnePlus One, you may proceed by installing a custom recovery (TWRP) on it.
- Navigate to Settings > Developer Options and enable “USB Debugging“. Make sure that you disable the “Update recovery with system updates” option in order to flash TWRP
- Switch off your OnePlus One once again, and reboot into the fastboot mode.
- For convenience, rename the recovery file you downloaded earlier to “Recovery.img” to prevent any confusions. Then copy the file to Desktop\android-sdk-windows\platform-tools.
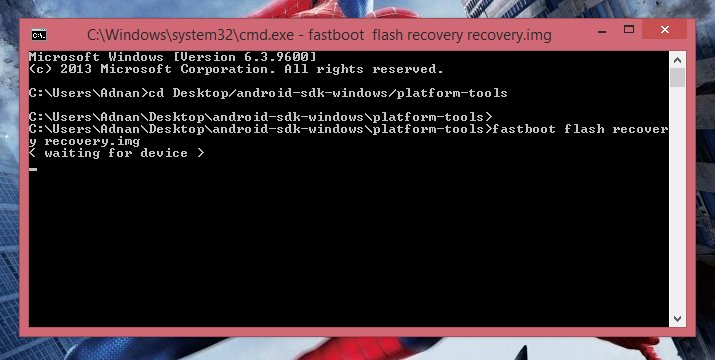
- Now launch CMD and type in the following codes.
cd Desktop/android-sdk-windows/platform-toolsfastboot flash recovery recovery.img
- Once it’s done, type in the following code to reboot your OnePlus One.
fastboot reboot
- Great! To check if the recovery has been successfully updated from stock to TWRP, power off the device, and hold Power + Volume Down at the same time. Now you should boot into the TWRP recovery instead of the stock CyanogenMod one.
Part 4 – Rooting
The final part of this guide is to root the OnePlus One itself. This method requires you to use CMD to root your OnePlus One, the same way you used it to unlock the bootloader and install a custom recovery. Follow the steps given below to successfully root your OnePlus One.
- Download the SuperSU file from above, and copy it to Desktop\android-sdk-windows\platform-tools.
- Now, switch off your OnePlus One, and reboot into the recovery mode, which can be accessed by holding down the Power + Volume Down buttons simultaneously.
- Now, connect it to your PC.
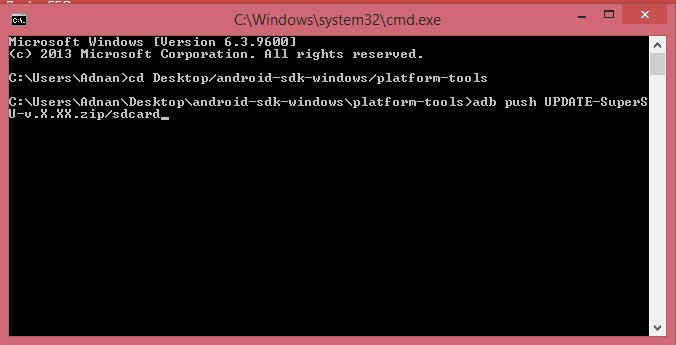
- On your computer, launch CMD, and type the following code in it.
cd Desktop/android-sdk-windows/platform-tools
- And then,
adb push UPDATE-SuperSU-v.X.XX.zip/sdcard
- The following code will simply copy the zip file to your OnePlus One’s internal memory.
- Now, reboot the recovery, and tap Install in TWRP, and browse and select the SuperSU file you just copied to your Internal memory.
- Swipe to confirm, and then reboot your OnePlus One.
Great work! You just rooted your brand new OnePlus One! To ensure that the device is now rooted, check for the SuperSU application in the app drawer. To be much surer, you can download an application which requires root.
Voila! Now you can use applications that require root access, or much better, you can now flash custom ROMs on your OnePlus One. If you encountered any problems while following this guide, make sure you have all the requirements and have all the important drivers installed on your computer. If you have any queries regarding this guide, feel free to leave a comment below, we are always here to help!
Also See:
How to install a Custom ROM on any Android Device.
How to Install Flashable Zips or Mods Using TWRP/ CWM/ PhilZ Recovery.


Hello Adnan,
I was on 13.1 Cyanogen rom which I had gotten OTA from oneplus. There were battery issues so I decided to follow these steps you have explained above. In step 4, after I swiped to confirm superSU, phone rebooted but got stuck on oneplus logo forever. I didn’t know what to do from there so I went to TWRP recovery, again tried flashing superSU but it says that no operating system was found in the phone. Please help. Thank you.
The stock OTA update to CM12s seems good to me
Note: unlocking the bootloader makes OTA updates unavailable
I need help- I messed it up- I flashed my OPO without unlocking bootloader. Now its sitting at boot screen and nothing is happening!! I could boot the device only in fast boot mode and nothing happens if I flash it!!
cannot flash twrp on cm12. i have unlocked bootloader. but in the 3rd step I cannot find the usb debugging mode. i presumed that android debugging and usb debugging are the same thing and went ahead with the steps. but after loading the phone in recovery mode i am only seeing the stock cyanogenmod recovery mode.
Hi. That mostly happened because you didn’t uncheck the ‘Update Cyanogen Recovery’ option from the Settings. Get into Settings>Developer Options, and uncheck the option which says ‘Update Cyanogen Recovery’. Now, use the OnePlus toolkit to flash TWRP on it while in fastboot mode. You can flash it via the ADB commands too.