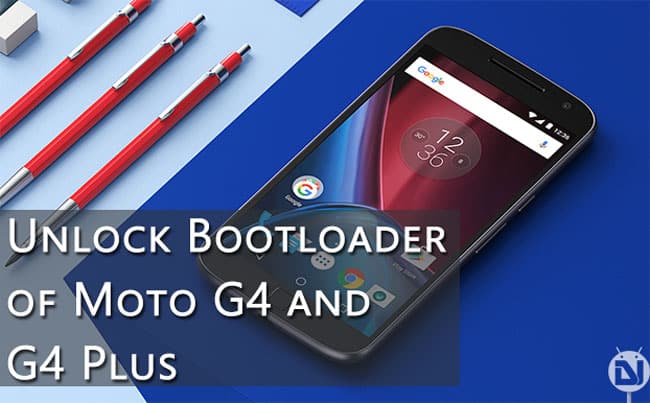
Moto G4 and Moto G4 Plus are the newest entry in the Lenovo-owned Moto G series of devices. The devices were recently launched at a launch event held in New Delhi. Both Moto G4 and G4 Plus comes with a 5.5. inch 1080p screen, which is a great improvement from last year’s models. Both devices are powered by Octacore Snapdragon 617 processor. While the G4 only has a 2Gb RAM model but G4 Plus comes in two variants one with 2gigs of RAM and another with 3gigs of RAM.
The main distinguishing feature between G4 and G4 Plus is the inclusion of fingerprint scanner and the better camera in the G4 Plus variant. All the other things remain quite the same in both the models. On the software front, both the Moto G4 variants run latest Android 6.0.1. The user experience is quite similar to stock Android, as you would get on a Nexus device. Few extra features like twist to open the camera, moto display, and double chop to start flashlight have been added to enhance the user experience.
In this guide, we will list out the steps to unlock the bootloader of your Moto G4 or Moto G4 Plus. Unlocking bootloader is a prerequisite step before rooting your device or making any other changes to your system files.
Warning: Following this guide will void your device’s warranty and it will also wipe all the data off your phone.
Backup
Before proceeding with this guide you must backup all of your data to a secure location. Backup all the application, photos, music, and all other important data you might have on your device. You may transfer the data to your PC or use an application that will backup everything to your external storage or to the cloud. Use the link given below to backup your applications and data.
[googleplay url=”https://play.google.com/store/apps/details?id=com.koushikdutta.backup”/]Things You Will Need
-
Moto G4/G4 Plus
-
A PC
-
USB drivers
Download and install these drivers on your PC.
-
ADB and Fastboot
Follow this guide to install ADB and Fastboot on your Windows PC. You may follow this guide if you have a Mac PC.
Steps To Follow
Step 1. Visit Motorola website, scroll down and press Next button. Then register yourself there, you may Sign-in if you are already registered at their website.
Step 2. Now open Settings app on your phone and go to About phone. Now tap Build number 7 times, this will unlock the Developer options on your device.
Step 3. Head back to the main Settings menu and go to Developer Options and switch the ‘Allow OEM Unlock‘ option. Also, enable the option for Android debugging.
Step 4. Now make sure you have successfully installed USB drivers and Fastboot on your PC. Then connect your device to your PC using the USB cable.
Step 5. Now type the following command in the Minimal ADB and Fastboot window:
adb reboot bootloader
Step 6. The previous step would boot your device into bootloader mode. Now type the following command:
fastboot oem get_unlock_data
This command will show the output as shown below:
$ fastboot oem get_unlock_data
 (bootloader) 0240540162024205#4C4D3556313230
 (bootloader) 30373as313630330df332323239#BD00
 (bootloader) 8A672BA4746C2CE0a328A2AC0C39F95
 (bootloader) 1A3E5#1F53280002000000000000000
 (bootloader) 0000000

On a Mac OS Desktop, the returned string format would be
 INFO0A40040192024205#4C4D3556313230
 INFO30373731363031303332323239#BD00
 INFO8A672BA4746C2CE02328A2AC0C39F95
 INFO1A3E5#1F53280002000000000000000
 INFO0000000
Step 7. Paste together the 5 lines of output into one continuous string without (bootloader) or ‘INFO’ or white spaces. Your string should look like this:
Code:0240540162024205#4C4D355631323030373as313630330df332323239#BD008A672BA4746C2CE0a328A2AC0C39F951A3E5#1F532800020000000000000000000000
Step 8. Paste the above string at Motorola’s website in the box which says “Can my device be unlocked?”. Click the button, if your device is unlockable you will see a “Request Unlock Key” button.
Step 9. Click on the “Request Unlock Key” button and wait for the unlock key to be sent on your mail.
Step 10. Once you receive the unlock on your registered email, type the following command on Minimal ADB and Fastboot window:
fastboot oem unlock <code>
Replace <code> with the unlock key you got in your email. Keep in mind this will unlock your device’s bootloader and will also wipe everything off your phone (including internal storage).
Step 11. Now wait for your device to reboot.
Congratulations! You have successfully unlocked the bootloader of your device. Now you may continue to root and install TWRP on our Moto G4/G4 Plus. The guide for those will be published soon on our website.
Stuck somewhere? Leave us your queries in the comments section below. We will try our best to resolve your issues as soon as possible.


Re: unlock bootloader article for Moto G4 Plus. After entering” fastboot oem unlock KEYCODE”, I get 3 lines (Line1) slot count: not found (Lines2&3)slot-suffixes; not found. then WARNING: This command erases all user data. Please re-run this command to continue. I re-enter fastboot oem unlock KEYCODE again, get the same 3 lines of slot stuff not found, then code validation failure with status 7, OKAY and finished. What am I doing wrong?
Can you show me the command window screenshot?