Nokia made a comeback in the smartphone industry earlier this year during the MWC in Barcelona. Nokia launched the latest smartphones from the company which were also the first to run Android operating system as the earlier smartphones that were launched by Nokia were running Windows OS and known as Nokia Lumia smartphones. The company launched the Nokia 3, 5 and 6 at the MWC among which the Nokia 3 is the budget smartphone out of the three. As far as the Nokia 3 is concerned, the smartphone has already been available in India from Amazon India.
In terms of specifications, the Nokia 3 comes with a 5.00-inch touchscreen display with a resolution of 720 pixels by 1280 pixel. Apart from that, the smartphone is powered by a MediaTek 6737 processor clocked at 1.3GHz and the smartphone has 2GB of RAM. In terms of internal storage capacity, the Nokia 3 has 16GB of internal storage which is expandable up to 128GB via a microSD card. In terms of the camera, the Nokia 3 houses an 8-megapixel primary camera on the rear and an 8-megapixel front camera.
The smartphone runs Android 7.0 Nougat which is expected to be upgraded to Android 7.1.1 Nougat and the smartphone has 2630mAh non-removable battery. As far as the software on the Nokia 3 is concerned, the company has tried to make absolute minimal changes to Stock Android as released by Google which will feel as the same on the Nexus and Pixel devices.
However, if you want to have more customization options or you want to upgrade your smartphone to the latest version of Android then you will need to unlock the bootloader on your device, install any custom recovery like TWRP and root your device if needed for more customization. Now, if you want to do the perform the above-mentioned operations on your device then we have all the instructions that you will need to unlock the bootloader, install TWRP and root your device.
Warning
Before you proceed with the steps mentioned down below, you will need to keep in mind that this method of unlocking bootloader, installing TWRP and rooting your device will work only on the Nokia 3 and you should not try it on any other smartphone as every device may have different steps and this might cause your device to stop working completely. Also, this method includes rooting which will void your phone warranty. If you understand the risks involved in performing these operations then you can proceed forward to the guide.
Prerequisites
- Download and install Minimal ADB and fastboot drivers.
- Install Nokia USB Drivers.
- Make sure that USB Debugging and OEM Unlock is enabled on your device. If you are not sure how to do this then you can follow this guide.
- Make sure to take a full backup of your phone as unlocking bootloader will erase each data on your phone which can not be recovered later.
- Make sure to charge your device to at least 60% battery before continuing with this procedure.
Downloads
- You will need to download TWRP recovery for Nokia 3 | Download.
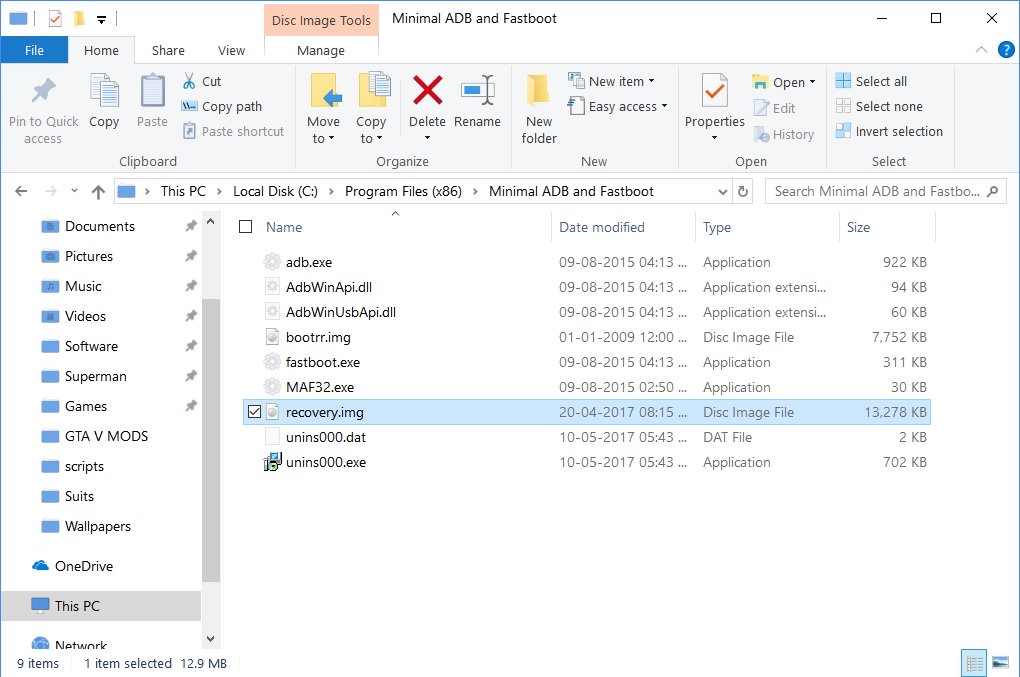
- Rename the TWRP file to recovery.img for ease of installation and move it into the ADB installation folder. If you did not change it during the installation, the path is usually C:\Program Files (x86)\Minimal ADB and Fastboot

- Latest SuperSU zip file – This will be needed to root your phone so this has to be transferred to your phone
Unlock Nokia 3 Bootloader
- Once you have completed all the steps mentioned in the Prerequisites section, you are ready to unlock the bootloader on your Nokia 3
- Now, you will have to right-click on an empty space while holding down the Shift key. Alternatively, you can type cmd in the address bar and hit enter.
- Now, connect your Nokia 3 via its original USB cable to your PC.
- In the ADB command window, type the following command to boot your Nokia 3 into the fastboot mode.
adb reboot bootloader
- After performing the above step, you have to type the following command and hit Enter.
fastboot oem unlock unlock_key
- Replace unlock_key with the unlock key that you see in the command prompt window. For example, fastboot oem unlock 675645353293. Note that the number mentioned here is just for example purpose and can be totally different from the actual number
- Now type the command below to reboot your phone when the bootloader has been unlocked.
fastboot reboot
Steps to Install TWRP on Nokia 3
- You have to right-click and press Shift key once again as you have done in Step 1 while unlocking the bootloader on your device. This will open a command prompt window once again and check if you see that your phone has been connected to your PC by typing the following command:
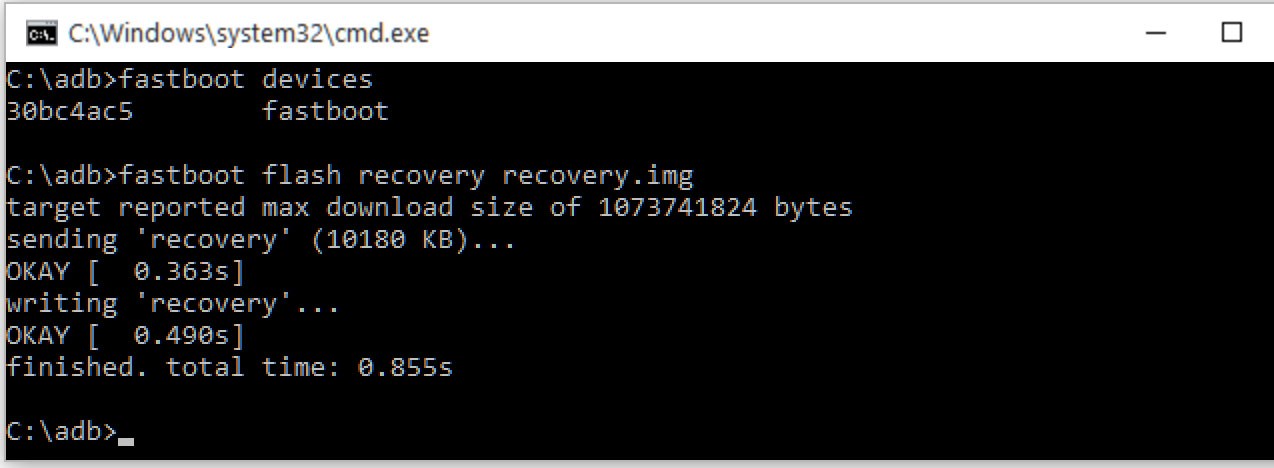
fastboot devices
- If you see an alpha-numeric number with fastboot besides it then you are certain that your device is connected in fastboot mode.
- Now, in order to flash TWRP on your device, type the following command:
fastboot flash recovery recovery.img
- After this step, TWRP will be installed on your Nokia 3 and this process does not take much time.
Steps to Root Nokia 3
- Disconnect your phone from the PC when the recovery is installed and boot it into recovery mode by pressing and holding the Power + Volume Up buttons simultaneously for a few seconds.
- Once you have entered TWRP on your phone, it is always a good idea to create a Backup first before installing any mods or zips. To create a Backup, select the Backup option from the TWRP main menu. Next, select all the partitions you want to create a backup for and then swipe to initiate the process. The Backup process can take a while depending on how many partitions you’ve chosen to back up. But when it is complete, you can flash anything with confidence that you can always go back to how things were.
- When the Backup is complete, go back to the main menu and select Install.
- Navigate to the SuperSu zip that you downloaded earlier, and select it.
- Swipe to flash the zip and then tap the Reboot system button at the bottom which appears after the process is complete.
- When your phone boots up, head over to the Google Play Store and install the Superuser app to take control of the apps that get access to the root storage.
After you have performed all the steps mentioned above, you should have unlocked your bootloader, installed TWRP and rooted your Nokia 3 successfully. In case you have any problems in following any steps mentioned in the guide, you can comment in the comments section down below.


i can not unlock my phone. Help me, i’m using Xiaomi redmi note 4x.