
Pre-installed apps are quite helpful because they are usually packed with really good features. They can be from carriers or manufacturers and are mostly utility, multimedia, customization apps and more. But over time, while you install more and more apps, you realize your phone is crammed with applications and you will start to notice all these applications you really didn’t even use, or have ever seen before.
These applications are called “Bloatware” or “Fatware”, you can say why they are called that by the name itself. They make your phone congested, taking up a space-a lot of it, running background processes and eating your battery up. And what’s worse is that it’s almost impossible to remove them.
So, how nice of the manufacturers to give you something you would not be able to remove from your own phone, right?
Some people wouldn’t really mind them sitting there, doing nothing, but that’s where they’re wrong..these apps can still run in the background taking part in the RAM’s usage. And while this isn’t a big deal to some, other people would move mountains to get them off their sight and especially their phone.
So let’s talk about how to uninstall pre-installed apps on your Android device without root. If you’re familiar with rooting devices, you will know why we want to encourage users to not root their phones and find a better alternative. Rooting has a lot of benefits, good stuff, I know. If you’re an expert in rooting, you can do great things with your phone, you can be your own phones “builder”, but for those who are afraid of taking risks (by risk, I mean permanently damaging your phone, breaking your contract with your carrier and making it susceptible to viruses) trying a non-root option would be a better alternative to remove bloatwares.
In this process, we will use ADB. ADB Stands for Android Debug Bridge, it is part of an Android’s SDK(Software Development Kit) which is used to develop applications. There are a lot of things you could do with ADB, you can backup your phone or copy specific files, extract APKs from your phone, run commands, record your screen, install/uninstall applications and a lot more. So needless to say, you will be able to manipulate your phone with ADB. And this can be done by connecting your phone to a computer.
Here are a few things you need to have before we start:
- USB debugging turned on on your Android phone
If you don’t have this turned on already, follow these steps:
- Go to your phone’s settings
- Go to “About Phone” options
- Click “Software Information”
- Click the “Build Number” several times until a message pops saying that the “Developer Mode” has been enabled. It may ask for a password for you to enable this option.
- Go back to your phone settings, scroll down to the very bottom. You will see the “Developer Options”, click it.
- Look for USB debugging and enable it.
- This may or may not have been set up already, but either way, scroll down and look for USB configuration and make sure it is set to MTP (Media Transfer Protocol)
*Note that this varies by phone. Just look for the software information and the developer options and you will see the USB debugging option or you can check your OEM’s site to find out.
- ADB should be installed on your computer
Follow these steps from XDA to set it up: Set up ADB
If you have these 2 + a USB cable to connect your phone to your computer, you’re ready to go! I know you’re itching for this moment, so without further ado let’s do a step-by-step process on how to delete preinstalled apps without rooting.
Uninstalling Pre-Installed Apps Using ADB
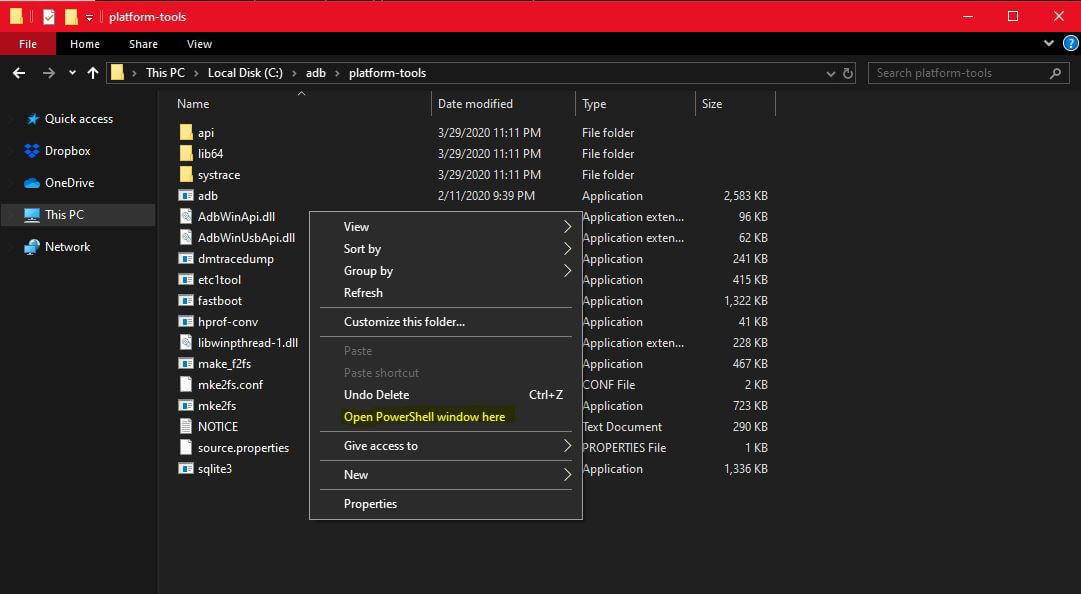
- Open ADB from the decompressed folder you downloaded from XDA. Click Shift + Right mouse click anywhere in the folder. You will see an option to “Open command window” or in some phones “Open PowerShell window“, select that option. (please see photos) The Command Prompt will open OR in my case, the PowerShell window.
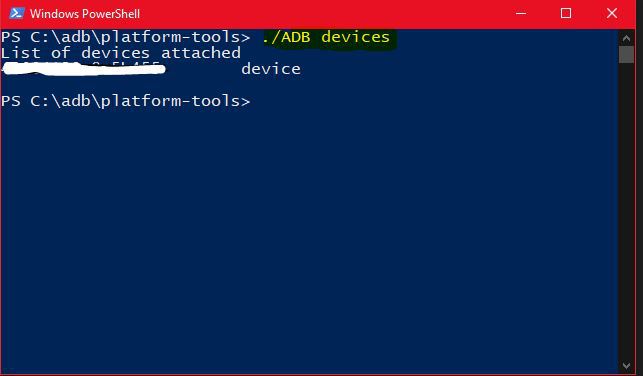
- Connect your phone to your computer via USB cable. You need to make sure the phone is connected. On the PowerShell/cmd window. Type in: adb devices OR if you get an error that the command is unrecognized, type: ./ADB devices
- You will get a pop up on your phone screen asking to allow permission, click yes and always allow if you are using a trusted computer on the other end.
- Check the connection by, again, entering: adb devices OR ./ADB devices. You will see the list of attached devices. If you see yours looks like the one in the photo, you’re good to go.
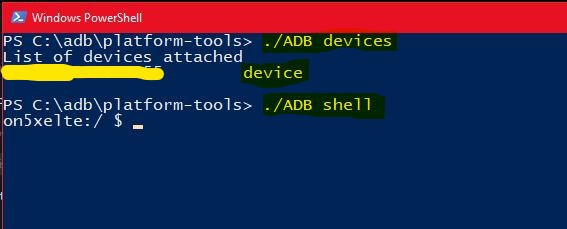
- Type in: adb shell OR ./ADB shell
- Type: pm list packages. You will see all of the packages/applications installed by the OEM, your carrier and Google. This list can be a little complicated. You can narrow it down by typing: pm list package
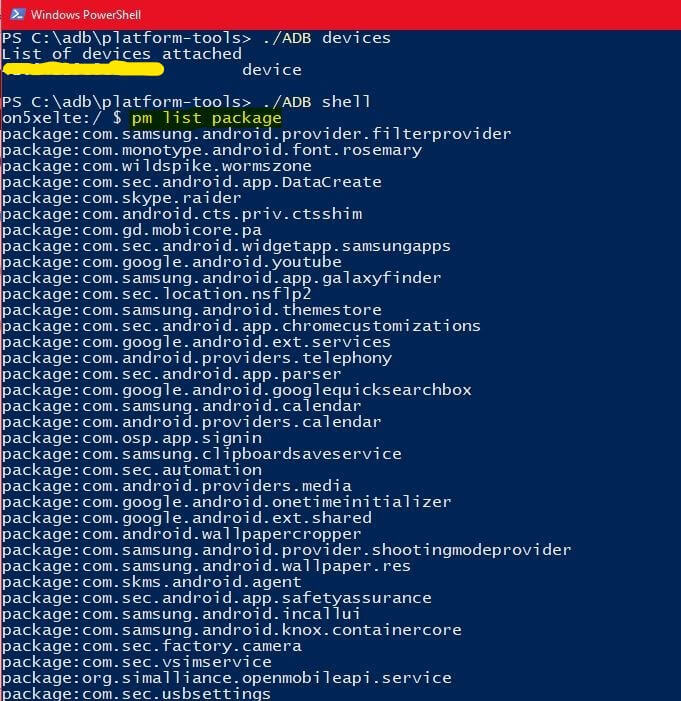
| grep (keyword)
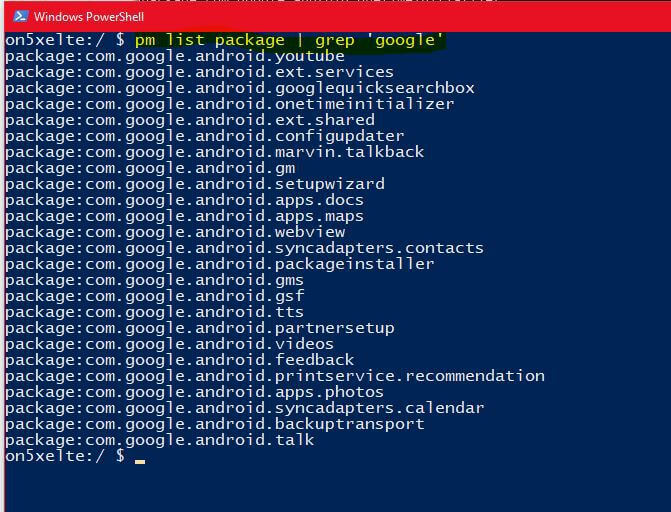 replace the keyword with words such as “Google”, “Samsung” or whoever developed the bloatware you want to remove.
For the best part, uninstalling the bloatwares!
- First you need to find out the name of your bloatware as it shows on the website. I highly suggest opening a tab on your computer. Go to Google Play and sign in to your account.
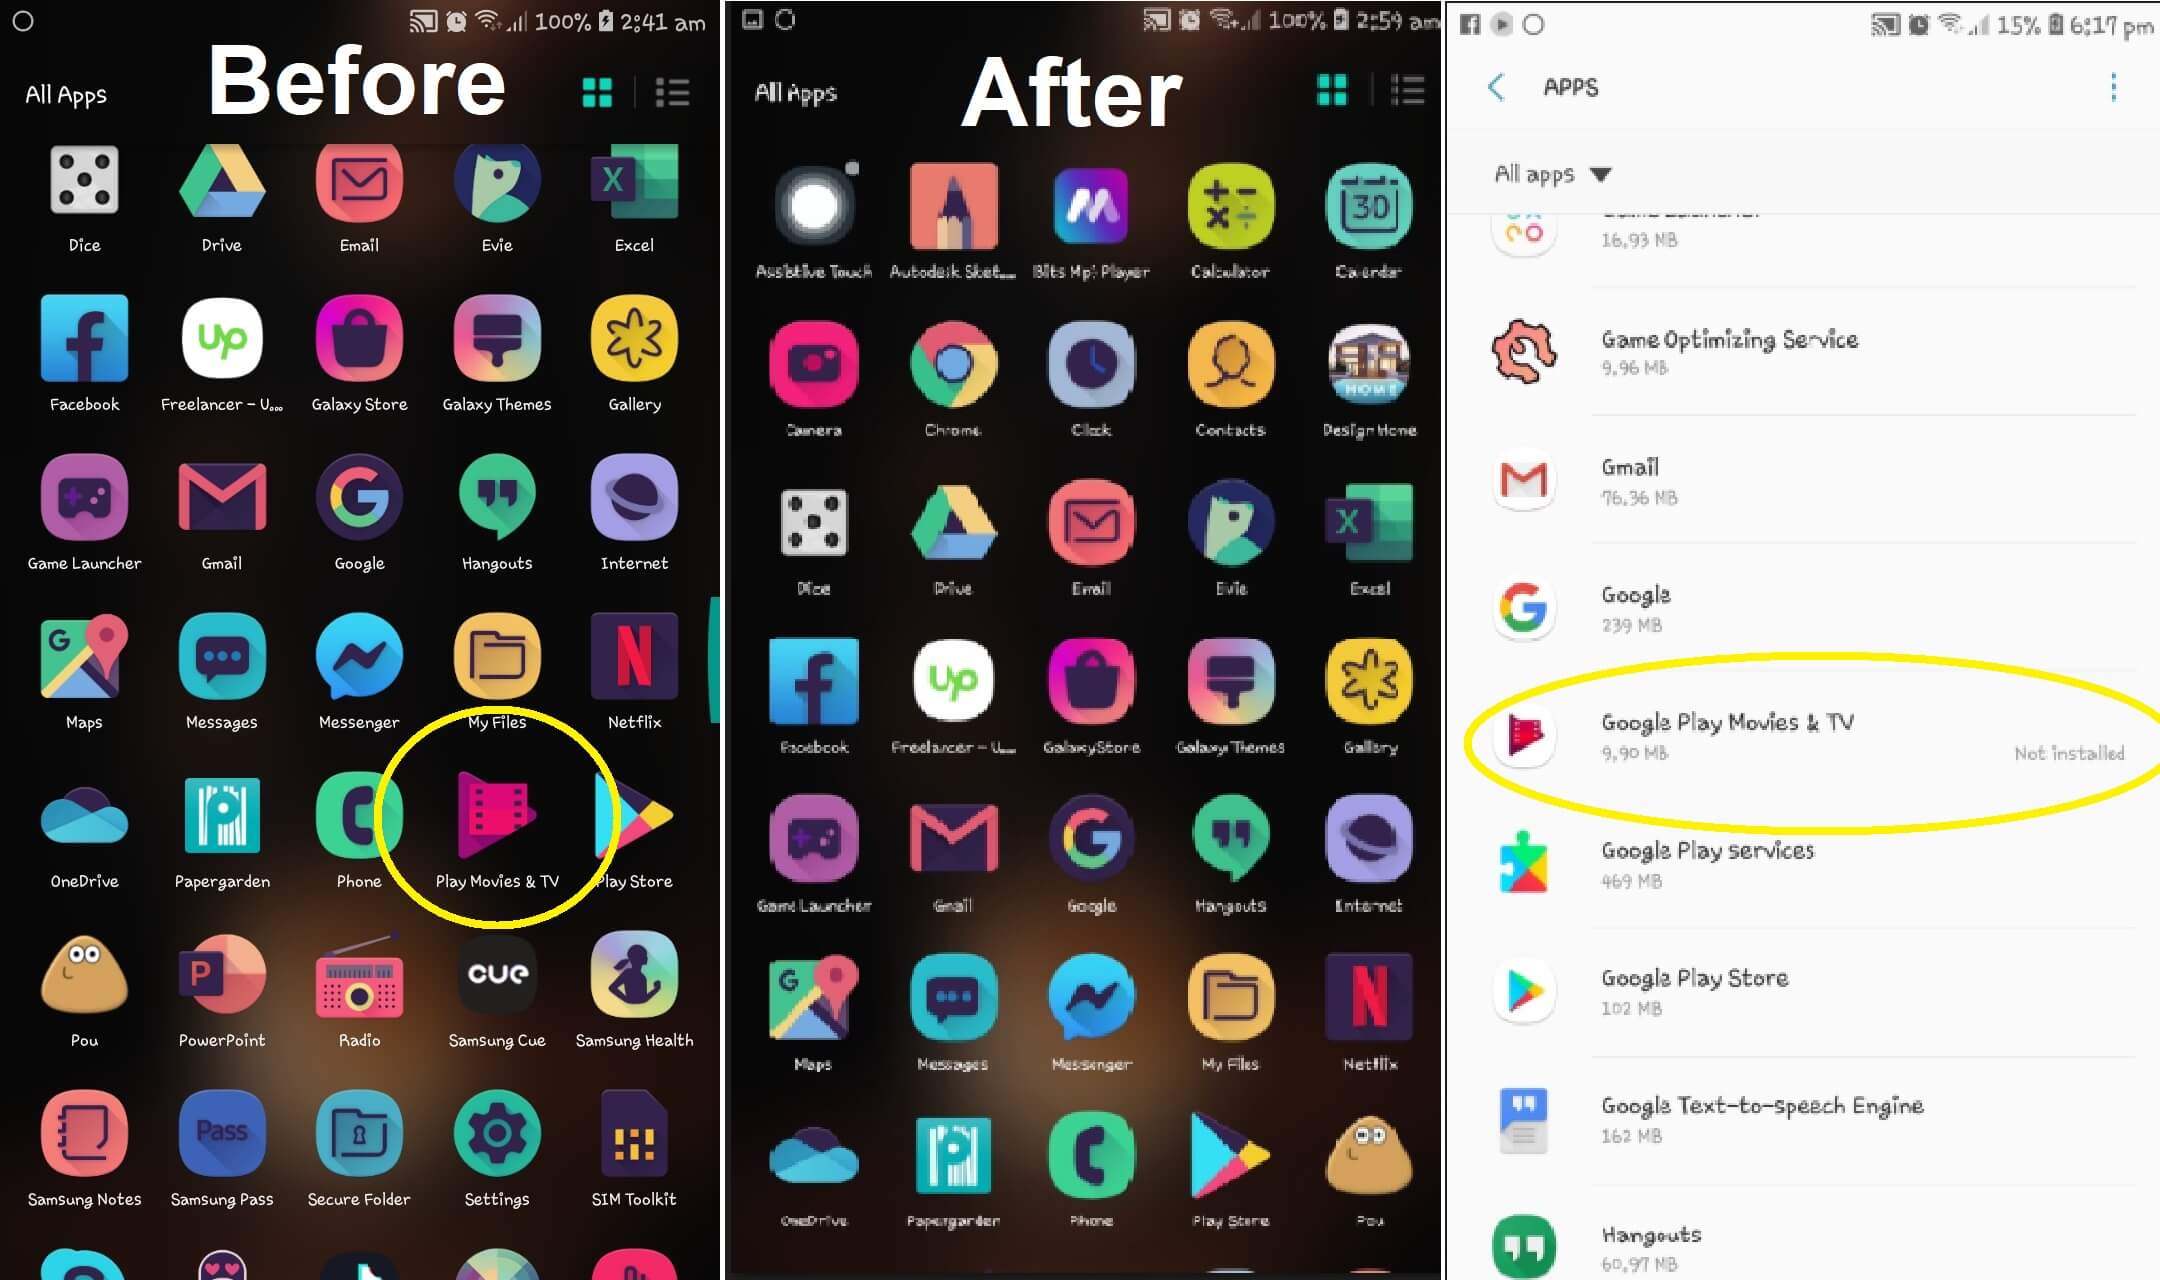
- Click Apps > My Apps. You will see a history of all the applications you have installed using this Google account. You will see a dropdown menu labeled “All apps” just below the search bar. Click on that and select the device that is currently connected to your computer, you will see all the apps that are currently installed on your phone. In this case, I will uninstall the pre-installed Google Play Movies & TV
- Hit Ctrl + click the bloatware, it will open it in another tab. (see the highlighted part) That is what we are looking for, remember or note this part of the URL
- On cmd/PowerShell type: pm uninstall -k –user -0 (the name of the bloatware from the url) – see photos:
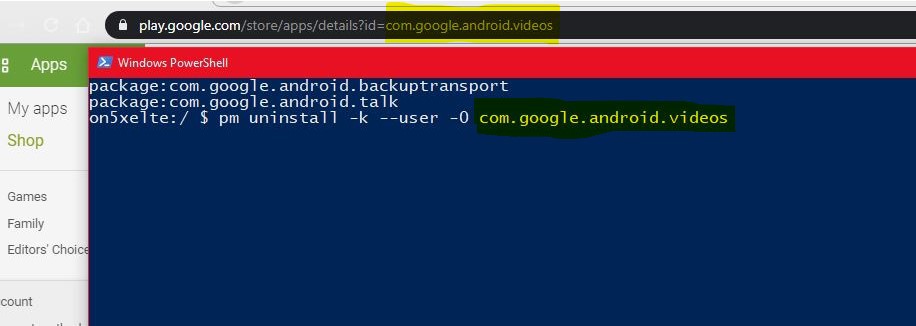 Once you get the ‘Success’ message that’s when you will know that the bloatware was successfully removed from your Android phone.
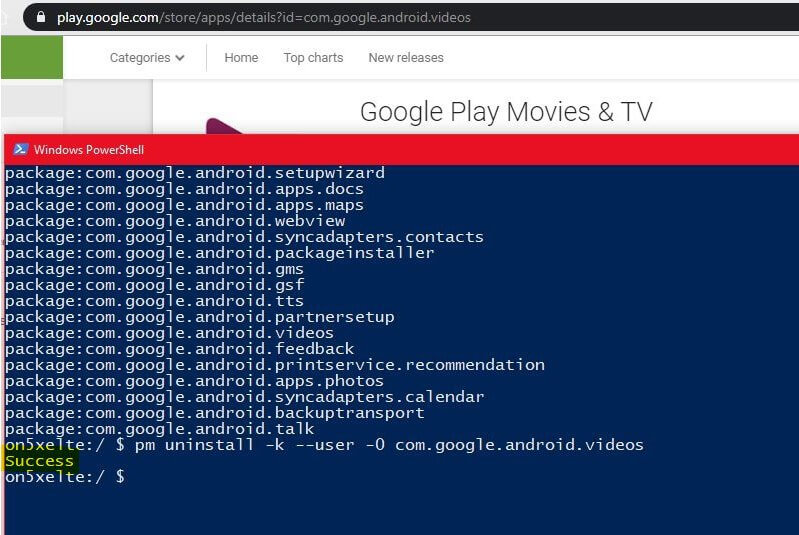
Check your app tray and voila! You won’t see a shadow of that application. This applies to a single user on the phone. This means that the moment you do a factory reset, it will bring back the original apps that came with the phone including all the bloatwares. Now, you may still see all these apps under settings, but it will say “not installed”, our main goal was to uninstall and that’s what happened, removing the app from the whole system(all users) is another story.
Disable Apps
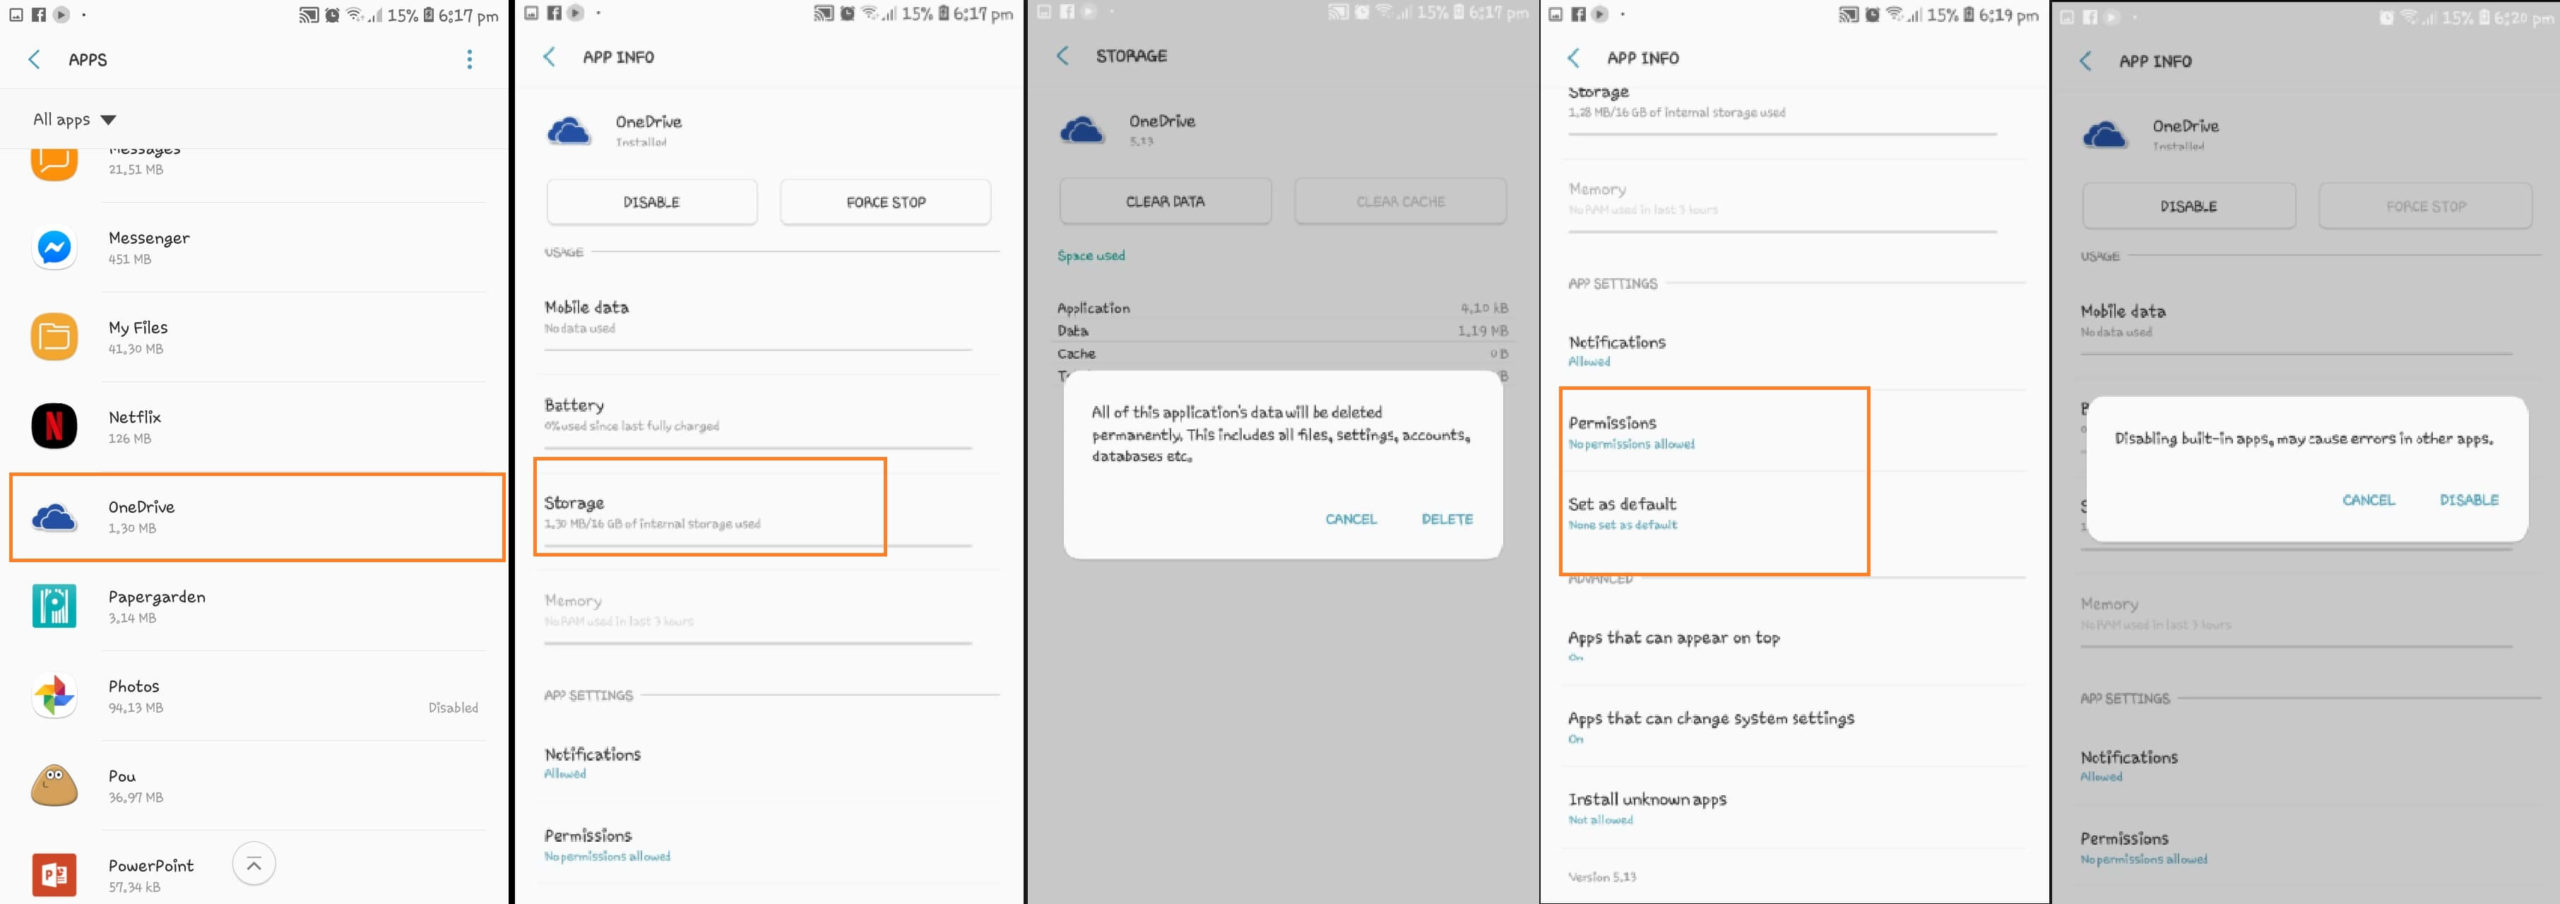
For those who are skeptical about this method, you can try a much simpler alternative. Main purpose of this alternative would be to free up some RAM space and remove these annoying bloatwares in plain sight. This can be done by simply disabling them.
Note: This doesn’t entirely remove the bloatware, it just hides it and stops its processes in the background.
Here’s a step-by-step guide on how to disable bloatwares on your Android device:
- Go to your phone settings
- Go to Apps
- Find the bloatware you want to disable
- Click that and choose storage
- Clear cache and data
- Go back to the previous page then clear defaults and turn off all permissions
- Force stop then disable the app
I hope this article helped you free up some space on your phone and remove these annoying bloatwares from your Android device. If it hasn’t yet, try them and let us know the results in the comments below.
Also, tell us any other effective apps or methods you use for uninstalling/disabling bloatwares. We’d love to hear about them.
Join The Discussion: