Tasks are the heart and soul of Tasker, evident from its name in case you missed it. In the previous tutorial, we learned what Tasks are. We also learned what Actions are. And in the world of Tasker, those two are inseparable. Actions are what your phone or your tablet does, and a Task is a collection of these Actions that are performed when the said Task is invoked. We’ll rather get to the Task this time instead of briefing you about the terms and show you how to actually create a Task. Because trust me, Tasker in itself is a programming language of sorts. There’s a lot of theory to write if one wants to.
Creating your first Task
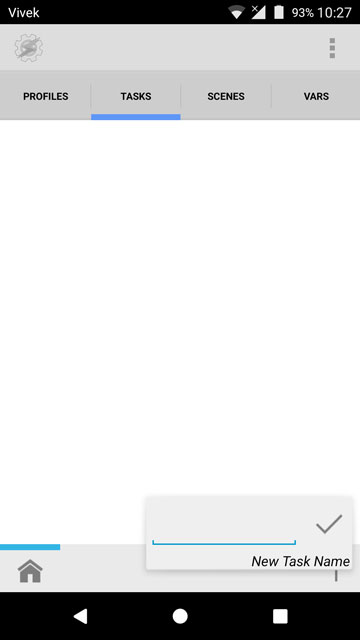
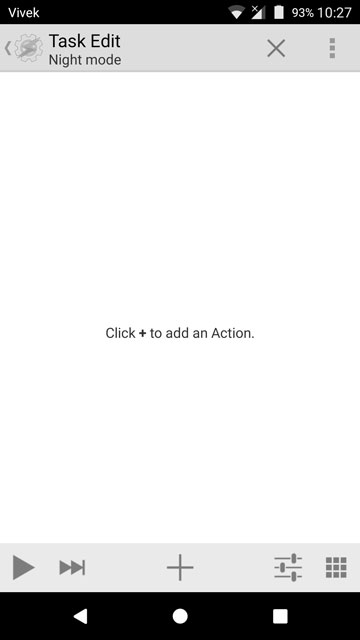
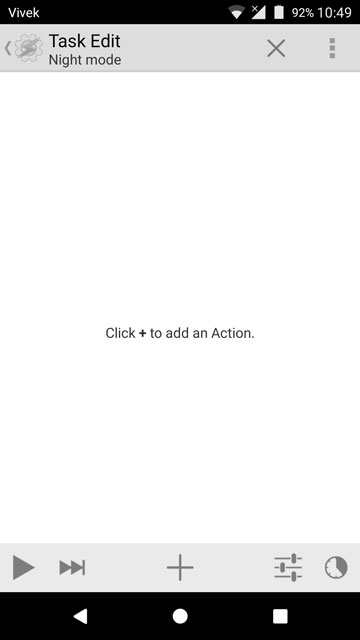
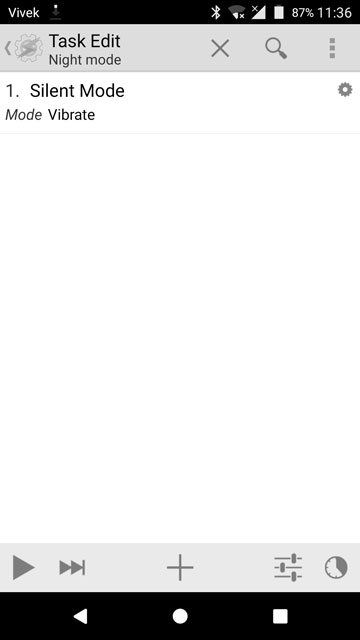
Hopefully, you have disabled the beginner mode in Tasker preferences as mentioned in the previous tutorial. Because now when you launch Tasker, please do, you should see a UI similar to the one above on the left. To create a Task, simply tap the + icon in the bottom right. Before doing anything else, you will be required to name the Task. I’ve named mine as “Night mode” in the screenshot above. Once you name it, you will notice the + icon shifts towards the center and the bottom left and right are populated with new icons.
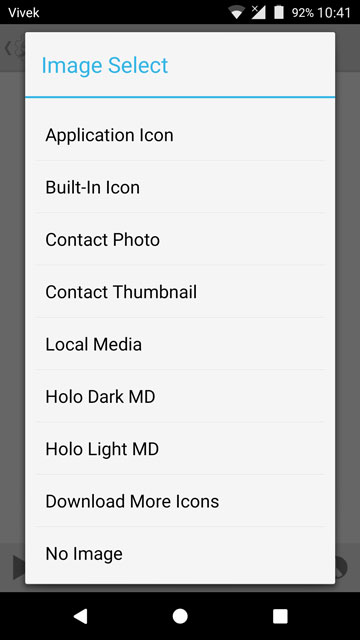
The play button on the left plays the Task, whereas on the right we have two buttons. The one on the far right is the Task icon picker while the other one is a Task setting button. You don’t need to worry about the latter yet. Tasker provides you with 300 built-in icons for your Tasks and you can also choose any other icon that you have.
You may also like: Erase Android Phone Data Remotely Without Internet
Why an icon?
You will need a Task icon if you want to trigger your Task using a home screen shortcut or even a gesture as allowed on some third-party launchers. A Task icon is mandatory so go ahead and pick one.
Congratulations on creating your first Task! But, it doesn’t do anything. As I said before, Tasks and Actions are inseparable and since we haven’t assigned any Actions yet, this newly created Task is as good as non-existent.
Assigning Actions to a Task
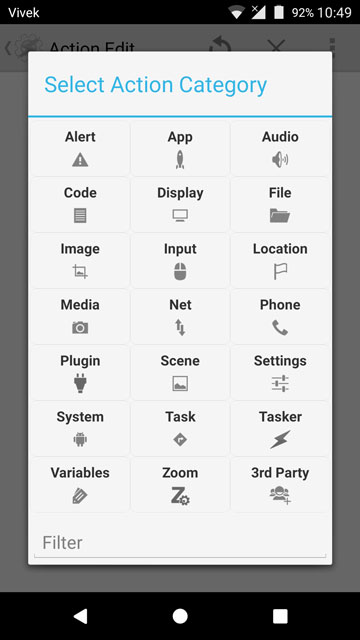
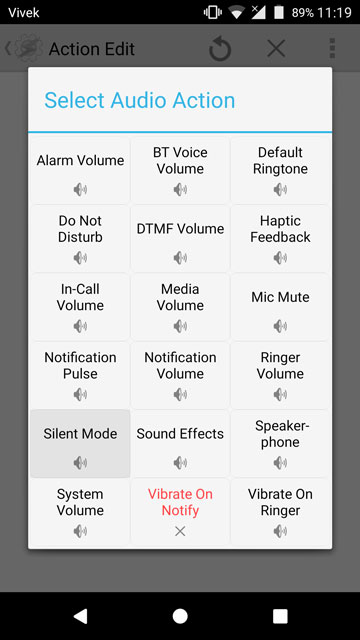
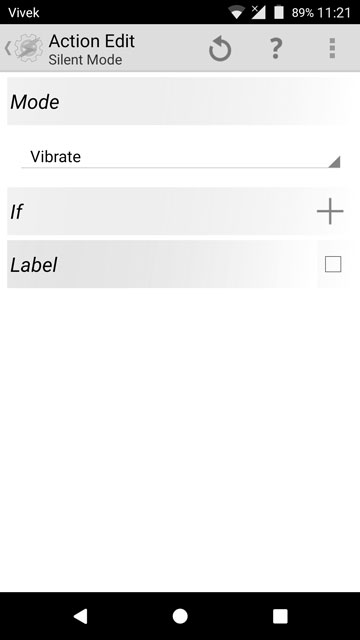
It’s time to plus it up so tap the + icon at the bottom in order to add an Action to your Task. When you do that, you’ll notice a menu grid pop up. These are infact folders, and below them is a search bar which comes in handy. A red tinted entry means it isn’t available on your device. It either requires root access or your device simply does not support it. You can select any Action you want. Since I’ve named my Task “Night mode” let’s start by adding Silent mode. In the Actions Edit screen, you can select Silent Mode On, Silent Mode Off, or Vibrate.
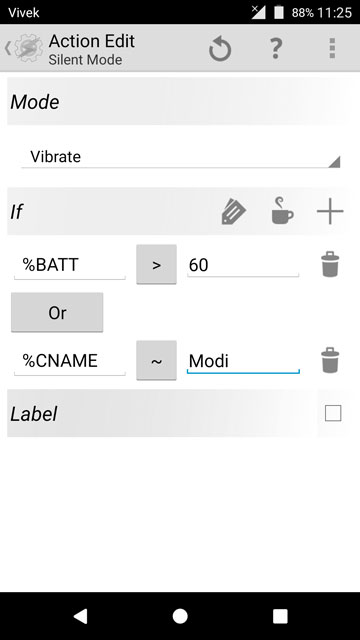
You might be wondering what that If section is about. You don’t have to worry about it right now. But just so you know, Ifs are conditions that should be met for your Action to happen. You can see in the screenshot above that I have set some conditions, that is the battery % should be greater than 60 and or the caller name should match “Modi”. Those are totally random conditions just for a demonstration so don’t dive much into the logic.
You can swap the selected Action with another if you think you’ve selected the wrong one. This can be done by tapping the re-do button up top. Notice the question mark icon next to it? You guessed it right, it’s a help button. The help button appears on every Action and context page explaining what the Action is. This is really helpful when encountering an Action for the first time. You can download the help document to your SD card or view it online.
When you’re done, just hit the back button and you should now see your Action listed under the Task.
Must read: 3 Nova Launcher Tricks You Should Know
Automating a Task
With one Action down, we can start adding more, if needed. My night mode Task now has three Actions that will be performed when night mode is triggered. My phone will go into silent mode, WiFi will be turned off and mobile data will be switched to 2G. You can add or not add any Actions you want similarly. Before we go further, it is best to test out our Task and see if it actually works. Just hit the play button and you can watch your Task being played out. In this case, my phone should go into vibrate mode, WiFi should turn off and mobile data should switch to a 2G network. All of that does happen as you can see in the screenshot. 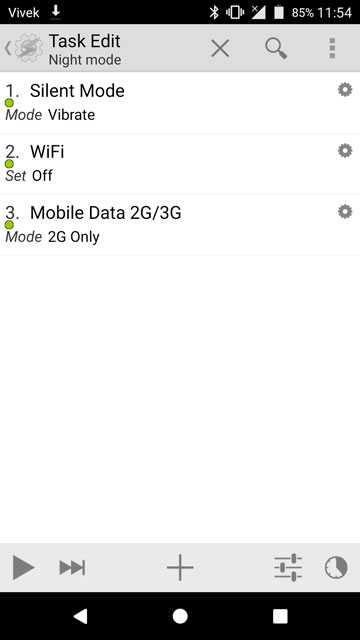
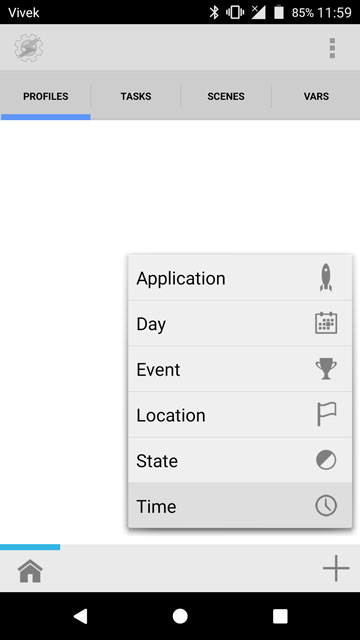
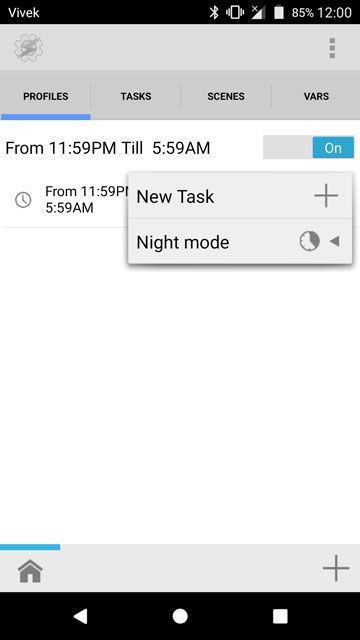
So now that we know our Task works, let’s move on to the many ways this Task can be triggered automatically. One of the most popular ways to do this is through Profiles. Since out Task is clearly saying here, it should be triggered in the night when one goes to bed. So it would be ideal to trigger it based on the time of the day. In the Profiles tab, just tap the + icon and select one of the choices that is named Time. Assign a start time and an end time and just hit back. You can hit the clock icon up top to set both clocks to the current time.
Back in the Profiles tab, you can select which Tasks you would like to be triggered with your newly created profile. We only have one Task yet so select Night Mode and you’re good to go. You can still edit the Profile or the Task by simply tapping on them.
Recommended reading: 5 Google Keep Tips and Tricks You Must Not Miss





Join The Discussion: