The Assistant app created by the Silicon Valley giants Google is capable of performing so many useful features, that it is really a tough time keeping a count of them. From creating reminders to waking you up each morning, the possibilities are endless. But even with such a plethora of options already up its arsenal, it keeps on getting acquainted with new features every now and then. Today, we are going to discuss one such feature. In the latest update, you could now integrate and sync your favorite notes app into Google Assistant. Here are the steps to do so. But before that, don’t forget to check out our list of 70 OK Google commands.
Sync Notes Apps with Google Assistant
Just to make things clear, Google Assistant already had a notes-creating capability. But it only allowed the creation, edit, and modification of notes within its capacity. Now with the latest update, you could easily sync your favorite notes across the Assistant app. Moreover, whatever notes you write via the Assistant app, the same will automatically be synced over to your preferred notes app as well.
Currently, the supported notes apps are Any.do, AnyList, Bring Shopping Lists and Google’s own Keep app. With that said, here are the steps to integrate and sync your favorite notes apps with Google Assistant (which recently has got an as well).
Steps to Integrate Notes Apps
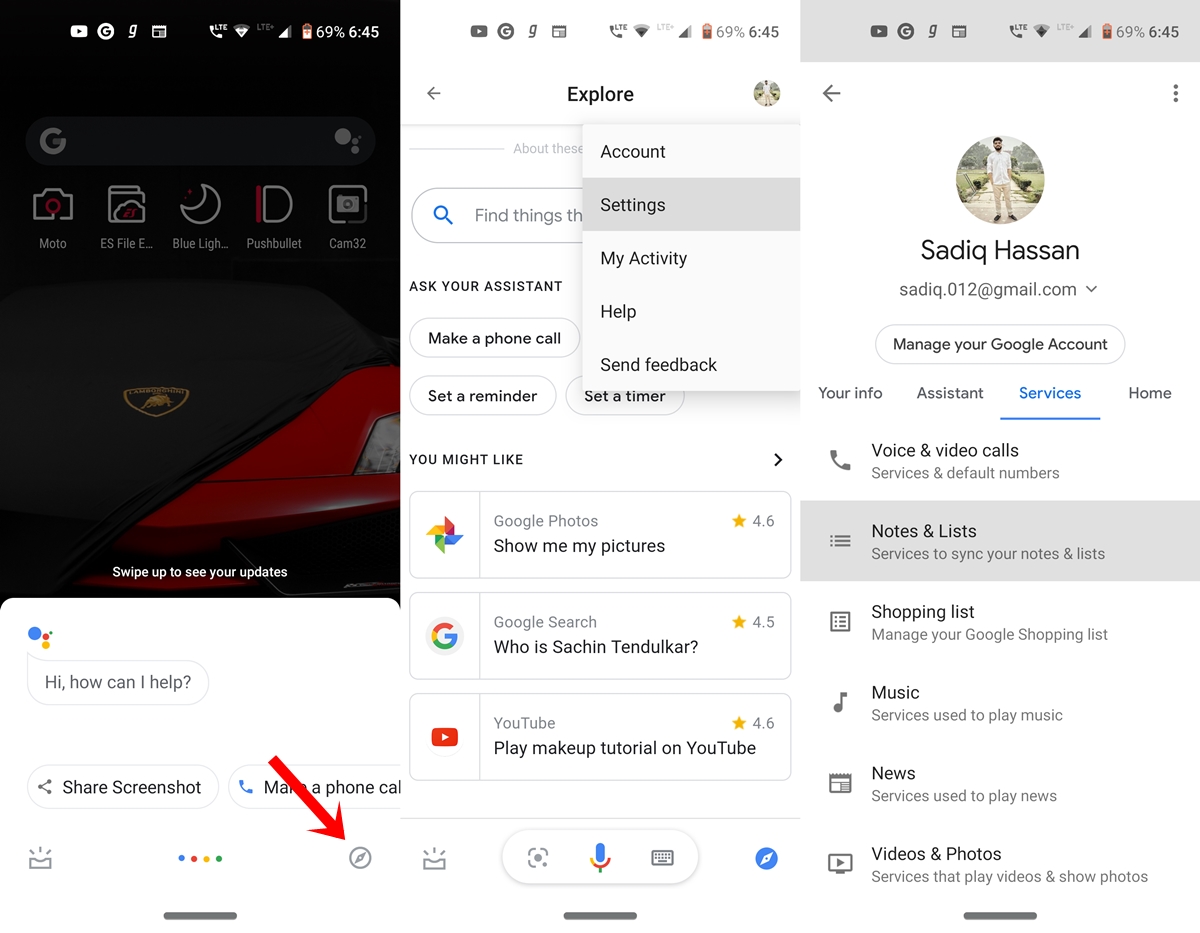
- Open the Google Assistant app by your preferred method of choice.
- Tap on the Explore icon present at the bottom right.
- Next, tap on your Avatar and select Settings from the menu.
- Go to the Services tab and look for the Notes & Lists app section.
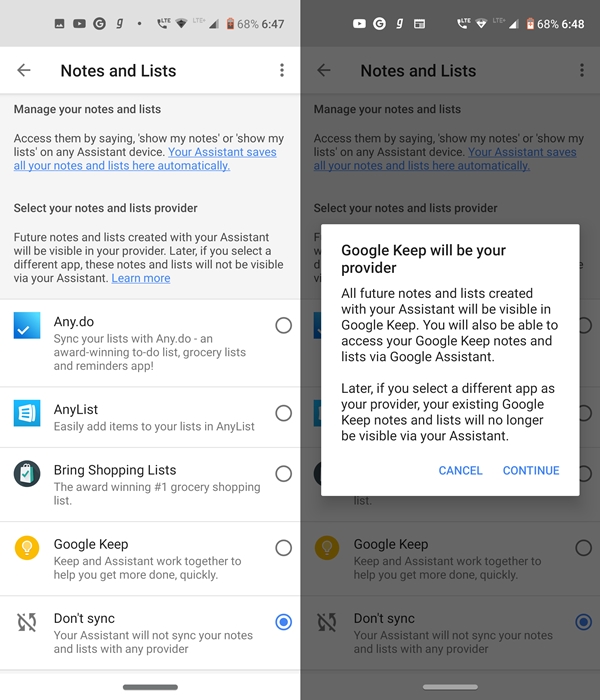
- Select your desired notes app from the list. In this guide, we will be choosing the Google Keep app.
- Select that app and tap Continue in the dialog box that appears.
That’s it. You have successfully integrated and synced your favorite notes app with Google Assistant. Now that you have chosen Google Keep (of which here are some useful tips) as your preferred note-taking app, all your notes will be saved inside the Keep app. You could easily view them via Google Assistant or that notes app. But, in the future, if you chose a different notes app, your earlier notes will no longer be accessible via Assistant. But they aren’t lost or deleted, you could still access them via your previous note-taking app. With that said, let’s now have a look at the steps to effectively manage these notes.
Don’t Miss: How to Delete Google Assistant Search History
How to Access and Modify these Notes via Assistant
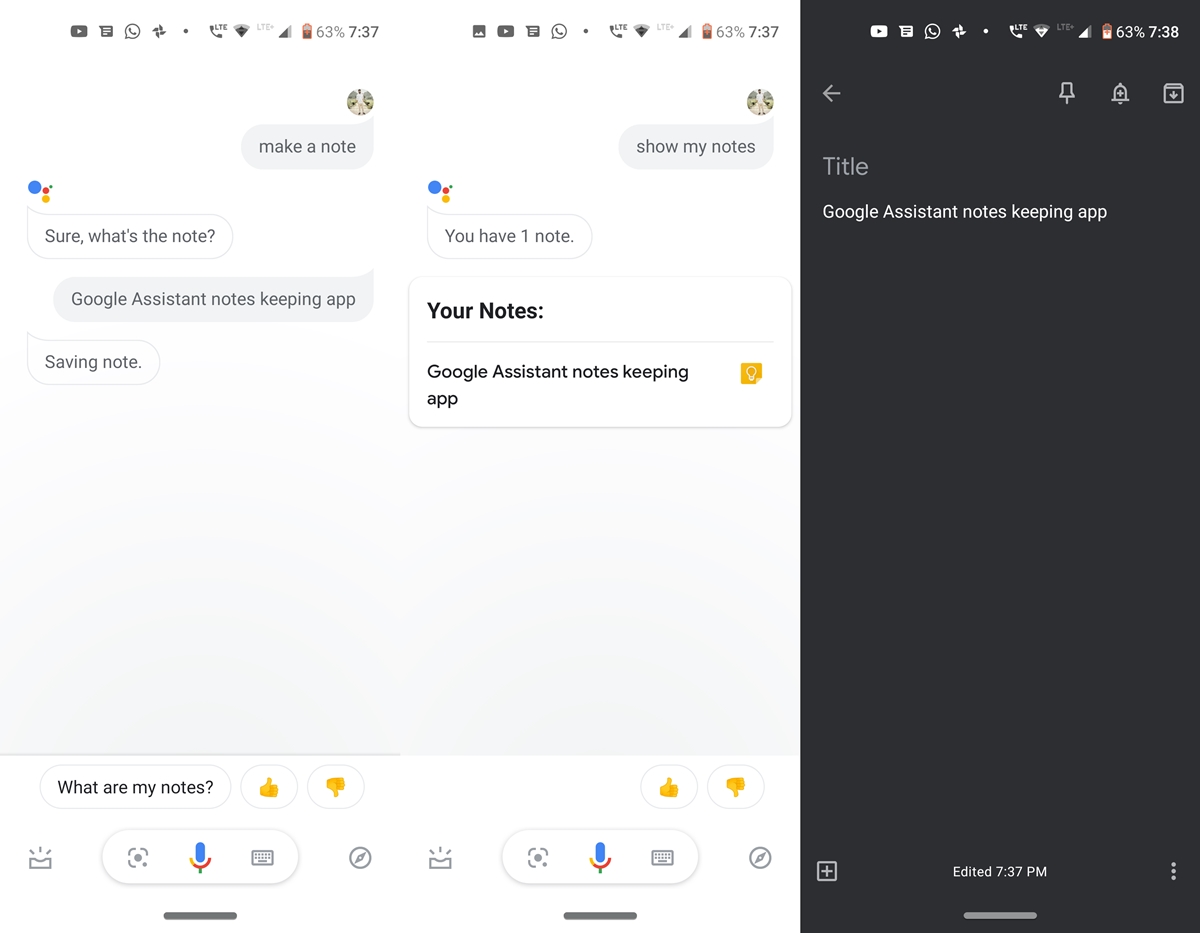
Till now we have seen the steps to sync any note apps with Google Assistant. Now let’s have a look at the steps to manage, edit, or modfiy them. To create a new note, the old commands like ‘Take a note,’ ‘Note to self’ or ‘Create a note’ still holds true. On the other hand, to manage your notes and lists, you could use these commands: ‘Show my notes‘ or ‘Show my lists‘ on your device. It will then display all the notes from your chosen notes app. On opening any of them, you will directly be taken inside that app to edit or modify it.
On that ‘note’, we conclude this guide on how to sync your favorite notes app with Google Assistant. Still, having doubts? Reach out to us via the comments section.
Read next: Map Any Button to Launch Google Assistant on Android



Join The Discussion: