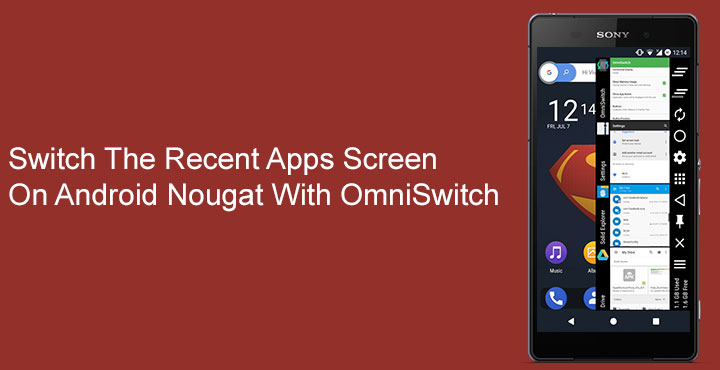
Apart from the fact that AOSP based ROMs are usually smoother and faster than the version of Android your OEM shipped your phone with, custom ROMs have another great advantage. Custom ROMs are rich on features and that’s true even for Lineage OS when compared to the stock ROMs on most phones. And Lineage OS isn’t really known for the features. Most feature packed custom ROMs, for instance, have a feature called OmniSwitch. It’s basically a more functional recent apps screen than the stock Android one. It’s probably not as aesthetically pleasing, but if you’re a power user it sure is for you. Luckily, you don’t need an entire custom ROM just for OmniSwitch.
Thanks to developer wrongway213, OmniSwitch can be installed on most Android devices running Android Nougat, with a simple flashable zip. Your device will still have to be rooted though and must have a custom recovery installed. Even though designed to work only with stock Android, OmniSwitch should work on OEM ROMs such as the HTC Sense as well. That’s because most manufacturers don’t toy around with the recents screen much.
Don’t miss: How to Get MIUI’s Quick Ball Navigation on Any Android
Requirements
- Android device running Android 7.0+ Nougat
- Rooted device
- Custom recovery installed, preferably TWRP
Downloads
Install OmniSwitch
- Boot your device into recovery mode.
- If you’re using the TWRP recovery like most of us, you can tap on Backup to create a backup of your current ROM in case you want to go back to how it was.
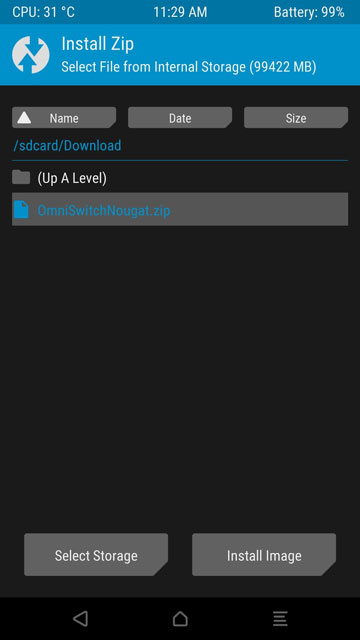
- To install OmniSwitch, select Install.
- Navigate to the OmniSwitchNougat.zip file and select it.
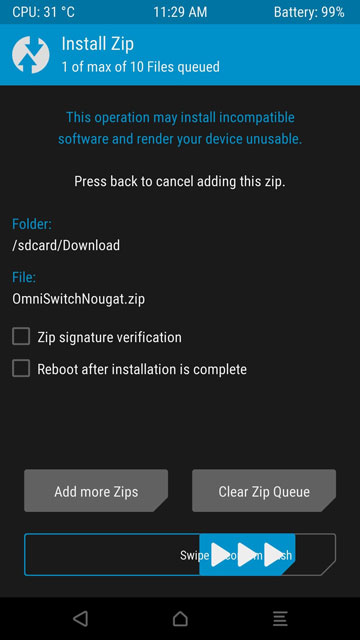
- Swipe to start the flashing process which shouldn’t take more than a couple seconds.
- Once done, tap the Reboot system button at the bottom.
Using OmniSwitch
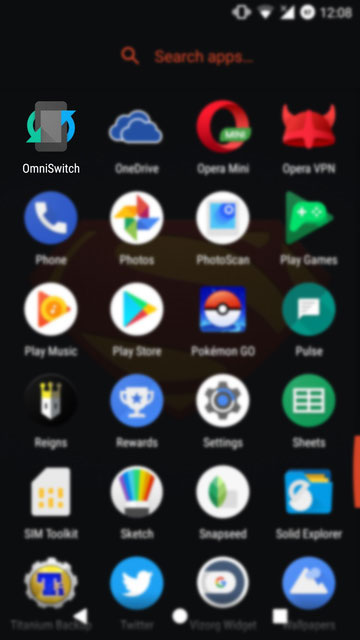
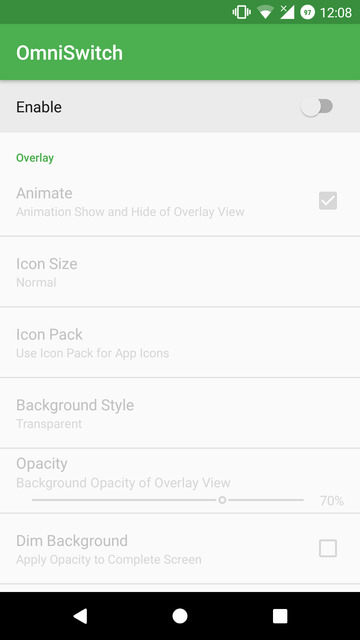
Once your device boots up, you can find the OmniSwitch app icon in your app drawer. Launch the app and toggle on the Enable switch at the very top. When enabled, you can now customize your OmniSwitch experience to the core with the multitude of options available. The first of which, that might interest you is the support for icon packs. You can change the size of icons and their look as well with any icon packs that you may already have installed. You can set the Background color, it’s opacity, etc.
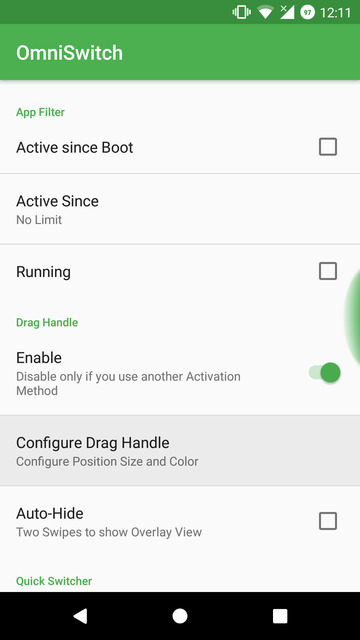
Another setting that you might want to know about is Configure Drag Handle. This lets you customize the width, color, and size of the drag handle, which is the area from the edge of your screen that you can drag inwards from to reveal OmniSwitch. You can also add navigation buttons to the app. Once you’re done with the customization part, exit the app. From now on, anytime you want you can drag from the edge of your screen that you’ve pre-defined in the settings to reveal OmniSwitch.
OmniSwitch also gives you the option to see all the apps you’ve used only since last boot, or all the apps you’ve used since last week. I don’t know why you will need that long a history of your active apps, but it’s there just in case.
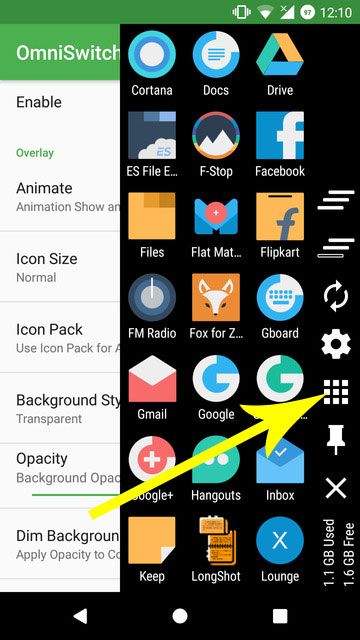
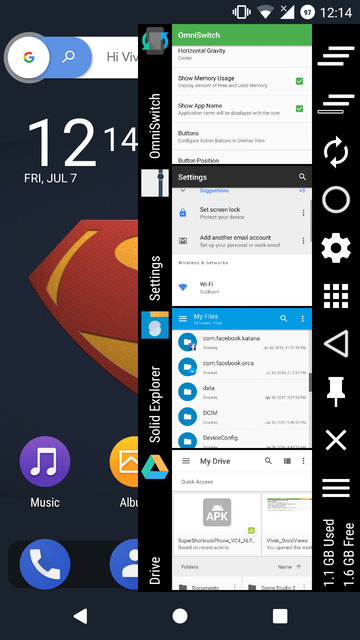
By default, it will show you all your recent apps in a KitKat like fashion along with some buttons on the side. The best feature about OmniSwitch over the stock Android app switching screen is that you also have access to any app installed on your phone and not only apps available in the Recents menu. You can access any app by pressing the button that looks like an old app drawer icon.
Also read: Install the Latest Motorola Gallery App on Any Android
Restricted Mode issue
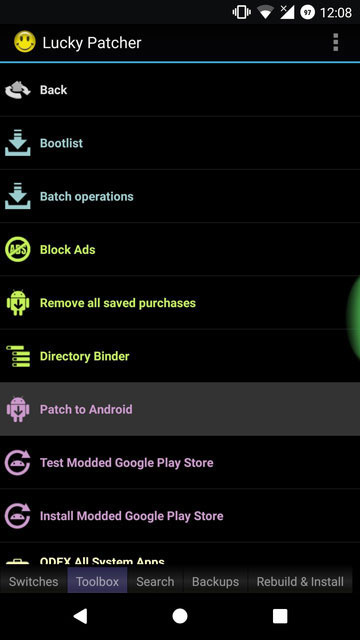
You shouldn’t in most cases, but in case you notice the OmniSwitch Restricted Mode notification after enabling OmniSwitch there’s a simple workaround. Download and install Lucky Patcher and then launch the app. Grant it Superuser access when asked. Tap on the Toolbox tab at the very bottom of the screen, and select Patch to Android.
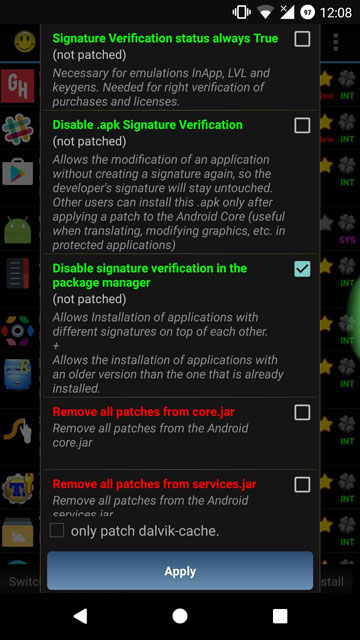
In the very long pop-up that appears, check the box next to Disable signature verification in the package manager and hit Apply. Your phone will reboot automatically but when it gets back up, you won’t see the Restricted Mode notification anymore.





Join The Discussion: