
We often boast of Android’s near-unlimited level of customization when comparing it with other mobile operating systems. Yet, most of us who do that have, at least in the past if not now, been using a rooted Android device. Because rooting is what essentially makes Android the actual open sourced platform we boast about often. It is the key to all sorts of visual or performance customizations that are typically locked by manufacturers, for good reasons of course. Sure, it means losing the warranty but for people like us, the benefits of rooting are far more. Especially considering you can always unroot a device. Sometimes, the device seems to automatically unroot itself though. Many people have faced the no root, missing root access issue before and many still do. Here’s how to fix it.
Before we begin, let’s make some things clear. Android is very complicated when you get to the nitty-gritty of things. It is supposed to be, considering how huge a chunk of software it is. This is one of the reasons manufacturers don’t allow root access to users because it just complicates matters to a whole new level. They would have no idea what you could possibly have done to cause an issue if they allowed you to have root access and provided a warranty. Similarly, we have no idea which device or which ROM you’re using. There are quite a few other variables involved one of which is also that we’re not really developers ourselves but merely enthusiasts.
So we can’t possibly guarantee that the fixes below will actually work for you but it’s always worth a shot.
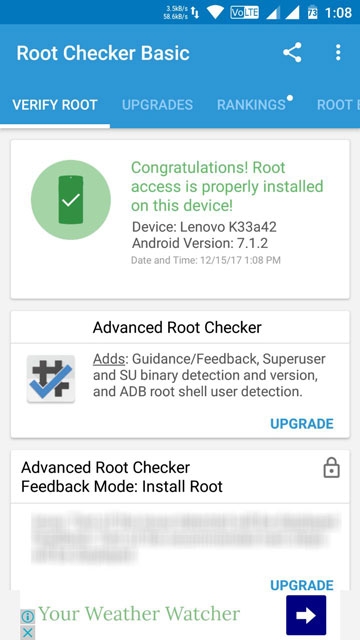
Confirm Root Access
There can be a number of reasons for the loss of root access but let’s first confirm that.
- Download and install Root Checker from the Google Play Store.
[googleplay url=”https://play.google.com/store/apps/details?id=com.joeykrim.rootcheck”/] - Launch the app and tap Agree on the pop-up page and then select the VERIFY ROOT option on the app’s main page.
- There are two possible cases now.
- If you have root access, you will be asked to allow root access to the app. Grant it and it will tell you that you have root access.
- If you don’t have root access, it will simply let you know.
Don’t Miss: Does Lowering Screen Resolution Increase Battery Life?
Fix Missing or Lost Root Access Issue
SuperSU has been the most popular root manager in the past for quite a while and it still continues to be the choice for many. Unsurprisingly, most of the issues related to lost root access have occurred with SuperSU users. But Magisk isn’t untouched by issues of missing root permissions either. They’re just not as common and seem to be related to a prior SuperSU installation in most cases.
Check your Root Manager
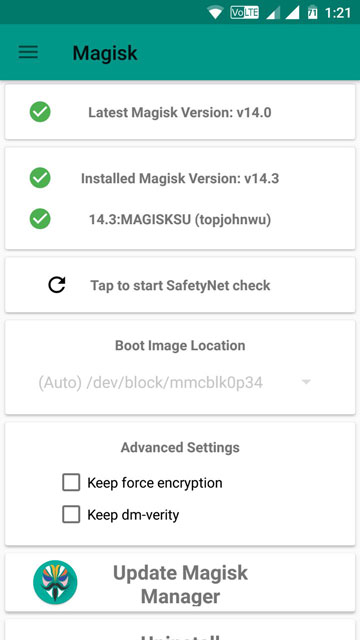
If Root checker says you have root access but you can’t allow root access to certain apps, it would be a good idea to see if these apps are getting denied by your root manager app. Depending on whether you’ve rooted your device with SuperSU or Magisk, launch the SuperSU app or Magisk Manager app.
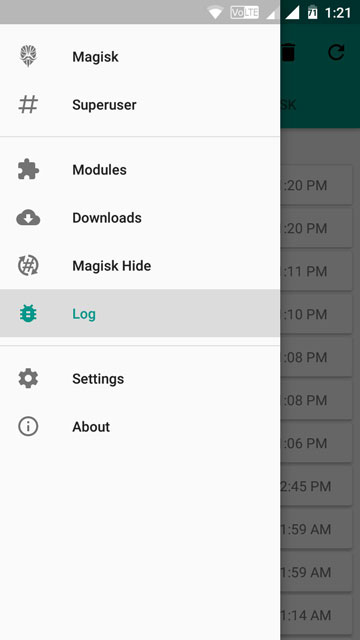
On the Magisk Manager app, you can check that by pulling the side menu drawer and tapping Logs. This is where you can see a log of all the Superuser requests made by apps and find out if the concerned app has even made a request to be granted root access. If it has, go to the Superuser section and make sure the toggle is enabled.
On the SuperSU app, both these options are right on the main app page and you can quickly swipe between the Apps and the Logs tabs to do the same things.
Update SU binary
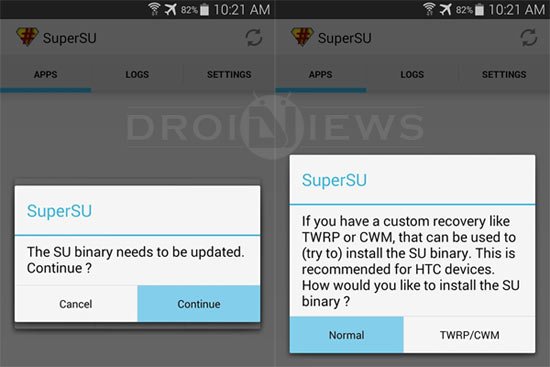 When you launch the SuperSU app, it may ask you to update the SU binary. Outdated SU binary can also be a possible reason for broken root access. It might result in a partial root, with some apps able to get it and some not or it might break root altogether. To update the SU binary, tap Continue on the pop-up dialog and then select Normal.
Try clearing SuperSU or Magisk Manager data
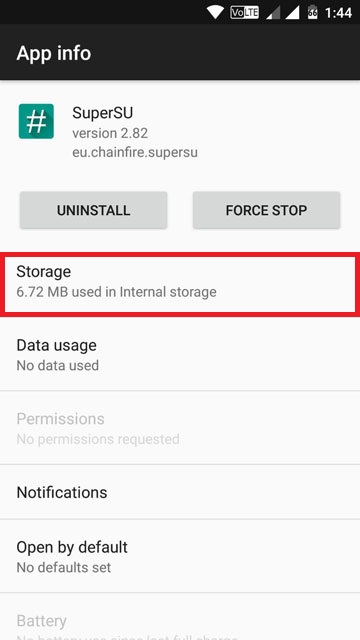
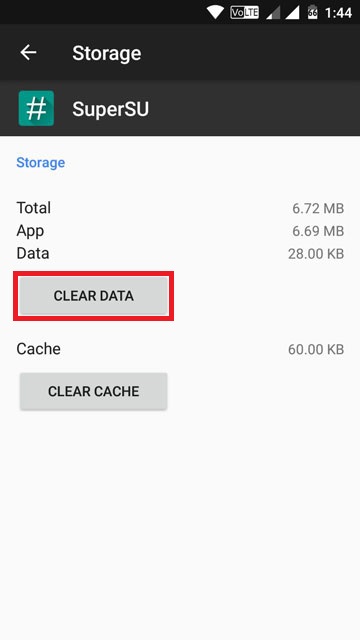
Sometimes you have to just take a leap of faith or shoot an arrow in the dark. Missing root access counts as desperate times in our book and sometimes all it takes is to tap that CLEAR DATA button for an app. Go to Settings > Apps > SuperSU/Magisk Manager > Storage and tap the magical button that says CLEAR DATA. Reboot your device and hope for magisk magic.
Uninstall SuperSU
If you lost root access after switching from SuperSU to Magisk, immediately or after a while, the issue could be related to the prior SuperSU installation. SuperSU is installed as a system app and Magisk is known to stay away from the system partition. Usually, though, Magisk does access the system partition during the time of installation to see if SuperSU is installed, in which case it uninstalls SuperSU. It is still possible though that for some reason it couldn’t, in your case. You can try manually uninstalling SuperSU by flashing this unSU zip.
Reinstall SuperSU/Magisk
If nothing works, your best bet would be to just start over. Uninstall the already installed SuperSU using the zip provided above and flash this Magisk uninstaller zip to uninstall Magisk. Download a SuperSU or Magisk flashable zip from below if you don’t have one anymore and just flash it again via a custom recovery.
- SuperSU
- Latest Magisk
Magisk v14 and above don’t necessarily require being flashed through a custom recovery. In case your device lacks a custom recovery, you can still install Magisk. Refer to our article if you don’t know how to install Magisk on Android.
Read Next: How to Hide Root on Android and Pass SafetyNet Check




Join The Discussion: