If you wish to send an email at a specific time, then rather than setting a reminder for the same, you may let Gmail do the job for you. In today’s time, it has become extremely important that the mail reaches the recipient at the scheduled date and time. But you can’t always be available at the desired date and time for sending the intended mail. So in these cases, you may take the help of the Schedule Email feature of Gmail. You just need to type in the required mail at your convenience and feed the required date and time. The scheduled email will then automatically be sent to the recipient at the pre-determined time.
Moreover, the best part is that you neither have to keep your PC turned on nor keep your internet connection active at the intended time. Sending Scheduled Emails via Gmail works in both the web version as well as in the Gmail app. Instructions for both are given henceforth. Not only mails, but you could also schedule Messages, WhatsApp, etc at a specific time. Interested users can have a look at how to schedule Facebook posts, WhatsApp messages, SMS and more.
Send Schedule Emails via Gmail Web Version
- Go to your Gmail account on the desktop or PC.
- Click on the Compose button present on the left side of your screen.
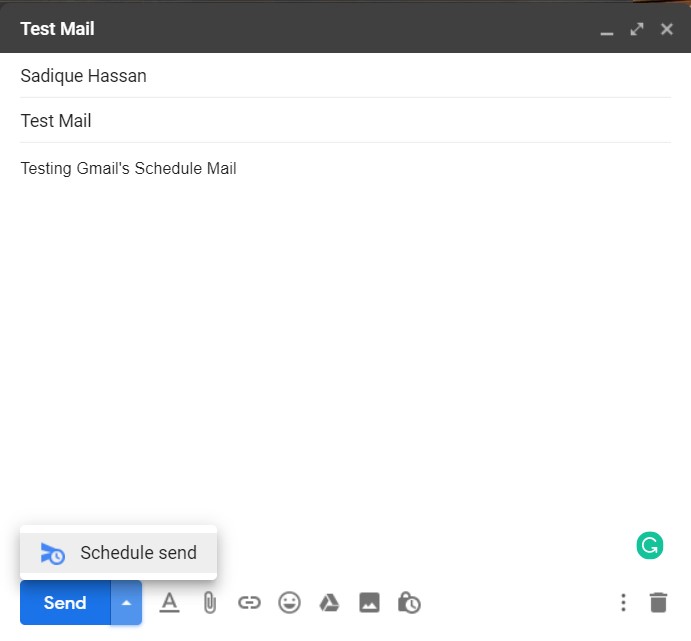
- Type in the Recipients, Subject and Message Body. Once done, click on the arrow next to the Send button and select Schedule send.
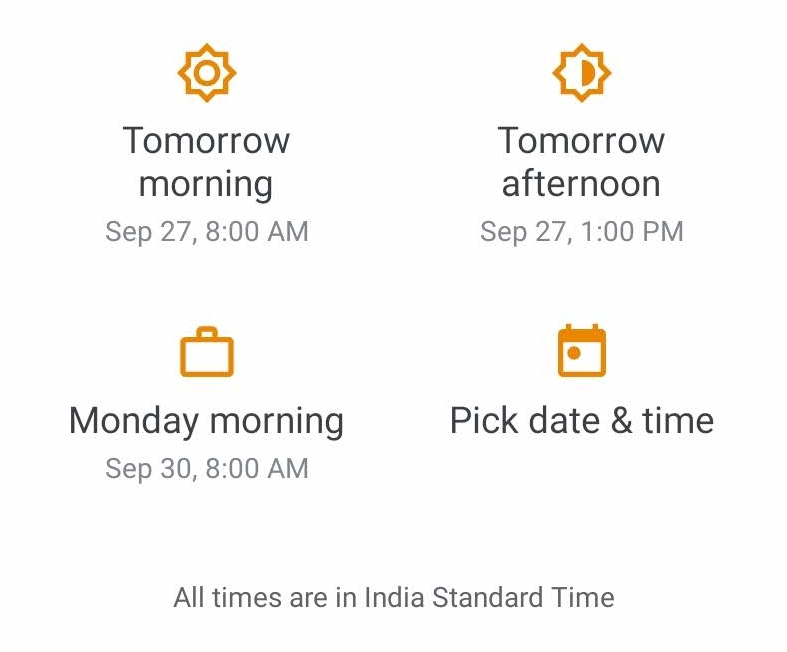
- Select from the preset date and time or create a custom one by going to Pick date and time.
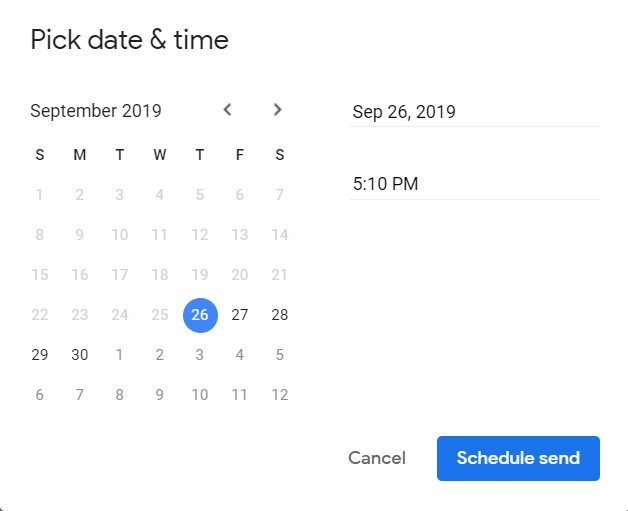
- Select the desired date from the calendar that pops up. Also, input the preferred time at which you have to send the mail.
- Once you have made your choices, click on Schedule send.
- That’s it. The scheduled email will now be sent via Gmail at the specified date and time.
Cancel Mail Set for a Scheduled Date and Time
- In the left menu bar, just beneath the Compose option, look for the Scheduled option.
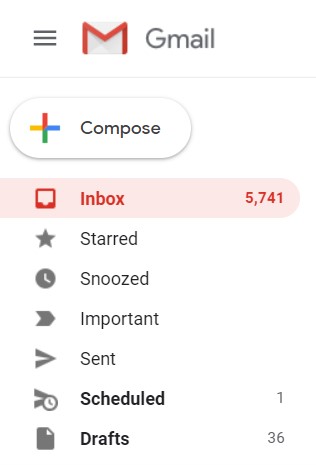
- If it isn’t available, then it must be hidden under the More section. Click on it to expand.
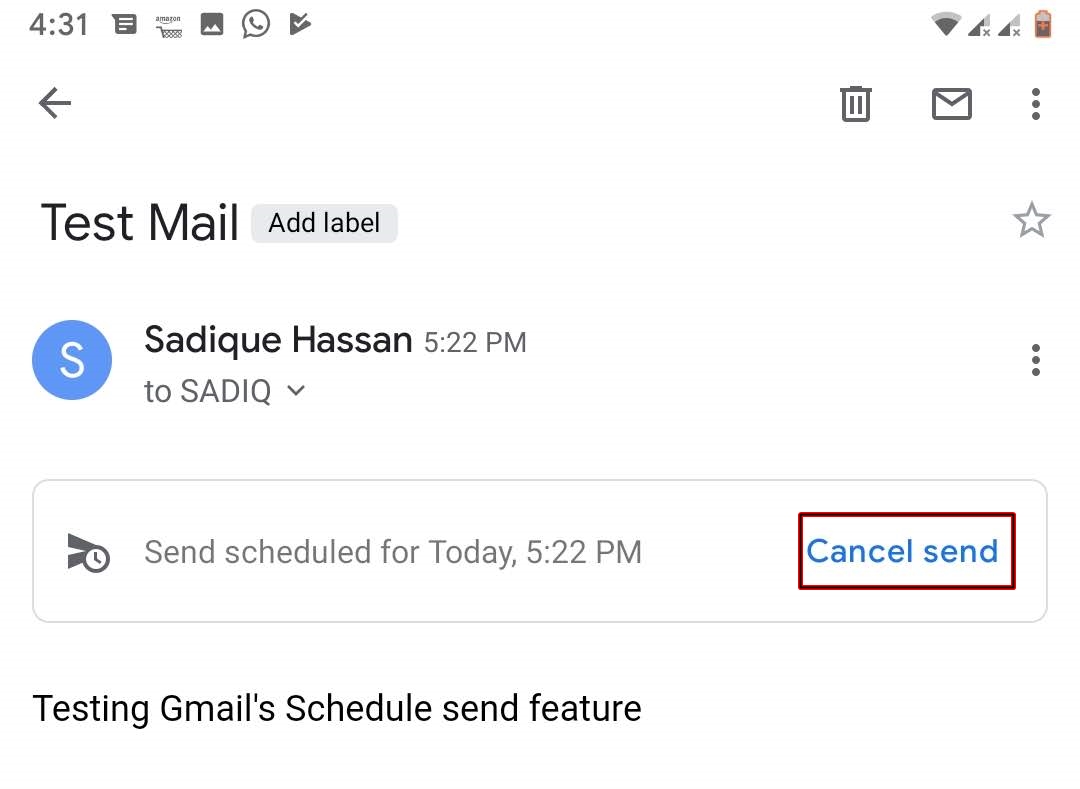
- Once you reach the Scheduled section, click open the mail wish you no longer wish to send.
- Finally, click on the Cancel send option. The scheduled email in Gmail will no longer be sent.
You may even send automatic SMS Reply from your Android app. Read our guide on scheduling automatic SMS replies on Android for the same.
Schedule Emails via Gmail App
- Open the Gmail app on your Android device.
- Tap on the plus sign present at the bottom right.
- Enter the required details, i.e From, To, Subject and Message Body.
- Now tap on the three vertical dots next to the Send button and select the Schedule send option.
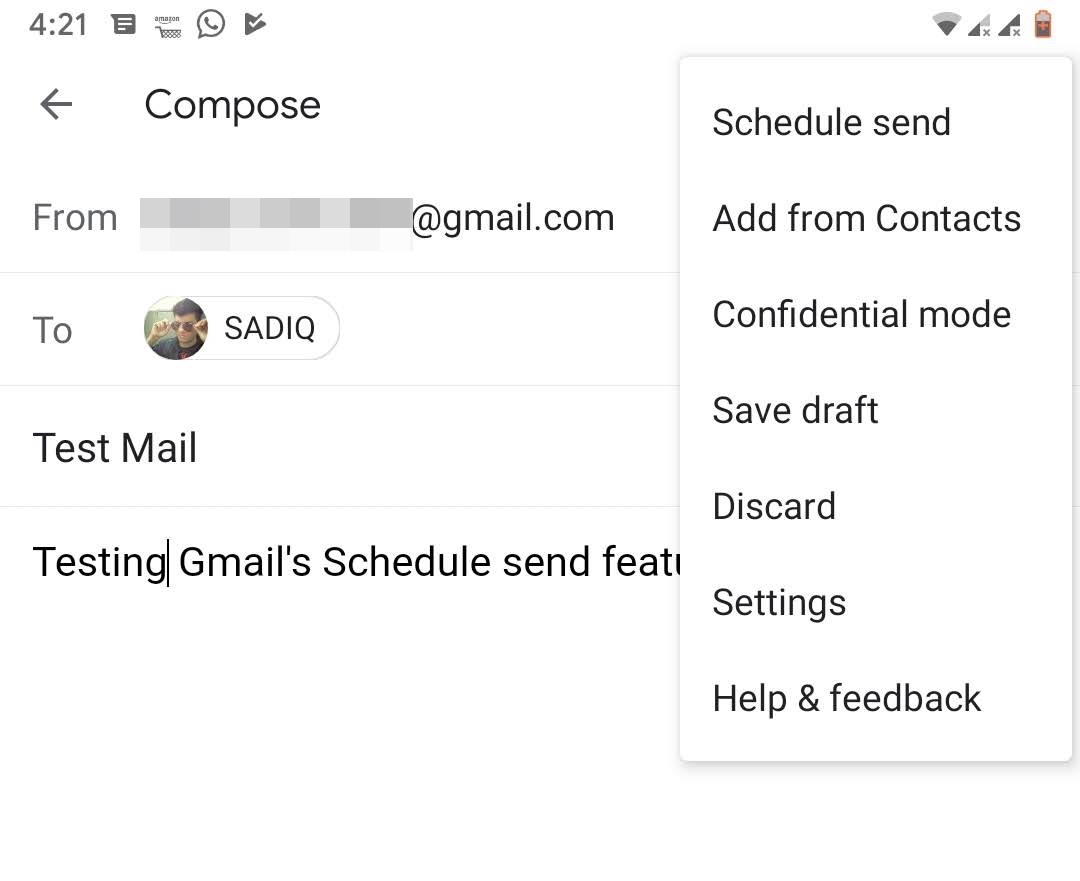
- Either choose from the pre-defined date and time and create your own by clicking on Pick date and time.
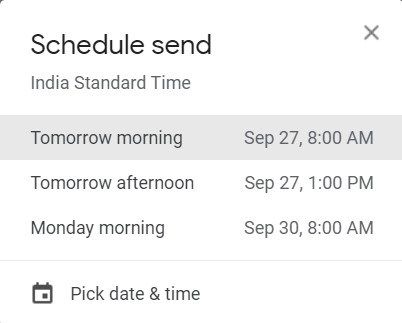
- Now, schedule your email by entering the desired date and time.
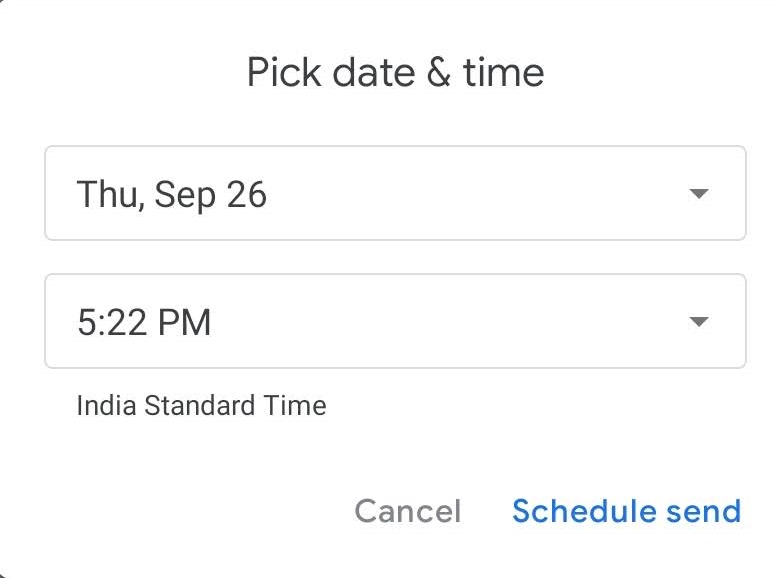
- Once done, click on Schedule send. The scheduled email will now be successfully sent via the Gmail app at the time you specified.
Cancel the Schedule Mail
- In the Gmail app, tap on the hamburger icon (three horizontally stacked lines at the top left).
- Select the Scheduled option.
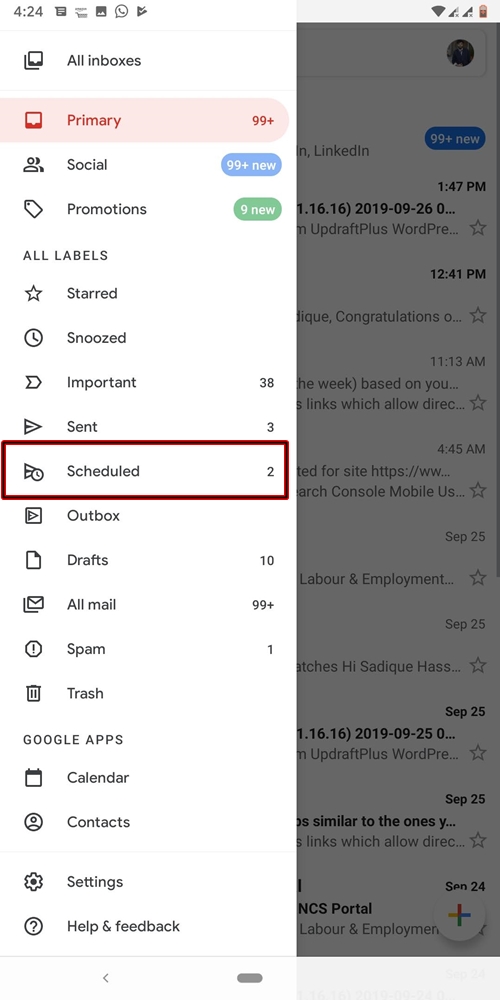
- Now open the scheduled mail which you no longer wish to send.
- Finally, click the Cancel Send button. The mail will no longer be sent at the scheduled date and time.

With that, we come to the end the guide on how to send schedule emails in Gmail. Do let us know if you have any queries with respect to any of the steps mentioned above. Do not forget to check out these 7 amazing Gmail tips and tricks too.
Read next: How to Recover Permanently Deleted Emails in Gmail


Join The Discussion: