Android always projected its open source nature in many ways. On Android, you can mod your icons, themes, boot logo and even install custom ROMs at your will. We have seen much development past years like Multi ROMs and even running few Linux distros on Android.
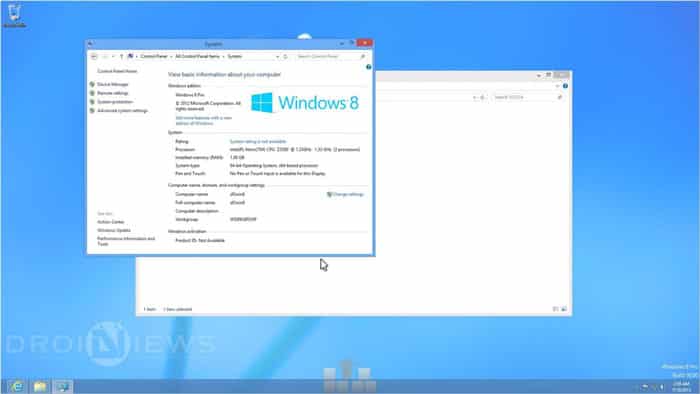
Android even managed to run early versions of Windows 95 and Windows XP, though it was lagging and inefficient it did well. Just a few days back XDA member ycavan came with amazing development. He managed to run Windows 7 on his Asus Zenfone 2 with the Intel-based processor. The nature of the Intel Atom’s architecture ensures that the OS runs at near-native speeds.
In his post, ycavan outlines every step required for the installation, the gist of which is that interested Zenfone 2 users must unlock their bootloader, flash a specific kernel, partition their SD card and run a host of terminal commands, upon completion of which, the Windows installation will begin in a virtual machine. The installation process is bit complex but nothing to worry, today we will present you the simplest guide to run Windows on your Asus Zenfone 2
Prerequisites
- Download KVM enabled kernel from here.
- Install following apps from the Play Store.
[googleplay url=”https://play.google.com/store/apps/details?id=com.iiordanov.freeaSPICE”]
[googleplay url=”https://play.google.com/store/apps/details?id=jackpal.androidterm”] [googleplay url=”https://play.google.com/store/apps/details?id=sk.vx.connectbot”] [googleplay url=”https://play.google.com/store/apps/details?id=stericson.busybox”]- Any Windows ISO image file (Windows 7/8/8.1)
Optional
- A decent sized SDcard of 128GB.
- Install SDcard partitioner from Play Store.
Procedure
- Flash the 2.19 kernel.img using fastboot or through custom recovery and reboot.
- Start Terminal Emulator
- Type su (For superuser permissions)
- Grant superuser permissions when prompted. (Select Always)
- Type Ismod and verify kvm.ko and kvm-intel.ko are active. If they are not active use; insmod /lib/modules/kvm.ko and insmod /lib/modules/kvm-intel.ko to activate them
- Exit the Terminal Emulator completely.
- Use Linux Deploy to install your favorite Linux distro. Only use SSH, you won’t need framebuffer or X access. This could take upwards of half an hour. (Light Linux distros are recommended like alphaOS)
- After Linux Deploy has installed your Linux distro, click Start to start up the chroot.
- Use an SSH client to connect to your Linux distro. VX ConnectBot is suggested as you won’t be PC dependable to boot every time.
- Use the package manager to install qemu-kvm for your distro. Most Debian & Ubuntu distros use apt-get, pacman, and other command lines.
- It is recommend creating a shell script to start up qemu-kvm because it can be a painful to remember all of the switches alike.
qemu-system-x86_64 -full-screen -m 1G -enable-kvm -cpu host \
 -drive file=/mnt/0/machine1.img,format=raw -boot menu=on \
 --usbdevice tablet -smp 4 -vga qxl -monitor stdio -balloon virtio \
 -soundhw hda -net nic,model=virtio \
 -net user,smb=/mnt/MicroSD \
 -spice port=5900,addr=127.0.0.1,disable-ticketing $@
8. Your script file must look like this
#!/bin/bashqemu-system-x86_64 -full-screen -m 1G -enable-kvm -cpu host \ -drive file=/mnt/0/machine1.img,format=raw -boot menu=on \ --usbdevice tablet -smp 4 -vga qxl -monitor stdio -balloon virtio \ -soundhw hda -net nic,model=virtio \ -net user,smb=/mnt/MicroSD \ -spice port=5900,addr=127.0.0.1,disable-ticketing $@Use chmod +x start_win7.sh to make it executable
9. Start up the qemu-kvm virtual machine referencing the location of your windows 7 install cd
./start_win7.sh -cdrom /mnt/MicroSD/Vcd/en_windows7.iso
10. Qemu will start up and then show you this:
QEMU 2.3.0 monitor – type ‘help’ for more information
(qemu)
11. Start up aSPICE.
12. Click the OFF button to the left of Show Advanced Settings and Make sure Enable Sound is checked.
13. The default connection is 127.0.0.1:5900, so on seeing this tap Connect.
Now the real magic begins. You will see Windows loading. Hurrah !

The installation of drivers and parting SDcard are omitted from this guide to make this guide simple. Anyhow if you have queries regarding drivers do reach us through comments below. Don’t forget to share your experiences with Windows on you Asus Zenfone 2.


Join The Discussion: