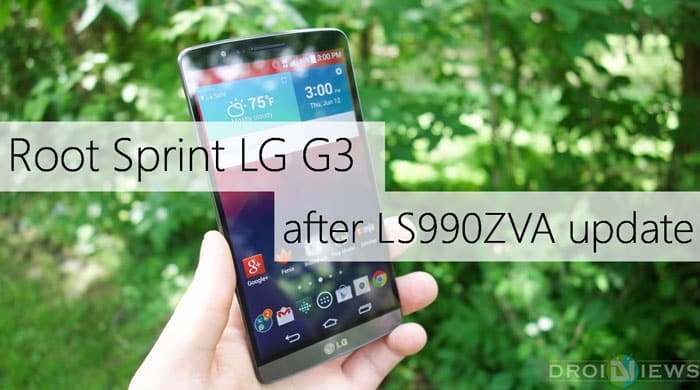
LG G3 is the first 5.5″ inch Quad HD IPS display smart phone. It is supposed to last easily for 8 hours as it has 3000 mAh removable battery. With the laser focus camera LG G3 takes super-fine 13 MP pictures which makes it the best camera phone among the flagship devices of year 2015. It is available in Shine Gold, Blue and Metallic Black colors.
Performance wise LG G3 is a power house with Snapdragon 801 Quad-core processor and smart phone comes with various other features from LG like LG Health. It is a beauty in looks and beast inside. G3 is titled as the best smartphone of the year by Global mobile awards.
Recently LG is active with OTAs for LG G3 (LS990). The latest update version is LS990ZVA. The latest update fixes few bugs and adds stability to stock ROM and is still on Android 5.0.2 version. The changelog reveals a new feature called Factory reset protection, no one is sure of what it does but I assume this Factory reset protection is a security measure in case of a lost phone. It prevents factory reset and requires authentication for successful reset.
Before this OTA, users were able to root their LG G3 by utilizing avicohh’s tools but things seem different after LS990ZVA update. The former avicohh’s tools no longer work on the latest update. LG has covered few loopholes here but not all. XDA member l33tlinuxh4x0r managed to find a new one after modifying avicohh’s tools. This modified avicohh’s tool works like a charm.
DroidViews presents a guide to root your LG G3 after LS990ZVA update.
Prerequisites
- Download and install the OTA for LS990ZVA update.
- If you have made any changes to system apps. Revert all the changes or else you will have cache problems resulting in boot loops.
- Factory reset is encouraged.
- Install the latest on your computer.
Warning: The author or the developer shall not be responsible, if you damage or brick your device. Do it at your own risk and follow the instructions properly.
Procedure
- Go to Settings > About phone. Tap the Build number several times to enable developer options.
- Now enable USB debugging from developer options.
- Download the modified Avicohh’s tool: LG_Root_Script_v2.3.zip
- Extract the LG_Root_Script_v2.3.zip to your computer.
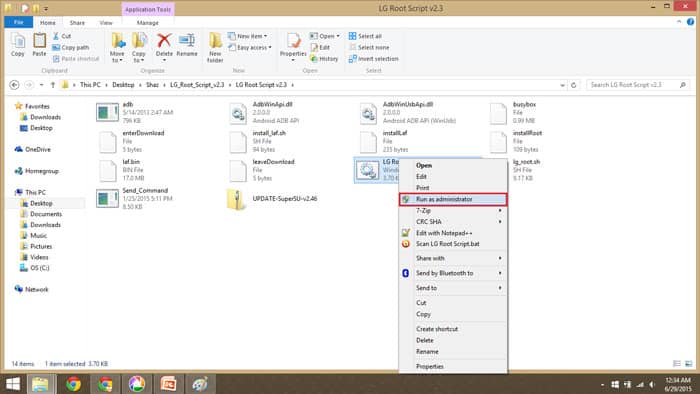
- Run LG Root Script.bat file with administrator privileges.

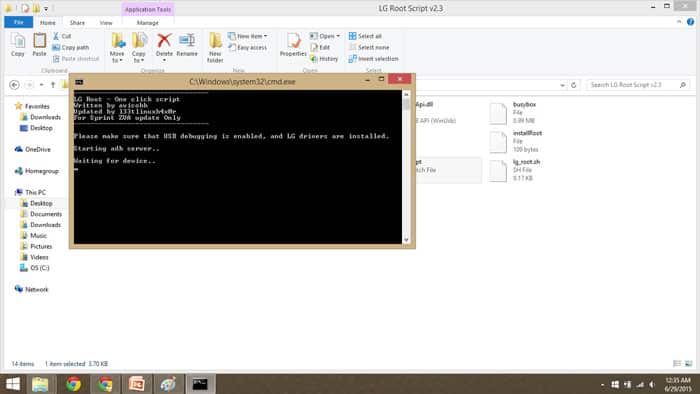
- Follow the on-screen instructions. Your device will boot several times during this process.

- After a minute or two, you will have root.
Congrats! Now your LG G3 is on the latest update and is rooted. If you have any problems with this method do let us know in the comments below. Don’t forget to share your experiences with us.


After trying the original 1.2 and 1.3 versions of the LG One Click Root script and having them fail every time, this script came to save the day for me. For those of you that are still having trouble with this, I have some tips:
Follow the instructions all the way through and be patient. Your phone is not frozen just because you see the script or your phone displaying the same message for a short period of time.
Wait it out.
If 10 minutes goes by and nothing changes, then you can assume something isn’t right but if you only wait a minute or so, you might be aborting too early for this script to actually work.
OK, so for detailed instructions about the root:
1. Follow all of the instructions in the above article. (Install LG Drivers, then reboot PC, then setup phone for usb debugging.)
2. Once this is done, before you run the script, I would actually enable ‘Unknown Sources’ first. This option is in ‘System Settings -> Security -> Unknown Sources’.
(The reason why I recommend this but it isn’t in the instructions is becuase the script is actually installing the SuperSU app but it’s not installing it from the play store so chances of your phone detecting the app as an unknown source are somewhat likely. If this option is enabled, the phone will allow the install regardless of the source.)
3. Run the script as administrator. (Right click the ‘LG Root Script.bat file and click run as administrator)
4. The script will start and output ‘Starting adb server..’
5. It will then output ‘Waiting for device..’
6. It will then output ‘Device detected!’
7. It will then output ‘Pushing files’ and a series of outputs showing the size of the files
8. It will then output ‘Rebooting’
9. It will then output ‘Looking for LG serial port..’
10. Your phone will reboot and when it starts back up, the script will either find the LG serial port or it wont. If it doesn’t, it will instruct you to put your phone into download mode manually.
11. Follow the instructions given.
12. Once you’re in download mode, you will see the script detect your device and output a message saying installing ‘LAF’ something. (I don’t know what LAF is but it must be one of the tweaks l33tlinuxh4x0r made to the original 1.2 version of this script becuase both version 1.2 and 1.3 did not install this.)
13. This will install LAF and the script will then prompt you to press CRTL+C and then press the ‘N’ key and then press the ‘ENTER’ key. Do that exactly like it says.
14. Once your phone reboots again, the script will make a second attempt at ‘Looking for LG Serial Port’. This time it should find it but it also may not. Whether it finds it or not, the script will try to reboot your phone into download mode again. If rebooting into download mode didn’t work the first time, it probably won’t work on this step either. No worries, just follow the manual download mode instructions again.
15. Once your phone is in download mode again, the script will detect your phone and install the ROM as well some other stuff. After this second install of stuff in download mode, the script will give you the same ‘CRTL+C N ENTER’ message. Follow these instructions again.
16. When your phone reboots, you will have root and you should see the ‘SuperSU’ app in your apps.
Gets to – “Pushing files.. cannot stat ‘busybox’: No such file or directory
I have tried it a few time….I have worked on this for hours with no success…
After rebooting..in the end it just says on the command prompt ..ENTER:LEAVE.. Just stuck on there while in download mode!wtf!
It gets to rebooting into download mode and never does