If you have something like a Samsung or a OnePlus device, rooting your phone might not seem very necessary. On a Pixel though, features such as network speed indicator in the status bar are still absent. For power users, stock Android is still pretty barebones, although it is a lot more polished and simpler. Google Pixel 4 and Pixel 4 XL, like other Google Pixel devices, are easier to root. For one, unlocking the bootloader is simpler. Moreover, Google provides easy access to all firmware images for these devices. And you’ll need that to root Pixel 4, right after you unlock the Pixel 4 bootloader.
Warning
At this point pretty much everyone who is into rooting their devices knows about the risks. Yet, we’re duty-bound to let you know anyway. It also helps that we can say “told you so” in case you manage to horribly mess up your device.
Unlocking the bootloader will void your Pixel 4 warranty. Once rooted, you will also not be able to directly install OTA updates on your phone, at least, not without losing root access. You should also realize that to root your device, you’re depending on a third-party mod, by someone you don’t know. And the mod affects your device on a system level. Needless to say, it is a risky affair even if you trust the mod maker’s integrity. There is always a chance that you might miss something, or things just go south anyway, no matter how careful you were. So proceed at your own risk. Neither DroidViews nor the developer of the root mod can be held responsible for any damage you do to your device.
Also, keep in mind that unlocking the bootloader will completely wipe all data from the device. This includes apps, settings and even the contents of the internal sd card (pictures, music, etc.). Copy all important files off the phone onto a PC or upload them to a cloud.
Requirements
- A Pixel 4 or Pixel 4 XL. This does not work on career locked Pixel devices.
- Download Android SDK Platform-tools zip on your PC.
- Enable USB Debugging and OEM Unlocking on your Pixel 4/Pixel XL.
- Make sure your phone is charged up to at least 50%.
Unlock Pixel 4 Bootloader
- Power off your phone and connect it to your PC via a USB cable.
- Go to the platform-tools folder on your PC.
- Command Prompt: Type in cmd in the address bar and hit enter.
- Windows PowerShell: Hold Shift and right-click in an empty space inside the folder then select Open PowerShell here.
- Terminal (macOS & Linux): Right-click in an empty space inside the folder and select Open in Terminal.
- Now check if your device is properly connected by typing the command given below and hit enter.
- Command Prompt:
adb devices
- Windows Powershell:
.\adb devices
- macOS or Linux:
./adb devices
- Command Prompt:
- You should see your phone’s serial number. If you don’t, you should check if you have installed all the required drivers.
- Reboot your phone fastboot mode using the following command. Change the syntax accordingly as before.
adb reboot bootloader
- Type the command below to unlock your bootloader if your device is detected. Remember this will wipe everything on your phone.
fastboot flashing unlock
- On your phone, you will be warned about unlocking the bootloader.
- Press the Volume Up button to highlight Unlock the bootloader and the Power button to select it.
- Your device will reboot again in bootloader mode but you will see the text “unlocked” along with a red warning sign.
- Use this command then to reboot back to your OS and set up everything again.
fastboot reboot
Download Pixel 4 & Pixel 4 XL firmware
When you flash the Magisk installer zip from TWRP recovery, it patches the current boot image. That’s how it installs itself. Unfortunately, TWRP recovery is not yet available for the Pixel 4. But since we know how Magisk does things, we can do it manually. You will need the stock boot image for your device though. Google lets users download the firmware images from their firmware download page for Pixel devices. Make sure you download the appropriate firmware. For your convenience, we’ve included the latest firmware links for the devices below.
Pixel 4
- flame-qd1a.190821.007-factory-04b0499d.zip | October 2019
- flame-qd1a.190821.011-factory-f4d0cfd1.zip | October 2019
Pixel 4 XL
- coral-qd1a.190821.007-factory-e915f51a.zip | October 2019
- coral-qd1a.190821.011-factory-6dbd28f3.zip | October 2019
Get Stock Boot Image From Firmware
![]()
When you have the firmware, open it using any archive manager. You’ll find another folder inside it, so open that too. In this folder, look for an archive that has a name starting with image-coral or image-flame. Inside this archive, you’ll find several image files (files with .img extension) and also a file named boot.img which is the stock bootloader image that we’re looking for.
How to Root Pixel 4 & Pixel 4 XL
- Download the latest Magisk Manager APK and install it on your Pixel 4.
- Transfer the extracted boot image to your Pixel 4.
- You can use an MTP connection via the USB cable or any other wireless methods.
- If you’re more of a command person, the following command will push the boot image file to the Download folder on your device’s internal storage.
adb push <path to file> /sdCard/Download
- Open Magisk Manager and click on the Install option next to the text “Magisk Manager is not installed”.

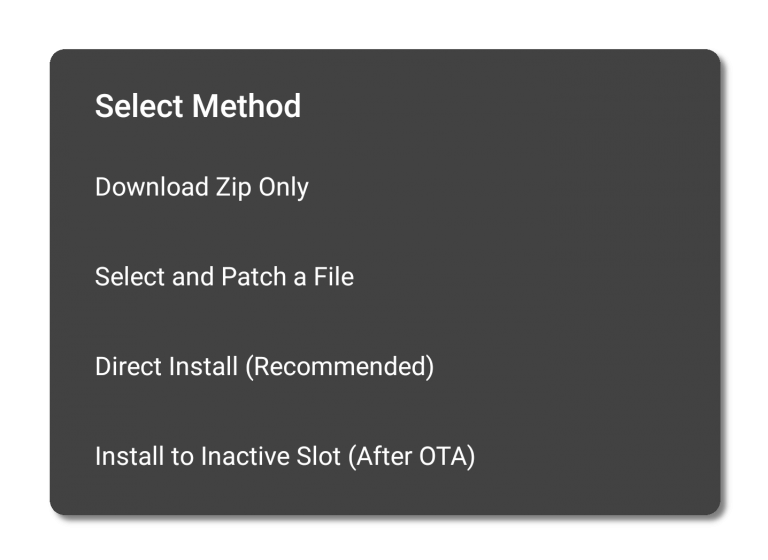
- Then tap on Select and Patch a file and a file manager will open.
- Navigate to and select the boot image you just transferred to your device.
- Magisk will patch the boot image. The patched boot image can be found in the Magisk Manager folder on your device’s internal storage.
- Copy it to your adb installation folder over the MTP connection or use the following adb command.
adb pull /sdcard/MagiskManager/magisk_patched.img
- Reboot your phone into fastboot mode again.
adb reboot bootloader
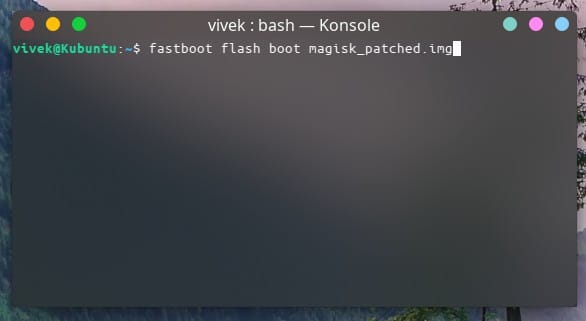
- Flash the patched boot image with this command.

fastboot flash boot magisk_patched.img
- Disconnect and reboot your device.
When your device boots up, launch Magisk Manager again and you will see that Magisk is installed. Do keep in mind that you will have to root every time you install an OTA update.
Read Next: PPI vs DPI: What Are They and What’s the Difference?


Join The Discussion: