OnePlus has recently released the official Nougat beta update in the form of OxygenOS Open Beta 8 update. The beta update brings your precious OnePlus 3 to Nougat platform with not much changes to the OS. The existing beta users won’t receive the update by OTA, so you need to flash manually using our earlier tutorial. In this page, you’ll see how to install modified TWRP and root OnePlus 3 Nougat beta build.
In my previous tutorial, I’ve mentioned that the TWRP recovery broke after the Nougat update. So, you need to install a modified TWRP recovery on your device to flash any ROM or mod. The credits for the modified TWRP go to XDA developer eng.stk. The TWRP recovery version is 3.0.2-1.28 and it works without any issue on the OnePlus 3 Nougat beta build. Once the TWRP recovery is installed, you can simply root your device using SuperSU.
Download the modified TWRP recovery file and SuperSU zip from below and follow the instructions to flash them on your device.
Prerequisites
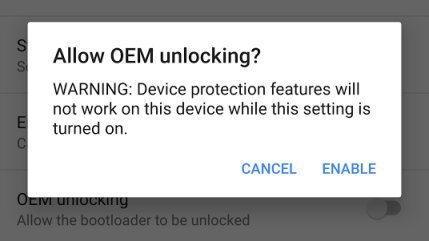
- Go to Settings » About phone » Build number and tap it 7 times to enable Developer options on your device. Then go back to Settings » Developer options and enable USB Debugging and OEM unlocking.

- Download the Minimal ADB and Fasboot Setup and install it on your computer.
- Backup important files on your device to a safe place as unlocking the bootloader will format your entire device.
- Make sure you have enough charge on your device before starting the process.
Downloads
How to Install Modified TWRP and Root OnePlus 3 Nougat Beta 8
- Download the SuperSU zip from the above link and save it on your device.
- Download the recovery file and rename the downloaded file to recovery.img for your convenience.
- Transfer the recovery.img file to the folder where you have extracted the fastboot files on your PC.
- Navigate to the fastboot files folder and open a command prompt inside the folder by pressing Shift key + Right-click in the empty space inside the folder, and select Open command window here option from the Windows context menu.
- Connect the device to the PC and make sure it is detected. Now boot your OnePlus 3 into the bootloader mode using the following command in the command:
adb reboot bootloader
- Once in bootloader mode, you can use the following fastboot command to flash the recovery image on your OnePlus 3:
fastboot flash recovery recovery.img
- Reboot your device once the recovery is flashed.
- Now, reboot into recovery mode on your device using the below command.
adb reboot recovery
- In recovery, install the SuperSU zip by clicking on Install button in TWRP and selecting the Zip.
- Reboot the device.
That’s it. You’ll see the SuperSU app after the reboot.


pls help.
i installed twrp successfully. then when i try to install super su, the file is not found in the sd card. but when i reboot my device, the file is there in my storage. why is dat?
Tap the Mount option in TWRP and mound the SD card.
“6. Once in bootloader mode, you can use the following fastboot command to flash the recovery image on your Nexus 9:” – really?! Did you copy/paste this?! 🙂
I don’t think so. I may be a typo. I make sometimes make such mistakes two. In some cases the writer copies the steps (from one of his own tutorials) because they’re the same for many devices and change it accordingly. It makes things convenient for the writer. As long as the method is correct, I don’t see any problem with this.
It’ll look more professional if you’ll check the entire text before clicking on the “Publish” button.
Well, I do that always but sometimes things escape your eyes and mistakes occur. I am really ashamed.