Nexus devices have a tendency of being fairly easy to root, and the Nexus 5 has followed suit. Thanks to Chainfire who has released the Auto-Root tool for the Nexus 5 to ensure a process that’s as simple as possible. So come on Nexus 5 users, it’s time to get our hands dirty and take control of your device. Rooting your phone can be a daunting task but with it comes large benefits and a range of root access apps which may be able to perform things you’ve only daydreamed about. For all the users who haven’t already rooted their phones, we’ll get right to it so you too can start enjoying the benefits of rooting without any further delays.
Warning
This guide should be followed very carefully and patiently. Any deviation could lead to a bricked device. Make sure to read each step completely before proceeding and allow ample time for the processes to be completed. Furthermore this guide does not guarantee the process will be successful and all risks are taken solely at the user’s discretion. This guide is intended only for the Nexus 5! Other devices are not supported. Incorrect use of these files might result in a bricked device. You alone are responsible for any consequences that might occur during the process, we shall not be held responsible for any damage to your device.
Before you Begin
Here’s a little checklist to help you prepare before you begin
- Ensure your battery is charged to above 60% to prevent it from dying and corrupting the process.
- IMPORTANT! If your Nexus 5 doesn’t have an unlocked bootloader, CF-Auto-Root tool will unlock it and in doing so it will wipe your phone’s apps and data. Remember to backup all files, contacts and other important data. If you have unlocked its bootloader, you will pass on unharmed.
- You can download the CF-Auto-Root program from here.
- Download and install Google USB Drivers.
- Turn on USB Debugging on your Nexus 5. Here’s how you can do it.
Root the Nexus 5
- Begin by extracting the contents of the downloaded file to somewhere convenient, like your desktop.

- Turn off your Nexus 5.
- Then turn it back on by holding down the Volume Down + Power keys altogether. Release the keys when you enter the Bootloader Mode.
- Plug your phone into the computer via a USB cable.
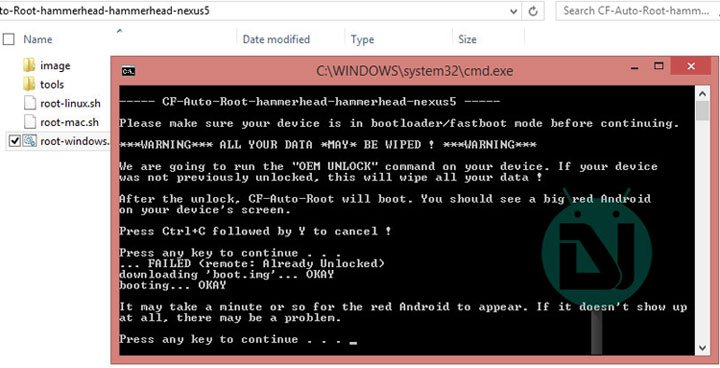
- Double click the root-windows.bat file. A command window will open up asking you to press a key to continue with unlocking the bootloader and rooting the device.

- Wait for the process to complete and click any prompts on your phone that come up when asked to.
- You will see a red Android bot and root scripts running on your Nexus 5’s screen. Just wait until the device boots up.
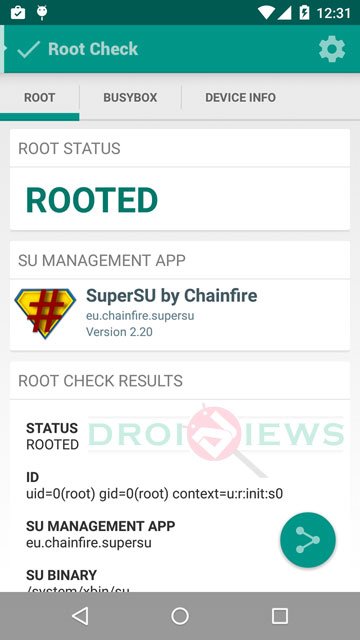
That’s the end! You now have a fully rooted Nexus 5 ready for you to play around with and reap the rewards of rooting. To verify root access, you can download the Root Checker app from the Play Store and run it.
[googleplay url=”https://play.google.com/store/apps/details?id=com.joeykrim.rootcheck”]Leave a comment down below to give us some feedback on your rooting experience or if you have any questions.
Credits: Chainfire


I used to use an older version of oneclickroot, it was great up until they stopped supporting the old version and wanted me to pay for the new version. It’s not that I can’t do this myself, it’s that I’m lazy lol this was very quick and easy, works great!
Gracias por la información, pude colocar ROOT a mi Nexus 5 con lollipop
Thanks for the guide. Quite easy to follow.
Rooted successfully.