Motorola is the exemplar of quick updates among the mighty OEM’s ruling the roost out there. Google’s own Nexus line-up is still waiting restlessly for the Android Lollipop update but somehow Motorola managed to give its users a taste of Lollipop. Motorola rolled out the Android 5.0 Lollipop OTA update for the second-generation Moto X last week as a part of the soak test. However, this update is limited to the few pure edition users with the model number XT1095. Luckily, graffixnyc of XDA captured the OTA file and mirrored it quickly but your Moto X must be unrooted to flash the update. If you’ve missed the update, grab it from the below link:
Moto X 2014 Android Lollipop OTA Update
Since the update requires an unrooted system, your Moto X will be barren without root support after the Lollipop installation. As always the legendary developer Chainfire has found out a way to root the Moto X 2014 and put an end to the itching of the Moto users. Adding to the good news, the root support comes with the popular one-click root tool from Chainfire which automatically root your Moto X without any complex commands. However, there’s a slight confusion of sorts regarding the OS support of the tool. The CF Auto root site shows Android KitKat in the supported OS column while a tweet from Chainfire claims it’s validity on Android Lollipop.
If you’ve made up your mind to root your Moto X, grab the one-click root tool from below and follow the instructions to root your device.
Warning
This guide is intended only for the Moto X 2014 Pure Edition with the model number XT1095, not for any other device. Be extra cautious when you choose the rooting patches as flashing wrong patches might result in a bricked device. You alone are responsible for any consequences that might occur during the process, we shall not be held responsible for any damage to your device.
Prepare Your Device
- Charge your Moto X above 60% battery level to avoid shut downs during the process.
- Backup your device storage, Contacts, SMS etc. using Google Sync service or any third-party app.
- Install Motorola USB Drivers on your computer.
- Enable USB Debugging on your Moto X. Read our guide to get instructions on how to do so.
- Revert back to pure stock by doing a complete un-root and flashing back the stock recovery.
Installation Procedure
- Download the CF one-click root tool for your Moto X → Click here to download
- Enable OEM unlock from Developer options in settings. You can check our previous root process for detailed instructions.
- Reboot your Moto X into bootloader mode using the hardware combo or the adb method.
- Extract the CF-Auto-Root-victara-victaratmo-xt1095.zip file on your PC.
- Connect your Moto X to your computer with a USB cable and make sure it’s detected.
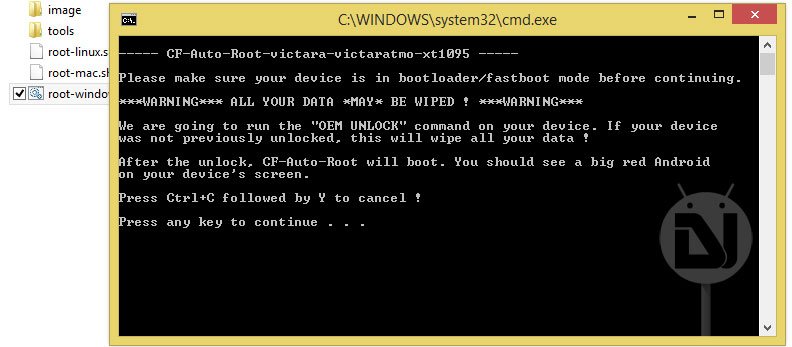
- Now simply launch the script file based on your desktop OS.

That’s it, lean back and wait for the script to show its magic. Once finished your device will automatically reboot.


Join The Discussion: