A few months ago, Lenovo owned Motorola introduced their new budget offerings, the Moto E4. The 4th generation of the Moto E wasn’t the best phone in the market for the price but that hasn’t been the case ever since the original Moto E. That does not mean it is not still a pretty decent smartphone considering the price. Lenovo launched the Moto E4 in two variants, one with a MediaTek chip while another with a Snapdragon chip. We’ll show you how to root Moto E4, the Snapdragon variant only.
That’s because both variants cannot be rooted as of now. As usually happens, the variant with the Qualcomm Snapdragon chipset has received a root method first. The MediaTek variant will soon follow hopefully.
Requirements
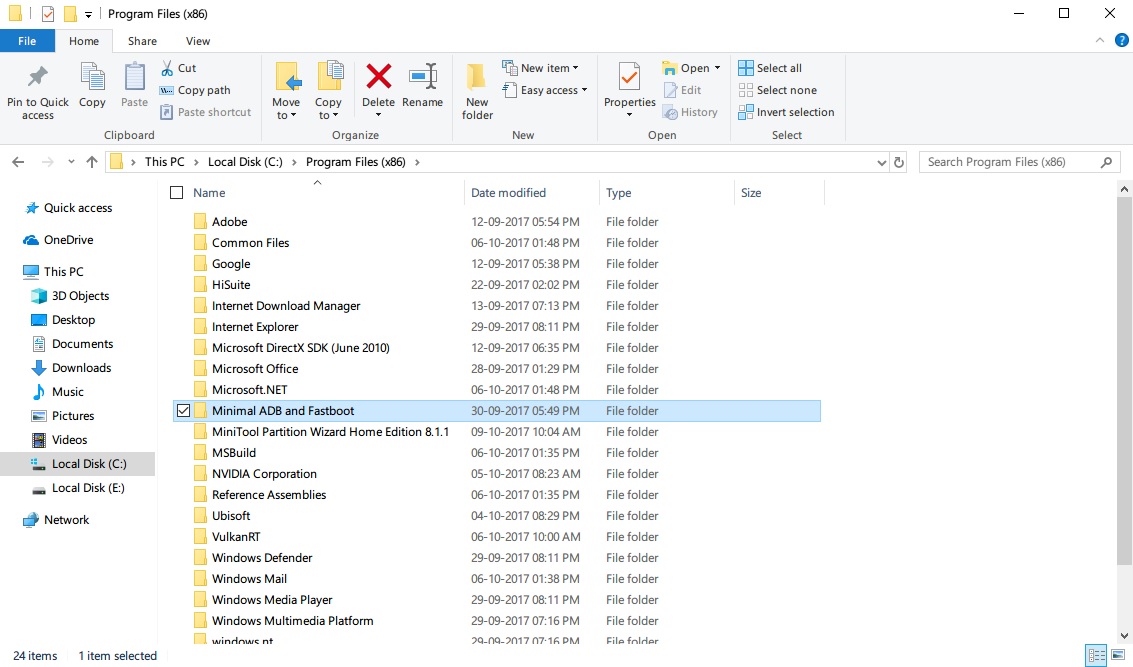
- You’ll need a PC with Minimal ADB and Fastboot installed. If you have another version of adb and fastboot drivers installed that will do as well. But we’re going to use Minimal adb and fastboot here. The commands are the same whatever version you use.
- Before you can root your Moto E4, make sure you unlock the device’s bootloader. An unlocked bootloader is required to install a custom recovery and thus eventually root the device.
- Make sure you have the Motorola USB Drivers installed on your PC before you begin.
- The Snapdragon variant of the Moto E4. Do not try the method described below on a Moto E4 with a MediaTek chipset.
Note
- Neither DroidViews nor anyone else is responsible for any bricked devices. We can assure you though that the process below has been tried and tested by several users of the device.
- You are doing this at your own risk.
- Make sure your Moto E4 is charged 70-80 percent.
- Your device will be entirely wiped so make sure you have a back up of all messages, call logs, and important files.
Downloads
Install TWRP recovery
If you have rooted any Android devices previously, you’ll be familiar with the process. A custom recovery is the first thing you should install after the bootloader has been unlocked. So download the TWRP recovery from the download section above.
- Rename the downloaded TWRP recovery file from twrp-perry-3.1.1-r3.img to twrp.img just to simplify the process a little. You’ll understand how that’ll help in a while.
- Once renamed, move the TWRP image file to the Minimal ADB and Fastboot installation folder. If you haven’t purposefully changed it during installation, the folder is usually located in C:\Program Files (x86)\

- Now enter cmd in the address bar once you’re in the Minimal ADB and Fastboot folder and hit Enter. This will open a command prompt inside the folder.
- Now you’ll need to connect your Moto E4 to your PC in the fastboot mode. To boot your Moto E4 into fastboot mode, power it off first. Once powered off, press and hold the Volume Down key. While holding the Volume Down key, press the Power button as well to power on the device. When your device boots though, instead of it booting normally you should see something like this :

- Now connect your phone to your PC via a USB Cable.
- In the command prompt window, type the following command :
fastboot devices
- If you see your device’s serial number listed, you’re good to go. If not, you should check if the USB Drivers are installed properly.
- For those who do see their device’s serial number, enter the following command in the command prompt to flash the TWRP recovery image to your device. If you haven’t renamed the recovery image to twrp.img, you’ll have to enter whatever the name of the file is.
fastboot flash recovery twrp.img - When the process is complete, simply disconnect your phone.
Boot to TWRP recovery
- Use the Volume keys to scroll through a list of available options, until you find Recovery mode. Press the Power button to confirm.
- Now when you see the Android logo, press and hold the Volume Up button. Then press and release the Power button while holding the Volume Up button.
- Your device should now boot into TWRP recovery.
Root your device
- When in TWRP recovery, select Wipe > Format data and type yes. Swipe to confirm the action. This will wipe your device clean, including everything on the internal storage. The process also removes encryption, which is the whole point here. This is required so that the system partition can be mounted as writable in TWRP.
- Go back to the TWRP main menu and select Reboot > Recovery. This will reboot your device into recovery mode.
- Download the Magisk v14 and no-verity-opt-encrypt zip files from the download section above on your PC.
- Connect your device to the PC again and transfer the downloaded files to your device over the MTP connection allowed by TWRP.
- Select Install from the TWRP main menu and then select no-verity-opt-encrypt.zip.
- Swipe at the bottom to flash the file.
- Now flash the Magisk zip similarly.
- Once the process is complete, tap on the Reboot system button that appears at the bottom.
When your device boots up again, you should see the Magisk Manager app in your app drawer. Just in case you don’t see the app, you can download the APK from the download section above and install it.


Join The Discussion: