Huawei Honor 8 is the flagship device from Honor for 2016. It is a great device and definitely stands worthy of Honor’s name for the flagship. It packs in some great hardware which includes the Kirin 950 chipset along with 4 GB of RAM and a fully customizable fingerprint sensor. Today, we will learn how to root Huawei Honor 8, install TWRP recovery and Xposed framework on it.
Prerequisites
- Unlocked Bootloader
- TWRP Recovery for Honor 8: twrp-3.0.2-0-frd-rc1.img
- Download SuperSU and paste them in your SD card: SuperSU-v2.78-201609011115.zip
- Turn on USB debugging. Navigate to Settings> Developer options> Enable USB debugging. To turn on Developer options, to Settings> About> Build number and tap it 7 times.
- Install correct drivers on your PC and ADB tools too.
Installing TWRP
- Navigate to the folder where you downloaded ADB tools.
- Shift + Right Click on mouse> Open Command Prompt Window (Make sure device is connected to PC).
- Type adb devices (Grant the permission in your phone and also select the box to always allow debugging from that PC).
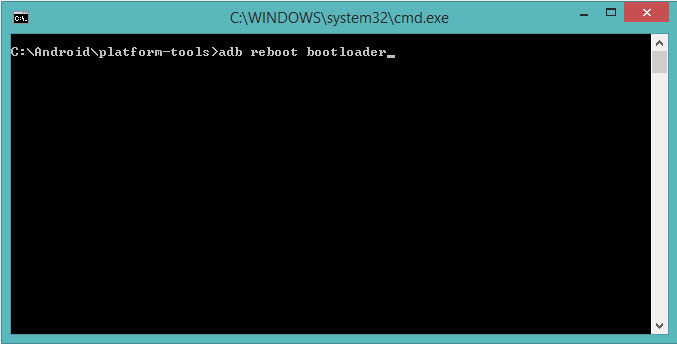
- Then, type adb reboot bootloader (This will make the device boot into fastboot mode).

- For confirmation whether you have a connection to PC type fastboot devices.
- Copy the downloaded TWRP .img file in the same ADB folder where you opened up the cmd.
- Then type fastboot flash recovery twrp-3.0.2-0-frd-rc1.img (Wait for the process to be completed).
- Then reboot your device normally.
- After your device has booted up, open the cmd again in the ADB folder and type adb reboot recovery.
- Wait for the device to reboot into TWRP.
- Do not change to read/write, keep in read-only and do a backup.
- To perform a backup in TWRP select backup from the TWRP main menu.

- Then check all the boxes and swipe to create a backup.
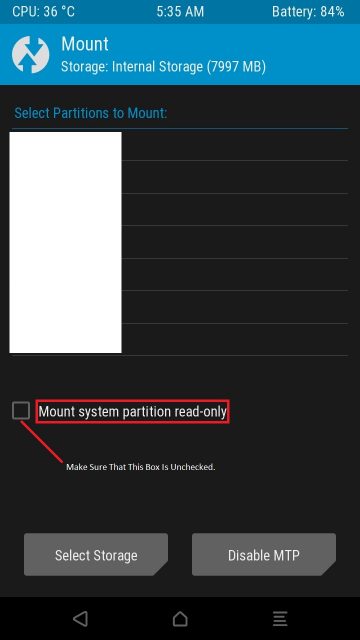
- Once completed, enable read/write.
- To do so, go to mount and uncheck the box which says mount system partition to read-only.

Steps to Root Huawei Honor 8
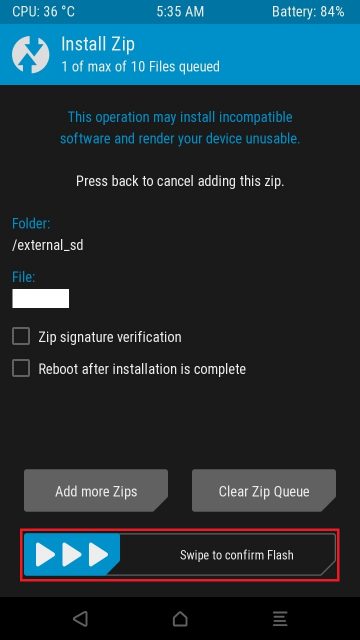
- Flash the SuperSU file (Navigate to the directory where you kept SuperSU.zip file, then select it and swipe right to flash).

- After the process is complete, reboot system.
- The device may reboot 2 to 3 times. This is normal, have patience.
- The System will reboot and you will have root access. Use root checker to determine.
Installing Xposed
- Download and install the Xposed installer 3.11.
- Download version 86 sdk23 arm64 and paste in SD card.
- Reboot into recovery, using the command adb reboot recovery (See step 9 of installing TWRP).
- Then, install the version 86 sdk23 arm64 binaries zip and reboot (Navigate to the folder where you kept sdk23, then select it and swipe right to install).

- First boot will take about 6 minutes.
- In order to avoid any future problems, it is highly recommended you create a backup from recovery after this process.
That’s it!! You are ready to download new modules and customize your device as you wish. Which modules you prefer?? Let us know in the comments section below. Any queries related to this post, we will be happy to solve it.


Join The Discussion: