The Samsung Galaxy J7 2017 is a mid-range phone released to target price-sensitive consumers across the globe. While high-end devices often get priority by OEMs when it comes to pushing Android version updates, their cheaper siblings lag behind. Quite surprisingly, the 2017 models of the Galaxy J7 received 2 major OS updates within a year. Samsung has been rolling out the Android 8.1 update of the international and the US variants of the phone and if you have already updated your phone, here’s how you can root Galaxy J7 2017 on Android Oreo and install TWRP recovery safely.
If you haven’t installed the 8.1 Oreo update with Samsung Experience 9.5 on your Galaxy J7 2017 yet, please head to the following guides to flash it manually:
- Install Android 8.1 Oreo Firmware on Galaxy J7 2017 (US Variants)
- Download Android 8.1 Oreo Firmware for Galaxy J7 & Galaxy J7 Pro 2017
Note
Before you proceed to root your Galaxy J7 2017, please be informed that doing so will void the warranty of your device but in exchange, you’ll full access to the system file of the phone and by flashing custom ROMs, using root apps and Xposed and Magisk modules, you’ll be able to the customization of your device to a whole new level. I have been very careful while describing the steps and you are supposed to be equally cautious. If you got any confusion, drop us a comment.
Downloads
Now, here are the root and recovery files you need to download. The TWRP recovery provided below is compatible with SM-J730F and J730G both.
- Download Odin: Odin3_v3.13.1.zip
- Magisk Systemless root: Magisk-v17.1.zip (source)
- No-Verity Encryption Disabler for Samsung: no-verity-opt-encrypt-6.0.zip
- TWRP for Galaxy J7 2017 (SM-J730F/J730G): TWRP-3.2.3-TwrpBuilder-j7y17lte-2018-09-13_15-35.tar
Preparations to Make
- Download and install the latest Samsung USB drivers on your computer.
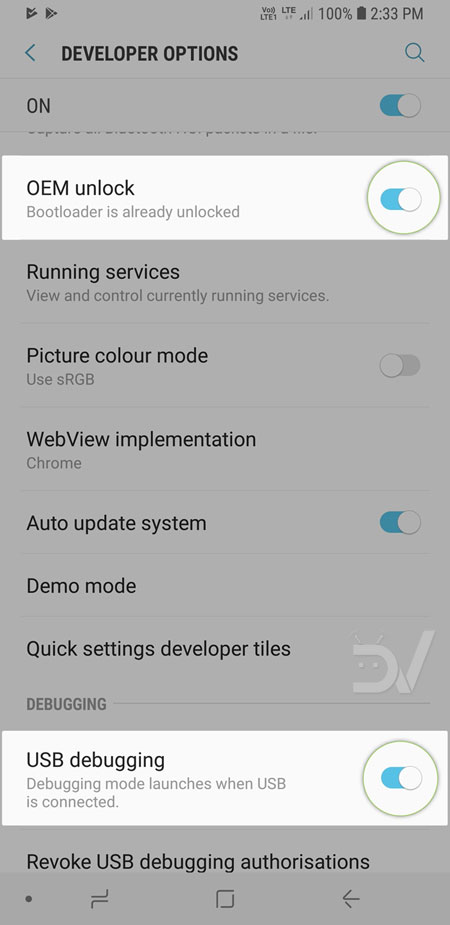
- Go to Settings> Developer options on your Galaxy J7 and enable USB debugging and OEM unlock. If you don’t find Developer options. listed among Settings menu items, follow these steps to make it visible.
- During following the rooting procedure, you’ll be asked to format your device and doing so will wipe the internal storage of your phone. We, therefore, strongly recommend you to backup everything that’s important to you. Also, make sure you have an external memory card inserted in your phone.
- Lastly, make sure your Galaxy J7 has at least 60% of battery juice on it.
Root Galaxy J7 2017 on Android Oreo and Install TWRP Recovery
After downloading the files required for rooting the Galaxy J7 2017 devices with model number SM-J730F and J730G, do as instructed below:
- Copy the no-verity-opt-encrypt-6.0.zip and Magisk-v17.1.zip files to the external memory card.
- Unzip Odin3_v3.13.1.zip, open the extracted folder and run Odin3_v3.13.1.exe.
- Now reboot your Galaxy J7 into the Download mode. To do so, press and hold the Volume Down + Home + Power keys at the same time for a few seconds. As soon as you get the warning screen, release all keys and press the Volume Up button.

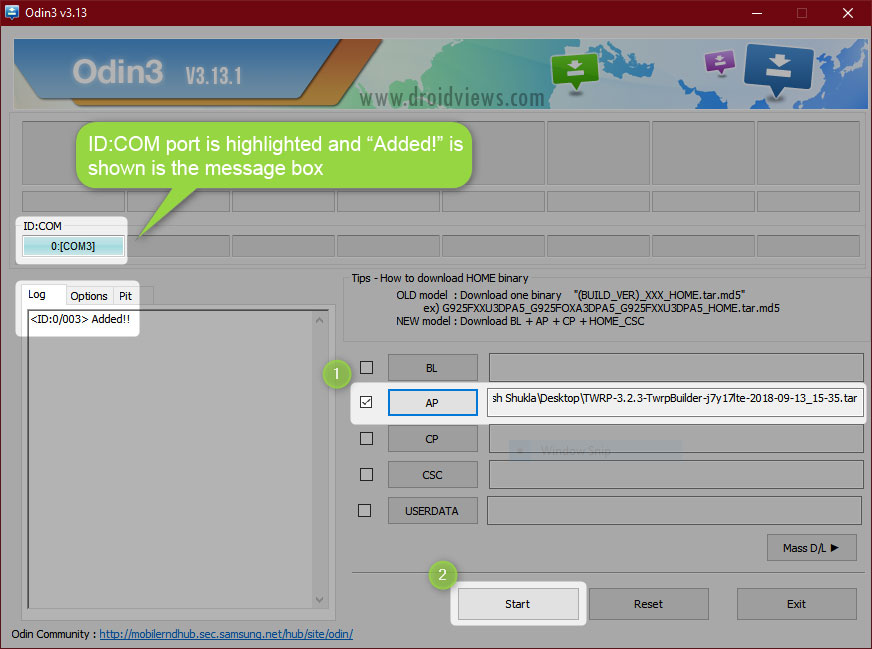
- Connect your J7 to the PC using a compatible USB cable, preferably the one that came with it. The ID:COM Port will turn blue and you’ll see Added!! in the message box in Odin (see the screenshot below). This indicates that Odin has detected your phone.
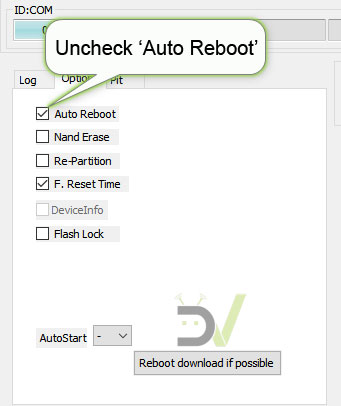
- Now click the Options tab in Odin and uncheck the Auto Reboot option.
- Then hit the AP button in Odin, navigate to TWRP-3.2.3-TwrpBuilder-j7y17lte-2018-09-13_15-35.tar file and add it. Finally, click the Start button to initiate the installation.
- TWRP recovery will be installed on your phone in a few seconds and you’ll see PASS! message. You can now disconnect the USB cable.
- Hold the Volume Down + Home + Power buttons at the same time for about 7 seconds. As soon as the screen turns off, quickly release the Volume Down key while holding the Power key and press the Volume Up button.
- When TWRP is booted, swipe “Allow modifications” confirmation slider.
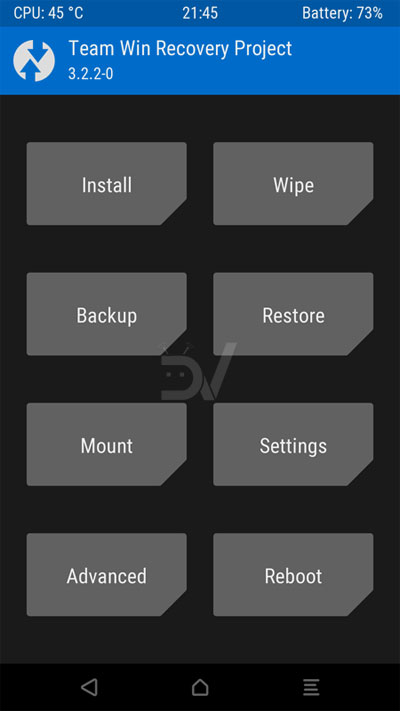
- In the main menu in TWRP, tap the Wipe> Format Data and type “yes” to confirm.
Now go back again and select Reboot> Recovery. Doing so will reboot your phone back into the TWRP recovery. - When your phone is booted into TWRP, tap the Install button, navigate to the no-verity-opt-encrypt-6.0.zip the same way.
- It’s finally time to flash Magisk-v17.1.zip. Tap the Install option in TWRP and install it.
- Go back to the TWRP menu, and tap Reboot> System option.
Once your Galaxy J boots up, open the app drawer and look for an app called Magisk there. If it’s present, you have successfully rooted your Samsung Galaxy J7 2017. Enjoy!
Thanks to ananjaser1211 from XDA for developing the Android Oreo compatible TWRP Recovery for the 2017 Galaxy J7!
Don’t miss: Install 1000+ Fonts on Samsung Devices (Oreo) without Root


Join The Discussion: