In the market of launching affordable smartphones with basic specifications offering high-end functions such as a 4G LTE connections, Samsung has been very well established. Many markets in the Asian continent know very well how Samsung is doing. Of the many cheap Samsung devices that offers The Galaxy Core Prime is one such device.
Offering decent specifications such as a Qualcomm Snapdragon 410, Android 5.0.2 Lollipop, a fairly decent 5 MP Camera and most importantly 4G LTE connectivity. Even though the specifications may not seem much on paper, the device gets the job done and 4G provides a much-needed icing on the cake.
One of the many things that a lot of these budget Samsung devices miss out on is extra support from developers. This restricts the users to mainly OTA software updates from Samsung which means they end up waiting a long time before tasting any new version Android may have to offer.
This might not be the case with the Galaxy Core Prime seeing that recently the developers of TWRP custom recovery launched a custom recovery for the device.
For those beginners who don’t have a clue about custom recoveries, A custom recovery is a third-party recovery environment. A custom recovery does the same things as the stock recovery along with additional features. Custom recoveries often have the ability to create and restore device backups.

This allows for developers to expand their device base towards this device too.
Disclaimer: Installing the TWRP recovery will void your device’s warranty, as it will trip the KNOX flag. The following procedure is highly risky and there are chances that you may brick your phone of not performed correctly, DroidViews cannot be held responsible it that happens. So user should tread cautiously and at their own risk.
Preparations
Before we begin as usual you’ll need to ensure a few things first.
- Confirm you are using the Samsung Galaxy Core Prime(LTE), running on Snapdragon 410.
- Enable USB-Debugging from Developer Options in the Settings menu.
- Ensure that you have at least 80-85% of battery.
- Ensure you have all the necessary USB Drivers installed on your PC (Download from here).
- Download the Odin flashing tool and extract the downloaded zip to your PC, so now you have 10.6 folder: Odin3 v3.10.6.zip
- Ensure you have a backup of all your personal data.
- For Contacts, Calendar and People details use Google Accounts Sync to backup
- For Apps and App Data check out our detailed post.
Downloads
Downloads this Odin flashable file and keep them on your desktop.
TWRP: Download here
How to get TWRP
Flash the twrp.tar file using our detailed guide on installing stock firmware on Samsung Galaxy devices using Odin.
Rooting the Samsung Galaxy Core Prime
Now that we have successfully flashed the TWRP custom recovery you have the freedom to start flashing custom ROMs, kernels, and other modifications, it’s time to move ahead and root the device, so that we can start using root applications.
Step 1 – Once the device boots up normally, re-connect it to your PC using the USB cable.
Step 2 – Copy the SuperSU.zip file you had downloaded earlier from your Desktop into the root directory of your internal storage.
Step 3 – Reboot your Samsung Galaxy Core Prime into Recovery Mode.
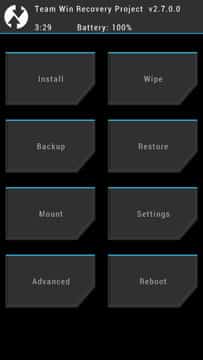
Step 4 – Select ‘Install’ and scroll all the way to the bottom till you see the ‘SuperSU.zip’ file.
Step 5 – Select the .zip file and swipe the bar to confirm. This will start flashing the .zip file.
Step 6 – Once the flashing finished you will see the ‘Reboot System’ option, click it to reboot your device.
Once the device reboots, you will see the SuperSU app appear in your app menu. You can also confirm if your device is rooted by installing and running the Root Checker application.
[googleplay url=”https://play.google.com/store/apps/details?id=com.jrummyapps.rootchecker”]


Join The Discussion: