The 2018 models of the Galaxy A8 series have been receiving the latest Android Oreo update for a while now. If you recently updated your Samsung Galaxy A8 or A8 Plus to Oreo and are now looking for a working method to have root privilege, you just landed the right page. In this guide, we’ll lay clear instructions using which you can root Galaxy A8 (SM-A530F) and Galaxy A8 Plus (SM-A730F) and install TWRP recovery on it with minimum possible risk. All you need to do is to follow it carefully.
Warning and Disclaimer
Rooting your device will trip the KNOX counter on your Galaxy A8 and void its warranty. Moreover, you may also soft brick your phone and may need to install the stock firmware to fix it. We’ve taken utmost care while writing the steps described below and if you follow them without making mistakes, you’ll successfully root your Galaxy A8 (SM-A530F) or Galaxy A8 Plus (SM-A730F) and install TWRP recovery on it. Don’t try the tutorial on any other model other than mentioned in this article.
Download Galaxy A8 and Galaxy A8 Plus Root Files
Okay, if you have made up you have your mind to proceed, download the Odin tool, TWRP, Magisk and boot encryption disabler files from below. The files provided here work with Android Nougat and Oreo both.
- Download Odin: Odin3_v3.13.1.zip
- No-Verity Encryption Disabler: no-verity-no-verity-opt-encrypt-6.0.zip
- RMM Bypass: RMM-State_Bypass_Mesa_v2.zip
- Magisk Systemless root: Magisk-v17.1.zip
- TWRP Recovery:
- Samsung Galaxy A8 (SM-A530F): twrp-3.2.3-0-jackpotlte.img.tar
- Samsung Galaxy A8 (SM-A730F): twrp-3.2.3-0-jackpot2lte.img.tar
Things to Do Before Rooting Galaxy A8/A8+ (2018)
- Install the latest Samsung USB drivers on your computer.
- Enable USB debugging and OEM unlocking on your phone. You can find these options under Settings> Developer options. If you don’t find ‘Developer options’ under ‘Settings’, follow the instructions given here.
- Charge you Galaxy A8 to ensure at least 60% battery level.
- Your phone’s internal storage will be wiped during the procedure, we strongly recommend that you back up all important data present on your phone.
- Make sure you have an external microSD card inserted in your device.
Install TWRP and Root Galaxy A8 (SM-A530F) and Galaxy A8 Plus (SM-A730F)
Okay, it’s action time now. Let’s do it!
- Copy RMM-State_Bypass_Mesa_v2.zip, no-verity-no-verity-opt-encrypt-6.0.zip, and Magisk-v17.1.zip to the external SD card.
- Extract the downloaded Odin3_v3.13.1.zip, open it and launch Odin3_v3.13.1.exe file.
- Turn off your Galaxy A8 and boot it into the Download Mode. Since the Galaxy A8/A8+ doesn’t have a Home or the Bixby button, here’s is how you can get into the Download Mode. Hold the Volume Down + Volume Up + Power keys simultaneously for a few seconds. As soon as you get a screen with an exclamation sign release all keys and press the Volume Up button.
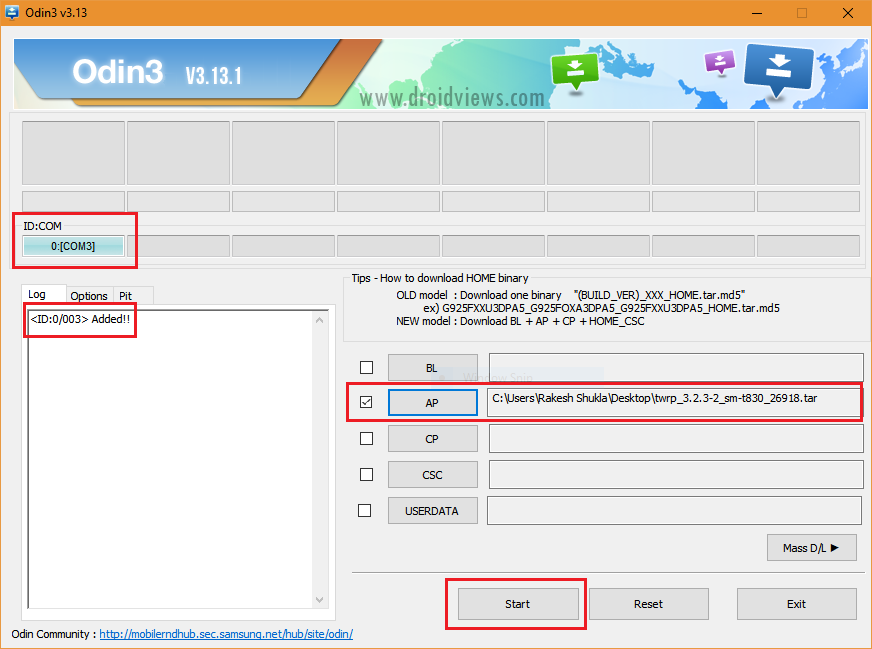
- Now connect your Galaxy A8 to the computer using the USB cable. A successful connection between your phone and computer is indicated by the ID:COM Port turning blue and Added!! in the message box in Odin.
- Click the Options tab on Odin and uncheck the Auto Reboot option.
![How To Install TWRP, Root And Fix OEM Unlock On Samsung Galaxy S9 And S9 Plus [Exynos]](https://www.droidviews.com/wp-content/uploads/2018/03/odin-options.png)
- Now click the AP button on Odin and add the twrp-3.2.3-0-jackpotlte.img.tar file to it.

- TWRP recovery will be installed on your Galaxy A8 and you’ll see PASS! message.
- Now disconnect the phone from PC and close Odin.
- Hold the Volume Down + Volume Up + Power buttons at the same time. As soon as the screen turns off, quickly release the Volume Down key and keep the other 2 buttons pressed for 10-15 seconds until your Galaxy A8/A8 Plus enters the TWRP recovery.

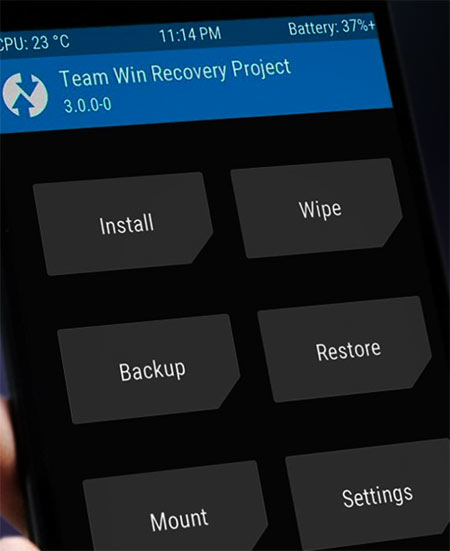
TWRP Recovery main menu - When TWRP is booted, swipe “Allow modifications” confirmation slider.
- Okay, now you need to format the Data partition so that it’s mounted properly. In the main menu in TWRP, tap the Wipe> Format Data and type “yes” to confirm.
Now go back again and select Reboot> Recovery. Doing so will reboot your Galaxy A8 back into the TWRP recovery. - When your phone is booted into TWRP, tap the Install button, navigate to the RMM-State_Bypass_Mesa_v2.zip file and install it.
- Install no-verity-no-verity-opt-encrypt-6.0.zip the same way.
- It’s finally time to flash Magisk-v17.1.zip. Tap the Install option in TWRP and install it.
- Go back to the TWRP menu, and tap Reboot> System option.
When your Galaxy A8 or A8 Plus, boots up, you’ll be greeted by the Setting Wizard. Make sure to uncheck the Diagnostic Data option here. That’s it! You have successfully rooted your Galaxy A8 and installed TWRP recovery on it. Enjoy!
source: xda


¡Thanks, this worked 4 me!
Thanks for confirming! Enjoy root privilege and keep visiting DroidViews!