A few days ago Motorola launched what can be presumed as one of the hottest entries into the budget section, the 3rd generation Moto G. The Moto G series have a huge public demand because they offer fairly decent specifications at a very competitive price point along with on-time software updates.
Owing to this public appeal the new Moto G has features such as a 64-bit Qualcomm Snapdragon 410 chipset, 2GB of RAM on board, as well as a 13MP main camera with 1080p video capture and 5MP front-facing unit.
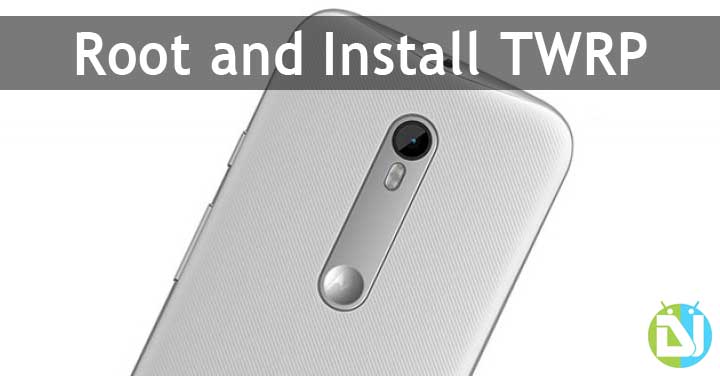
Also with IPX7 water-resistant body and customizable colors for the back, it manages to trump most of its competition. Now with every new phone launched the developer community stat instantly to work on how to root it to expand its functionalities. And today we bring you how to Root and Install TWRP Custom Recovery on the new 3rd Gen Moto G.
Preparations
First of all you will need to ensure a few things before we start flashing:
- Confirm you are using an unlocked Moto G 3rd Gen
- If you haven’t unlocked the bootloader then see here
Note: Any carrier-specific model might not work with this method. The user is to perform this at their own risk.
- Ensure that you have the necessary Motorola USB device drivers installed (Download here).
- Check if you have at least 80-85% of battery charge. We don’t want the phone dying in the middle of the process.
- If you have done this process before on other devices then you must be familiar with adb and fastboot. Ensure that you have it installed.
For those who aren’t familiar with adb and fastboot, please refer to our detailed guide on setting up ADB and Fastboot on Windows within seconds.
- Enable USB-Debugging from Developer Options in the Settings menu.
- If you cannot find Developer Options, then you’ll have to first enable it by going to Settings -> About Phone -> Build Number and tap it 7 times until you see a small notification that you have enabled it.
- Then return to the Settings menu, you should find Developer Options there. Open it and enable USB Debugging.
- Make sure that you have backed up all your personal data and apps as all data will be erased!
- For Contacts, Calendar and People details use Google Accounts Sync to backup
- For Apps and App Data check out our detailed post here.
Disclaimer: The following procedure is highly risky and there are chances that you may brick your phone if not performed correctly, DroidViews cannot be held responsible if that happens. So the user should tread cautiously and at their own risk.
Downloads
You will need to download these files on keeping them on your Desktop.
TWRP for Moto G 3rd Gen: Download here
SuperSU: Download here
Flashing TWRP on Moto G 2015 3rd Gen
After preparing your device along with all the required files we can start flashing.
Step 1 – Connect your Moto G 3rd Gen to your PC using the USB Data cable.
Step 2 – Open Command Prompt and type the following command
adb devices
You should be getting a message saying ‘List of devices attached’ along with your device name. This will confirm that adb has recognized your device.
If you don’t see your device it means you haven’t properly installed your device USB drivers.
Step 3 – Next reboot your device in fastboot/bootloader mode by typing this command in Command prompt
adb reboot bootloader
Step 4 – Now change the directory of your Command prompt to your Desktop by typing this command
cd Desktop
Step 5 – Type the following command next and press Enter
fastboot flash recovery twrp-osprey-2.8.7-test1.img
This will flash TWRP custom recovery on your Moto G 3rd Gen replacing the stock recovery.
Step 6 – Once the flashing is complete, select RECOVERY from the Fastboot menu to enter Recovery Mode, use the volume keys to navigate.
Step 7 – If you see the TWRP logo, then you have successfully performed the steps on you now have TWRP custom recovery installed on your Moto G 3rd Gen!
Step 8 – You will now see the TWRP Touch Recovery Menu, Select ‘Reboot’ to reboot you device and exit from the recovery.
How to access Recovery Mode
Switch off your phone and switch it on again by holding the Volume Down + Power buttons together, you will directly enter the TWRP Touch Recovery Menu.
Rooting the Moto G 3rd Gen
Now that we have successfully flashed the TWRP custom recovery you have the freedom to start flashing custom ROMs, kernels, and other modifications, it’s time to move ahead and root the device, so that we can start using root applications.
Step 1 – Once the device boots up normally, re-connect it to your PC using the USB cable.
Step 2 – Copy the SuperSU.zip file you had downloaded earlier from your Desktop into the root directory of your internal storage.
Step 3 – Reboot you Moto G 3rd Gen into Recovery Mode (given above).
Step 4 – Select ‘Install’ and scroll all the way to the bottom till you see the ‘SuperSU.zip’ file.
Step 5 – Select the .zip file and swipe the bar to confirm. This will start flashing the .zip file.
Step 6 – Once the flashing finished you will see the ‘Reboot System’ option, click it to reboot your device.
Once the device reboots you will see the SuperSU app appear in your app menu. You can also confirm if your device is rooted by installing and running the Root Checker application.
[googleplay url=”https://play.google.com/store/apps/details?id=com.jrummyapps.rootchecker”]And that’s it you have successfully rooted your Moto G 3rd Gen and installed the SuperSU application, now you can start using root application.


I followed this tutorial step by step up until the reboot after installing twrp, but before i rebooted it said something to the tone of “this phone is not rooted do you want to intall superSU” and I said yes, but now it has been around 15 minutes since I clicked reboot and it is still on the “warning bootloader unlocked” screen, is this normal or should I be worried?
Sorry for the late reply? What’s the current status?
I left it for 3 hours but it was still on the same screen but luckily I was able to boot into twrp and flash a stock rom I found online and booted it up and managed to get it running, right now I’ve switched from that rom to CRdroid and am very happy with it