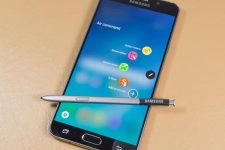
It’s just been a couple of months since the Moto X Play has launched, and there are speculations about this device receiving the Android 6.0 Marshmallow update. However, to receive such updates over the air, you need to be on the stock firmware. If you have installed a custom ROM for any reason, then here is a small tutorial that will help you revert back to stock in order to receive further updates from Google.
Moreover, this will also lock your bootloader and get the stock recovery installed on your device. This involves the usual process of flashing the image files like the system, boot, etc. by issuing commands through command prompt or terminal if you are using Linux based OS. If you are new to this process, then here is a detailed tutorial on how to restore stock firmware on Moto X Play.
Currently supported variants on the X Play are XT1562, XT1563. However, support for other variants will be added with time. So stay tuned and check the repository from the download section. Read the full tutorial first and then proceed.
Disclaimer
Although this won’t void your device’s warranty, it still remains an unofficial process. We won’t be liable for any damage to your device whatsoever. We won’t be held responsible if you brick your device. Reader’s discretion is advised.
Download Section
Download | Stock Firmware for Moto X Play XT1562, XT1563 and more
Mirror | Stock Firmware for Moto X Play XT1563 (Faster download)
Download the firmware file specific to your device. Verify the model number and download the latest available file.
Backup Apps and Data
This process may wipe all of your data. Hence, a backup is highly recommended. Once you install TWRP, backup your system, data, etc. from the recovery. It will be helpful in case anything goes wrong.
Prerequisites
- This tutorial is compatible with Moto X Play XT1562, XT1563. However, other variants shall be added in the download repository soon enough.
- Set up ADB and Fastboot on your computer. You can download the fastboot package from here.
- Install Motorola USB Drivers on your computer. Windows 10 users may need this pack for drivers to work.
- Open Settings> Developer options and enable USB Debugging on your device. Get developer options by tapping the Build Number 7 time, found in About Phone
Restore Moto X Play to Stock Lollipop Firmware
- Download the firmware file from the download section and transfer it to your PC.
- Make sure you have setup ADB and fastboot on your PC. Also, accept Always allow from this computer when you plug in the device for the first time to enable USB Debugging.
- The firmware file is a zip file. Extract the firmware file in the same folder where you have setup ADB and fastboot so as to get the boot, system, logo and other image files.
- Now power off your device and unplug it from your PC.
- Boot into the bootloader. To do so, press and hold volume down and the power button for 5-6 seconds.
- You will see the bootloader screen. Now connect your device to the PC using a USB cable.
- Navigate to the location where you have placed the firmware file. While the folder with recovery.img file is open, right-click on an empty space and select “Open command window here” option to launch a cmd window.
- Now type the following in the command prompt to get a code to check your device connectivity
fastboot devices
- Now issue the following commands to install the stock firmware
fastboot flash partition gpt.bin
 fastboot flash bootloader bootloader.img
 fastboot flash logo logo.bin
 fastboot flash boot boot.img
 fastboot flash recovery recovery.img
 fastboot flash system system.img_sparsechunk.0
 fastboot flash system system.img_sparsechunk.1
 fastboot flash system system.img_sparsechunk.2
 fastboot flash system system.img_sparsechunk.3
 fastboot flash system system.img_sparsechunk.4
 fastboot flash system system.img_sparsechunk.5
 fastboot flash system system.img_sparsechunk.6
 fastboot flash system system.img_sparsechunk.7
 fastboot flash modem NON-HLOS.bin
 fastboot erase modemst1
 fastboot erase modemst2
 fastboot flash fsg fsg.mbn
 fastboot erase cache
 fastboot erase userdata
 fastboot reboot
- Once the installation is complete, the phone will self reboot.
If you see the new boot logo, that means you have successfully installed stock firmware on your device. First boot takes a while. If in case your system does not boot up, try a factory reset from the stock recovery and restart the system. If the problem persists, make sure you have the exact firmware file for your device and go through the process again.
Note: Alternatively, to boot into bootloader, you can issue the following command. Do this after you setup ADB and fastboot and your device is plugged in.
adb reboot-bootloader
Also, note that system.img_sparsechunks may differ in number + name – Always check contents of the folder you’re working with.
Also See:
Collection of Custom ROMS for Moto X Play
For queries, comment down below. If we have helped you, then like and share us on social platforms. If you need help with other devices, let us know.


thank you so fucking much because i have been trying to find a restore just like this
Hi,
I followed the above procedure correctly but I get this error message:
load_file: could not allocate 251286788 bytes
error:cannot load ‘system.img_sparsechunk.6’
What have I missed or done wrong? Many thanks.
Successfully installed this version on my phone. But mine is a Dual SIM X Play. This version doesnt show the second SIM or SIM Management section
Now, there’s a small problem in downloading from FileFactory for XT1562 RETASIA 6.0.
First, it’s too slow even after Registering;
Second, I don’t know if that’s even the exact updated firmware for the Indian X Play Retail Model.
Please help.
Which firmware is for Canadian Wind Mobile?
Some roms have 9 sparsechunks (From 0 to 8)