Owning an Android device gives you a number of choices and you can use your phone any way you want. Apart from the usual icon packs and launchers, a major part of Android customization are custom ROMs. There’s a huge community dedicated to creating and modifying ROMs for millions of Android devices, Honor 8 Pro being just one of them. These are, of course, third-party sources not affiliated to the device’s OEM or Google in any way. As such, you may run into bugs when using custom ROMs more often than not. Sometimes, not every feature that worked on the stock firmware works. Today we’ll be taking a look at how you can restore Honor 8 Pro to any stock firmware.
The Honor 8 Pro does not have an S-Pen or other exclusive software features that cannot be implemented on a custom ROM. Most of the useful features like dual apps, network speed indicator in the status bar, gestures, etc. can be easily made available on a custom ROM. The device does have a dual camera set up on the rear though which is kind of like its S-Pen. That’s because stock Android does not support dual cameras. So the OEM had to write its own code to make use of the two cameras. Luckily though, after a wait, the stock Honor camera has also been ported to the only AOSP custom ROM available for Honor 8 Pro right now.
There still are some minor bugs that need ironing out on the custom AOSP ROM. Other than that, there aren’t any other custom ROMs that you’d not want to come back from. If you’re in a similar situation and want to restore Honor 8 Pro to the stock firmware, you’re in luck. XDA member nanortemis, has managed to create an all-encompassing restore tool that works on any variant of the Honor 8 Pro that you may have. It also works with any firmware as long as the firmware is meant for your device.
Requirements
- You will require an unlocked bootloader but you should already have that, all things considered.
- TWRP recovery is required, but it is provided in the package.
- ADB and Fastboot should be installed on your PC in case you don’t already have TWRP recovery installed. Also, enable USB debugging on your device.
- To flash the stock firmware you will obviously need the firmware. You can download it using the Firmware Finder tool. Remember to download the FullOTA ROMs not simply OTA updates. Full ROMs are about a couple of gigabytes in size.
- External SD card or a USB OTG.
Downloads
Flash TWRP
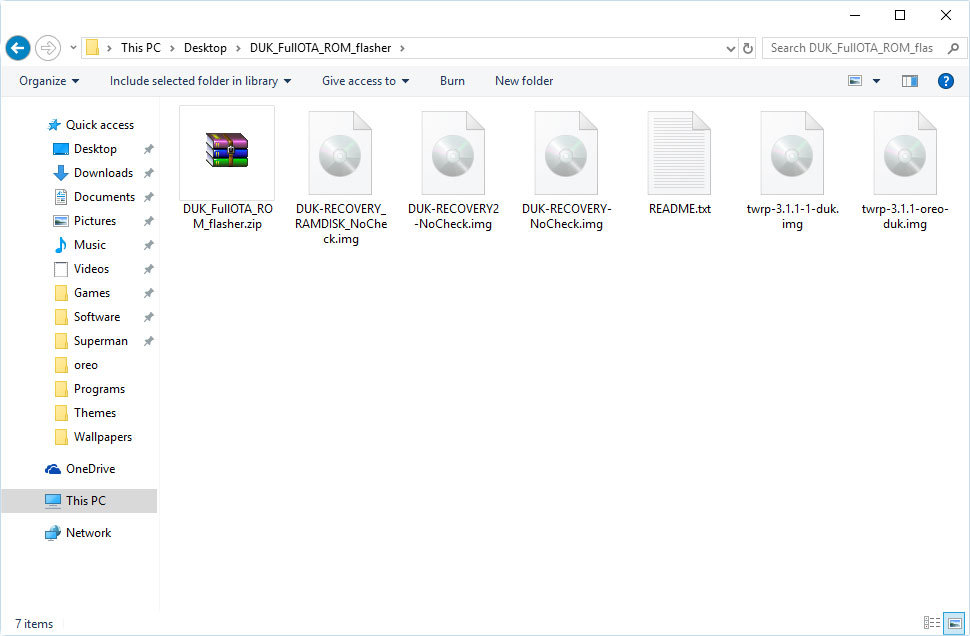
- Download the DUK_FullOTA_ROM_flasher zip file from the link above and extract it.
- In the extracted folder, you will have another DUK_FullOTA_ROM_flasher zip file as well as a bunch of recovery images.

- If you don’t already have TWRP installed on your device, you can do so now using one of the TWRP images in the folder. Use twrp-3.1.1-1-duk.img if your current ROM is based on Android Nougat or twrp-3.1.1-1-oreo-duk.img if you’re on Android Oreo ROM.
- In order to install the recovery, place the appropriate recovery image inside your adb folder.
- Power off your Honor 8 Pro and connect it to the PC with a USB cable whilst holding the Volume Down button. This will boot your device into fastboot mode.
- Flash the recovery using the following fastboot command.
fastboot flash recovery twrp-3.1.1-1-duk.img
or
fastboot flash recovery_ramdisk twrp-3.1.1-1-oreo-duk.img
if you’re using the oreo recovery
Restore Honor 8 Pro to Stock Firmware
We have actually used this tool to upgrade the Honor 8 Pro to the official Android 8.0 Oreo-based EMUI 8.0. The process is very much the same.
- Once the recovery is flashed, disconnect your phone and then hold the Power and Volume Up button together until your phone reboots. Let go of the Power button when your phone vibrates. This will boot your device into TWRP recovery.
- Now place your ROM files into the DUK_Full_OTA_ROM_flasher folder. These are three files named something like update.zip, update_data_full_public.zip, and update_full-DUKL09I_hw_in.zip.
- Transfer the folder to an external SD card or USB OTG and insert it into your phone.
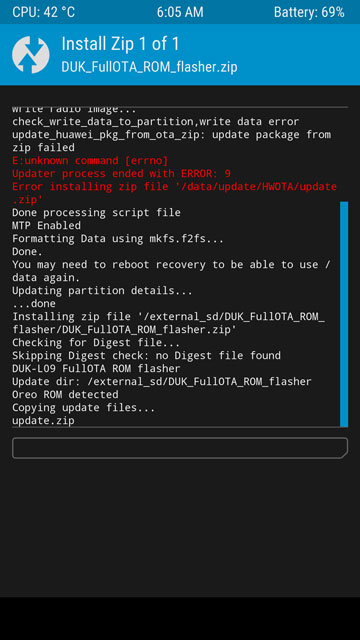
- In the recovery, simply go to Install, select the DUK_FullOTA_ROM_flasher zip inside the folder on your external SD or USB OTG.
- Swipe at the bottom to flash the package.

Now sit back and relax as your device will soon reboot into the stock EMUI recovery and flash the firmware package. It will then reboot automatically when that’s done. This may take a little while though.
source: xda


Join The Discussion: