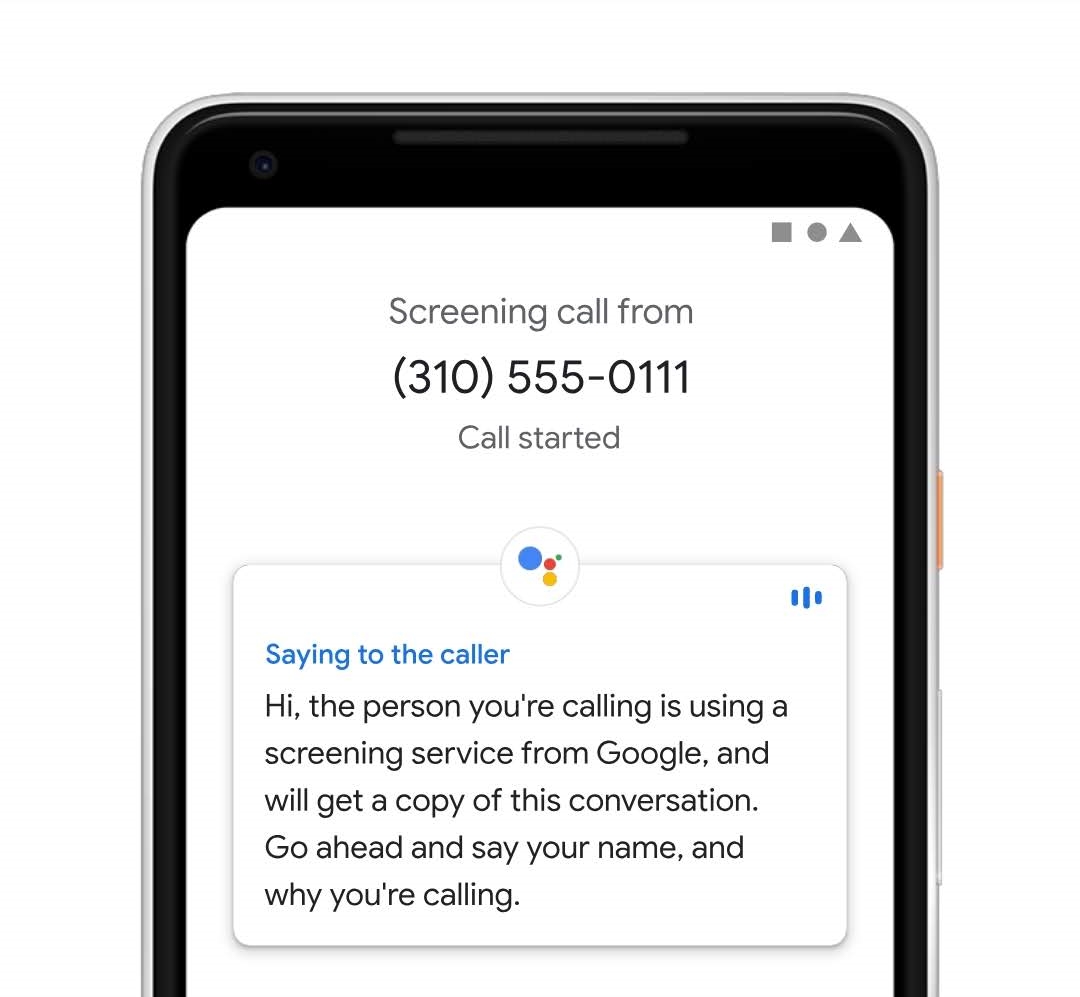
One of the most useful features of Pixel 3 is the smart Call Screen feature. This feature allows you to “see” who is calling and what they want to talk about. When you enable it, Google Assistant will pick up the call on your behalf. It will then inform them that the recipient is using the Call Screen feature. Subsequently, it will wait for the caller’s response. Whatever the caller says from that end, it will be transcribed live on your screen.
After having a look at the caller’s response, you may take over the call from the Assistant or ask it to end the call. Moreover, you may even choose to carry on this conversation via the Assistant itself by choosing from any of the preset responses. These include “Is it urgent?”, “I’ll call you back, etc.”. And now you could enable this Call Screen feature on your Android device as well. Make sure to have a look a the pre-requisites given below. Also, have a look at the way to add widgets to Android screensaver.
Prerequisites
- A rooted Android device
- Google’s Phone app (which many of you might be having pre-installed on your device).
- File explorer with root capabilities. We have used Solid Explorer in this guide.
So now that you know everything about Call Screen, and having covered the requirements section, its time to enable it on your device. Follow the below steps for the same.
Don’t Miss: Build.prop Tweak to Improve Interface FPS on Android
Enable the Pixel 3 Call Screen Feature
- Download and install the Solid Explorer file manager.
- When you open it for the first time, it will ask for a Superuser Request. Tap on FOREVER.
- Next, tap on the hamburger menu and select the Root option under Storages.
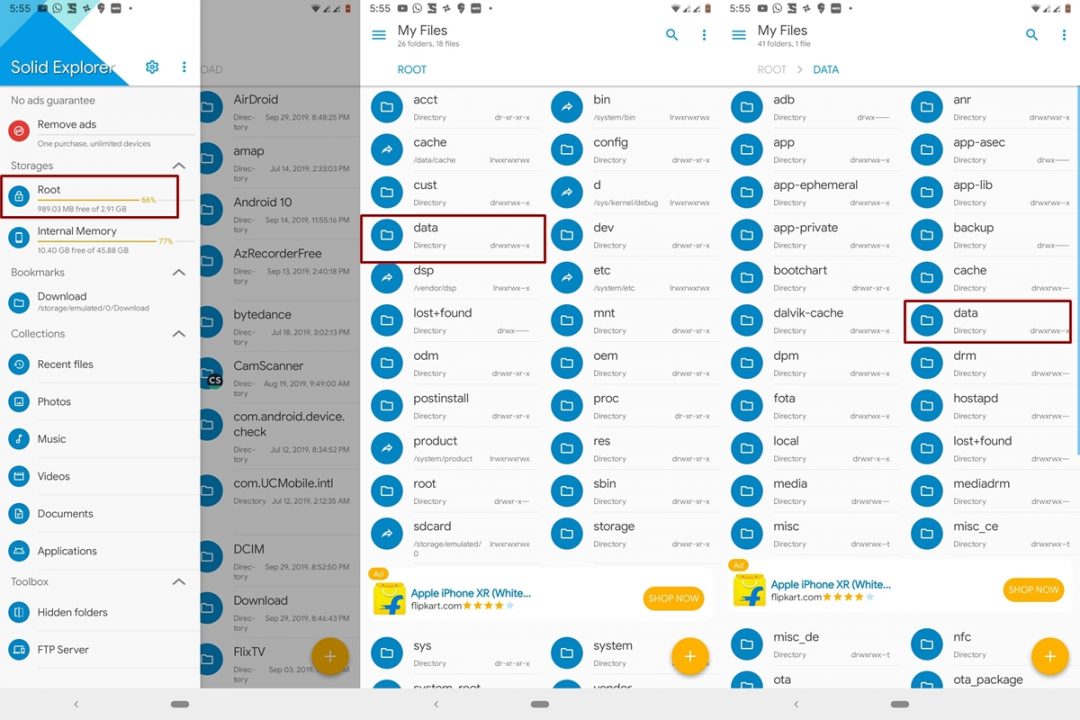
- Go to data > data and search for com.google.android.dialer.
- Under that folder, navigate to the shared_prefs folder.
- Open the dialer_phenotype_flags.xml file.
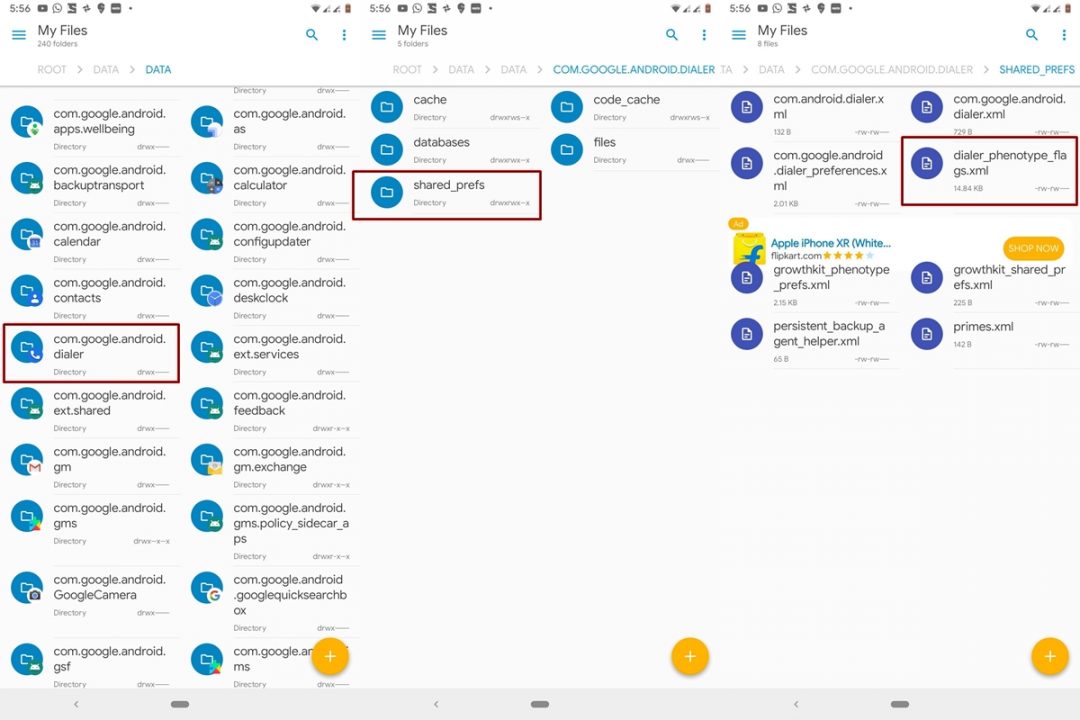
- This is where you will have to enable the Call Screen feature. Search for the following lines and change the value from false to true:

G__enable_speakeasy_details

G__speak_easy_bypass_locale_check

G__speak_easy_enabled
- Tap on the floppy icon to save the file.
- At this point in time, you need to force stop the Phone app. This could be done by going to that app’s info page under Settings > Apps and notifications and taping on the Force stop button.
- Now open the Phone app and tap on three vertical dots present at the top right.
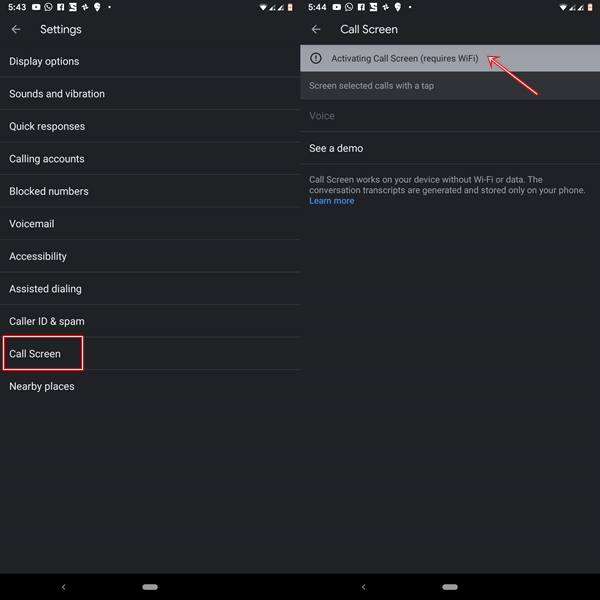
- You will now see the Call Screen option. Make sure to enable the WiFi while you are inside that section. This is because it requires some additional data to be downloaded. This is a one-time process only.
That’s it. You have successfully enabled the Call Screen feature on your Android device. As and when anyone calls you, simply tap on the Screen call option and let Google Assistant do the job for you. Once enabled, you could easily get an idea of whether a call is a legitimate one or rather one of those pesky spam calls. If it turns out to be spam, just tap on Report as spam and Assistant will end the call for you, along with reporting it as spam.
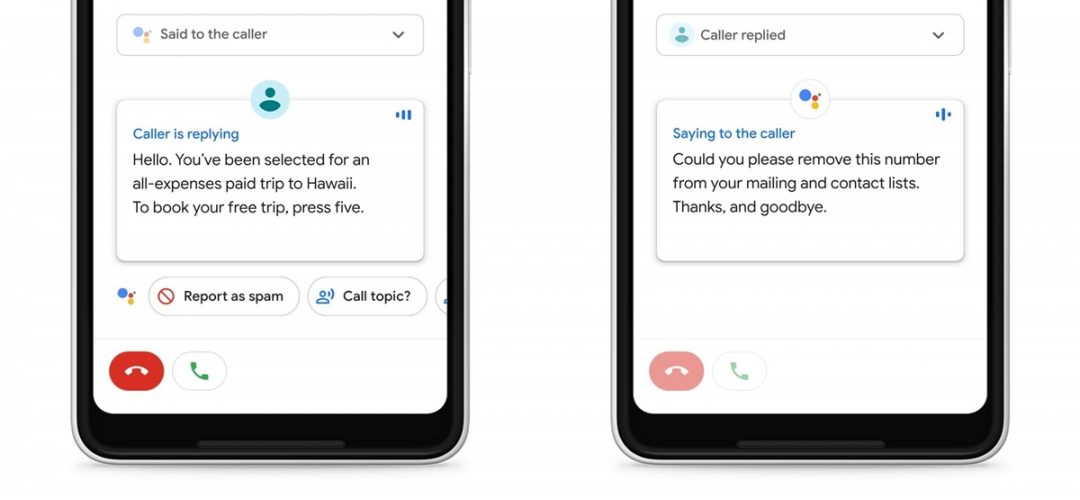
Moreover, Google also saves the transcriptions from these screen calls. Simply head over to the call details section and have a look at all the stored transcriptions. However, if you are concerned about the Privacy, neither the call nor its transcript is sent to anyone, including Google. You could also delete these stored transcripts on your device by simply deleting the associated call logs.
Read next: 10 Best Google Duo Tips and Tricks You Should Check Out


Join The Discussion: