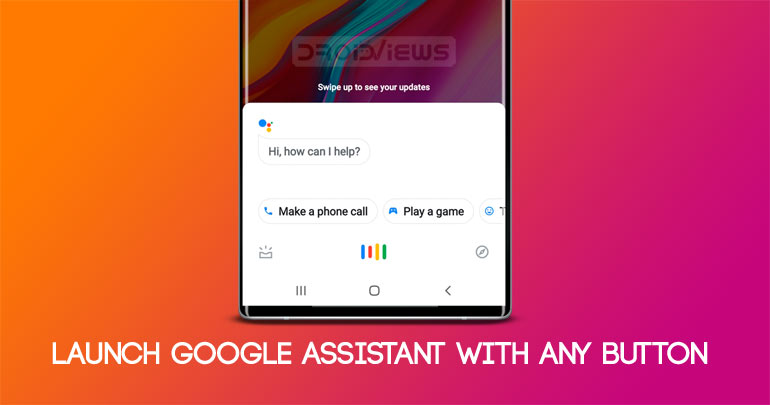
Different devices have mapped different buttons for launching their corresponding Voice Assistant apps. Some Samsung devices come with a dedicated Bixby button to launch Bixby. Similarly, Pixels have their own dedicated key for launching Google Assistant. It is becoming a trend nowadays to have a separate key just for this purpose. But sadly, not everyone could enjoy this benefit. Although, speaking ‘OK Google’ is still a convenient method of launching the Assistant app, but in some cases, it might be irritated as well. It’s where apps like Button Mapper come in handy as they let you map any hardware button on your phone to launch Google Assistant.
I always carry two of my Android devices. My voice has been fed into both the devices to launch the Google Assistant. Therefore, it becomes extremely difficult to launch the Assistant in one device without waking or disturbing the other. So in these cases, mapping any particular button on your device for launching the Google Assistant app might definitely come in useful. This is what we are going to cover in this guide. Also, since you are here, don’t forget to check out 4 handy Google Assistant tricks you may not be taking advantage of.
Map Hardware Button to Launch Google Assistant
Although many apps are capable of doing it, the one I have been personally using it without any hiccups is the Button Mapper app. But before you begin the process, please remember this. While mapping any key, always assign the functionality of opening the Google Assistant to an action that doesn’t have any predefined functionality. For example, if you are going to choose the Volume Key, then it is recommended to select the Double Tap option rather than the Single tap. This is because Single Tap already has a pre-defined functionality of increasing the volume. So choosing the single tap option might create a conflicting situation.
Setup the Button Mapper on your Android Device
- Open the Button Mapper app.
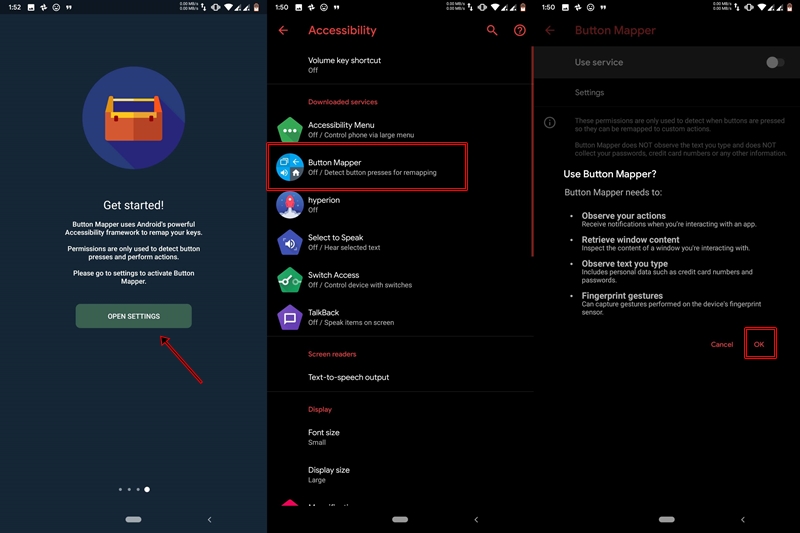
- Swipe left two times until you reach the Get Started page.
- Tap on Open Settings and you will be taken to the Accessibility menu. Select Button Mapper from there.
- Enable the toggle present at the top right. A dialog box will pop-up. It will show all the permissions that this app wants. Tap on OK.

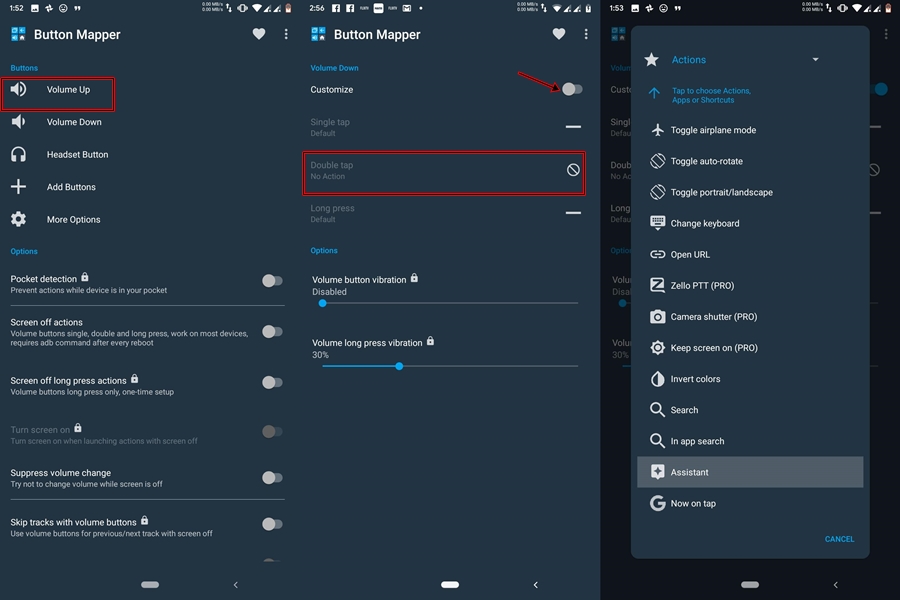
- Now go back to the app and select any of the available buttons using which you will be launching the Assistant app.
- After you have made the selection, toggle on the Customize switch.
- Three options will be there: Single Tap, Double Tap, and Long Press. It is highly recommended to choose that option which says No Action, i.e. which doesn’t have any functions attached to it. In this case, I have selected Volume Up key, and I am going with the Double Tap option.

- On making your choice, a menu will appear. It will ask for the preferred app or shortcut that you want to open. Scroll down to the bottom and select Assistant.
- That’s it. The setup is complete. Now just tap on the newly mapped button to launch the Assistant app.
With this, we come to the end of the guide on how to map any button on your device to launch Google Assistant. If you face any difficulty during the setup process, do let us know in the comments below.
Read next: 70 Useful ‘OK Google’ Commands for Google Assistant


Join The Discussion: