Nexus 9 is an extremely powerful Android tablet which was introduced during the year 2014, it offers some really cool hardware features like the Full HD 8.9 inches IPS LCD display, blazing fast Nvidia Tegra K1 chipset, with Dual-core 2.3 GHz Denver processor, Kepler DX1 Graphics unit, 2 GB RAM and a lot more, packed with an affordable price tag.
The Google Nexus devices have been recently seeing a lot of updates since the Android Lollipop 5.0 announcement. Later, two more minor updates followed within a matter of months – 5.0.1 and 5.0.2, which bought several device-related fixes and upgrades. And then finally Android Lollipop 5.1 was released, again comprising of some useful changes. These changes were majorly meant for the tablets, like the Nexus 7 and Nexus 9.
While the other Nexus devices were already ahead of everyone, experiencing Lollipop 5.1.1, the Nexus 9 which is the latest Nexus tablet was left behind. But it recently got itself updated to Lollipop 5.0.2 via OTA and factory images, which was quite late. While the N9 users were still busy updating to 5.0.2, Google finally decided to push out Lollipop 5.1.1 update, reaching the users worldwide as factory images and OTA updates.
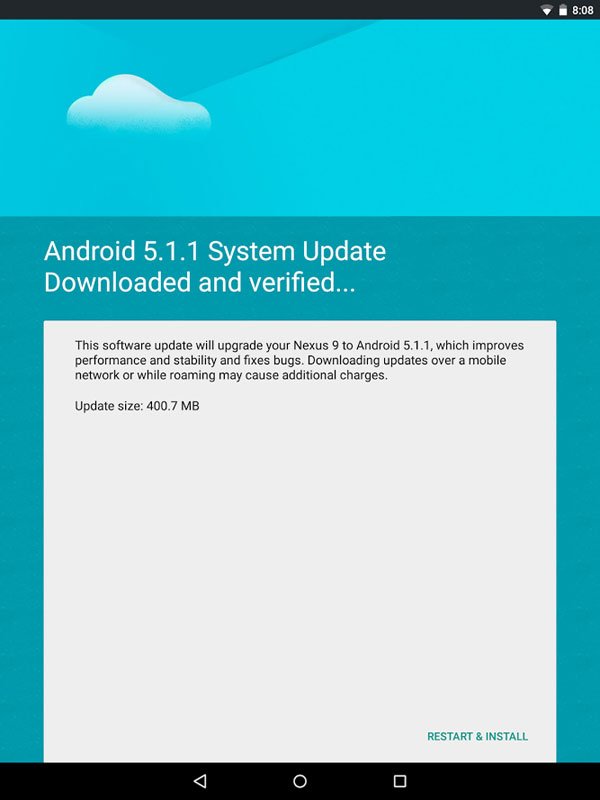
The update was released about 24 hours ago, publicly and is around 401 MB in size, so there are definitely some major changes coming to your N9. The update will move your device from Lollipop 5.0.2 (LRX22L) to 5.1.1 (LMY47X). We’re here to assist you to Install Lollipop 5.1.1 OTA update on Nexus 9.
If you feel like starting fresh using a Factory Image, grab your image from here and follow our guide on How to Install Factory Images on Nexus Devices. But if you really wish to keep your data and update by manually installing the OTA update, then you have just landed at the right place. We would like to thank oldblue910 for providing the link to the OTA update package here.
Warning!
Manual updating or sideloading updates could be a risky process if done wrong, so make your mind up first, understand the risk involved and then only proceed towards the instructions. DroidViews or any of its community members shall not be held responsible in any manner if your device is damaged.
Prerequisites
- Charge your Nexus 9 to at least 60% battery level to avoid uncertain shutdowns during the process.
- Backup your complete device, including your storage, SMS, emails, contacts and everything else that you feel is important to you.
- Make sure your device is unrooted and completely stock.
- Enable USB debugging. If you don’t know how follow our guide.
- You need to be on Lollipop 5.0.2 LRX22L build.
Downloads
ADB tools package: adb.zip
Lollipop 5.1.1 OTA package: 5cb0c625.signed-volantis-LMY47X-from-LRX22L.5cb0c625.zip
Install Lollipop 5.1.1 OTA Update on Nexus 9
- Extract the contents of the adb.zip to the location where the OTA package has been downloaded.
- Open the very same folder where all these files are present.
- Now, press the SHIFT key and right-click on an empty space within this folder.
- Select Open command window here from the pop-up menu that appears.
- Connect Nexus 9 to the PC via USB cable and type in the following command in the CMD window afterward:
adb reboot recovery
- Your N9 should now display an Android bot with warning logo.
- Press the Power button, and simultaneously press and release the Volume up key, once.
- The stock recovery menu will appear, displaying Android System Recovery <3e> at the top.
- Now, use the volume button to scroll down and highlight apply update from ADB.
- Type the following command in the CMD window and press Enter:
adb sideload 5cb0c6254e487f66c25478c8c11bff7975af669e.signed-volantis-LMY47X-from-LRX22L.5cb0c625.zip
- The process will take some time, so sit back and relax.
- When done, the recovery menu will reappear.
- Use the volume keys to highlight reboot system now and press the power key to select it.
The process wouldn’t take much of your time and finish off with ease. The first boot after installation may take some time, so be patient. Once the device has rebooted, give it some time to settle down. Give us some feedback about your experience of Lollipop 5.1.1 on Nexus 9. If you have somehow managed to run down yourself into some trouble, prompt us with a comment and we shall help you.


Join The Discussion: