
Google Photos amazing search functionality allows you to look out for images based on its content (via OCR), date, time and location. However, for the latter (i.e. location), you should have turned on the location services before the picture was taken. If that wasn’t the case, the image would be bereft of the timestamp data. Therefore, in this guide, we will be mentioning the steps to manually add photos location in Google Photos.
Moreover, if you have a lot of photos stored under an Album, then rather than assigning individual locations to these images, you could assign the location to the entire album. The process for this is a little bit different. But we have discussed both of them in detail below. So, let’s begin. Also, don’t forget to check out our collection of some cool Google Photos tips and tricks.
Manually Add Photos Location in Google Photos
We will first discuss the steps on how to add a location to any single image, followed by an entire album. Strangely, for the individual assigning of location, you will have to take the help of the Photos website. This functionality isn’t yet available in the Photos app. Whereas adding the location to an entire album is very much possible via the app itself. With that said, head over to the below instructions to manually add photo location in Google Photos. The app has also received a markup tool for editing functionalities. Go check that out as well.
Assigning Location to Individual Images
- Head over to the Photos website.
- Open the image on which you need to add a location.
- Now tap on the Info icon and click on the Where was this taken option.
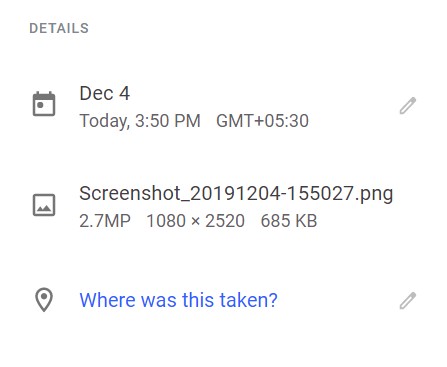
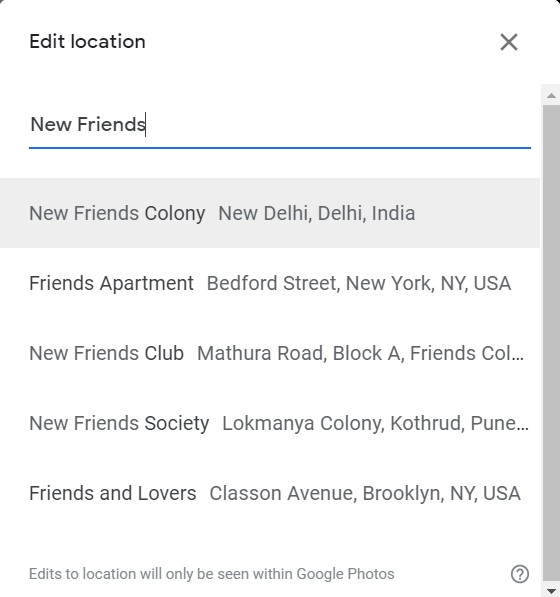
- Add the desired address of the location that needs to be assigned to an image in Google Photos.
- The address you entered will now be shown under the Details section.
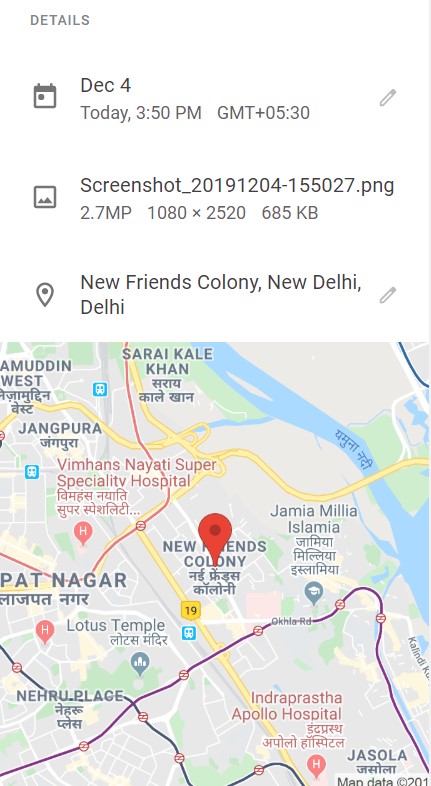
Moreover, a Google Maps snippet will also be added, depicting that address. Click on it and you will be taken to Google Maps site, with a much-enlarged view of your location on the map. You will also get additional information like longitude, latitude or information about nearby places.
So these were the steps of manually adding location to Google Photos. However, if you wish to add the location to numerous photos in an album, then doing so on an individual basis is going to take ages. Fortunately, there exists an easy workaround for that. And as mentioned before, this functionality is supported by the app as well.
Don’t Miss: Use Google Photos More Efficiently with These Tips
Assigning Locations to Albums in Google Photos
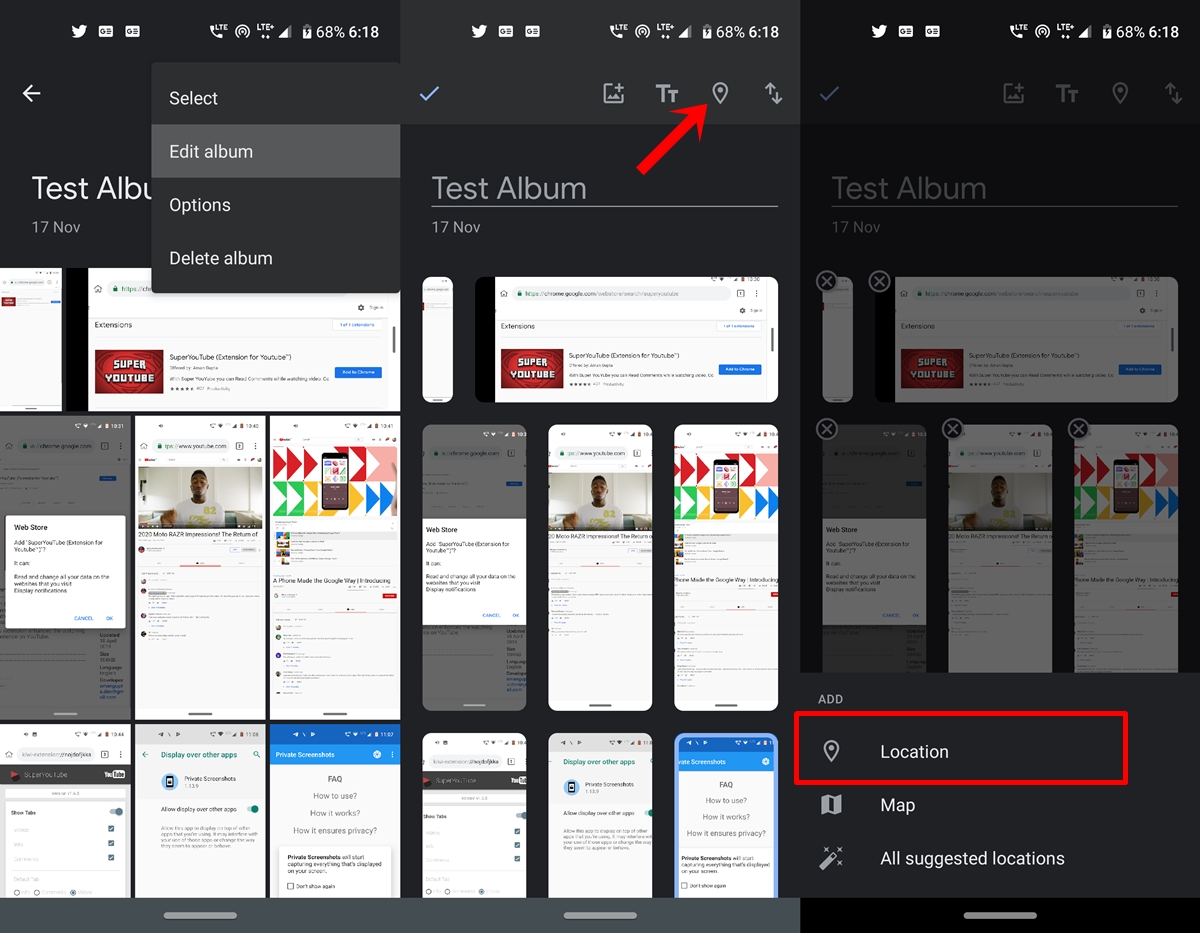
- Open the Google Photos app on your Android device.
- Head over to the Albums section and select the album of your choice to which the location needs to be assigned.
- Now tap on the overflow menu and select Edit Album.
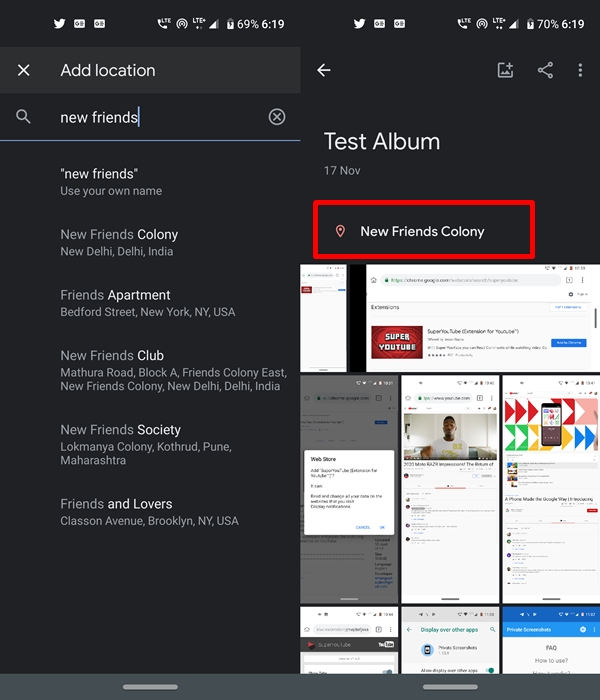
- Tap on the GPS icon present at the top bar and choose Location.
- Just input the desired location and tap on the tick mark to confirm your decision.
That’s it. You have succeeded in manually adding locations to individual photos and the entire album as a whole in the Google Photos app. If at any point in time, you wish to remove the location from Google Photos, head over to our guide on the same. And in near future, if you want the app to automatically assign the location to your image, just head over to Settings> Google Location Settings> Enable the Use location toggle. Also, make sure that the Remove Geo-location feature is turned off in the app’s Settings page.


Join The Discussion: