The LG V20 smartphone has made its official debut back in September this year, and it’s already hailed as one of the best smartphones in the market. The device comes with the latest Snapdragon 820 chipset along with some powerful hardware under the hood. However, no Android device can ever be interesting without rooting it. The same goes with LG V20, and many users are already searching for a safe and easy rooting process. Luckily, a new root method based on Dirty COW vulnerability can root T-Mobile LG V20 with model number H918.
jcadduono from XDA-developers has come up with a working root process for the T-Mobile LG V20 smartphone. The rooting process revolves around the Dirty COW vulnerability in Android devices. You’ll also get to install TWRP recovery on your device which will allow you to flash custom ROMs and mods on your device. The root process is a bit tricky, but you can easily get through it by following our step-by-step tutorial. So, let’s see how to root T-Mobile LG V20.
Before we begin the rooting process, make sure you have unlocked the bootloader on your LG V20. If you didn’t, you could do it now from the below-linked tutorials.
Prerequisites
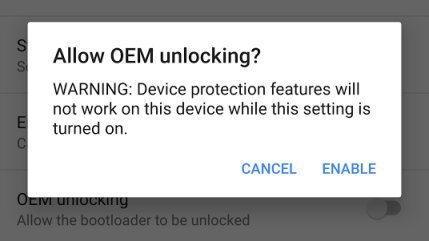
- Go to Settings » About phone » Build number and tap it 7 times to enable Developer options on your device. Then go back to Settings » Developer options and enable USB Debugging and OEM unlocking.

- Download the Minimal ADB and Fasboot Setup and install it on your computer.
- Install LG smartphone drivers on your PC.
- Backup important files on your device to a safe place as unlocking the bootloader will format your entire device.
- Make sure you have enough charge on your device before starting the process.
Downloads
Download the required binaries, custom TWRP, and SuperSU files on your PC from below.
How to Install TWRP & Root T-Mobile LG V20
As it’s a rather hectic process, we’ll break it down to simplify your understanding and hassle-free root process. So, hang on tight and proceed with rooting your T-Mobile LG V20.
Run Dirty COW Exploit
- Connect your device to PC and make sure it’s detected.
- Navigate to the folder where you’ve extracted the ADB and Fastboot files and open a command prompt by pressing Shift + Right click on any empty space inside the folder and select Open command window here from the context menu.
- In the command prompt, type the below four commands one-by-one to push the four binaries to your device.
adb push dirtycow /data/local/tmp
adb push recowvery-applypatch /data/local/tmp
adb push recowvery-app_process64 /data/local/tmp
adb push recowvery-run-as /data/local/tmp
The above commands will transfer the binaries from your PC to your device under the directory /data/local/tmp. All the four binaries are required at various stages of our tutorial.
- Now, use the below commands to provide full permissions (777) to the four binaries under /data/local/tmp.
adb shell
cd /data/local/tmp
chmod 0777*
- Next, you need to execute the Dirty COW exploit on your phone in the same command prompt. Don’t open a new command prompt unless we say as the process requires you use adb shell for few commands and normal ADB commands at few stages. To run the Dirty COW exploit, execute the below commands:
./dirtycow /system/bin/applypatch recowvery-applypatch
Wait for the above command to complete. Then, execute the below command.
./dirtycow /system/bin/app_process64 recowvery-app_process64
After giving the above command, your phone looks like it’s crashing but don’t worry. Wait for it to complete and type exit. You’ll now exit from the shell.
exit
- You need to track the logcat of your device to see if the exploit is successful or not. To do this, use the below command.
adb logcat -s recowvery
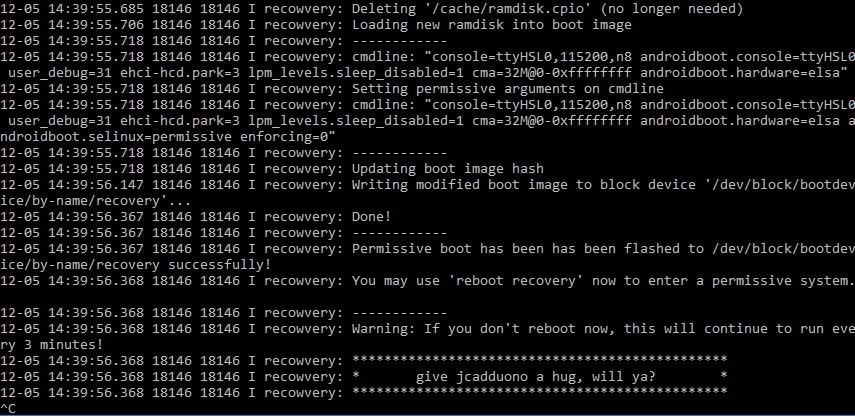
You should see something like this if the exploit is successful. We need to make sure the exploit is successful before proceeding with the next steps.
 Type Ctrl+C to exit the logcat.
 - Now, type the below command to reboot the recovery.
adb shell reboot recovery
Wait for the device to boot again. Your recovery will be reverted to stock again.
- Check the SELinux status using the below commands. It should say “Permissive” in the output.
adb shell
getenforce
After completing these steps, you will have a temporary root on your device, thanks to the Dirty COW exploit. Now, you’ll need to install TWRP recovery on your device and flash SuperSU zip to permanently root it.
Install TWRP on T-Mobile LG V20 & Root it
Here we will install TWRP recovery on your device. Follow the below steps carefully and don’t try to boot your device till TWRP and SuperSU are flashed, else you’ll end up in a boot loop.
- Use the below commands to run the dirty COW exploit to install TWRP on your device.
cd /data/local/tmp
./dirtycow /system/bin/run-as recowvery-run-as
run-as exec ./recowvery-applypatch boot
It will flash a modified boot image with some security features disabled. This will enable us to boot into TWRP recovery later.
- Download the TWRP recovery and place it in the ADB folder. Now, run the below commands one-by-one to flash the TWRP recovery on your device.
run-as su
exit
exit
adb push twrp-3.0.2-1-h918.img /sdcard/twrp.img
adb shell
run-as exec dd if=/sdcard/twrp.img of=/dev/block/bootdevice/by-name/recovery
- Open a new command prompt in the ADB folder. Reboot to recovery using the below command:
abd reboot recovery
- In TWRP recovery, it will ask you if you want to enable system modifications. Make sure to swipe to allow modifications or TWRP will be replaced in the next boot.

- Perform a factory reset and also the “Format Data” option under the Wipe menu in order to disable device encryption.
- From the TWRP main menu, reboot the recovery.
- Copy the SuperSU zip to your device using MTP mode. At this step, don’t try to reboot your device or you’ll end up in a boot loop.
- In TWRP, click Install and flash the SuperSU zip that you’ve downloaded to permanently root your device.
- Finally, you can reboot the device from TWRP main menu.
A lengthy process, right? But it’s worth the time. Let us know if you’re successfully able to root your device.


Is this still possible after 10i patch Dec. Update, I’ve read several different posts, and seems to be contradicting, if not that would blow considering I got mine near March 2017
Works great thanks with 10j