The Galaxy Tab E is a mid-range tablet from Samsung which comes in two variants – an 8-inch model and a 9.6-inch slate. Samsung is known for manufacturing different types of devices that fall in premium, mid-range, and budget-friendly categories. It’s the only company that has a huge share in all market niches of Android smartphones. Rooting and installing a custom recovery on your device will give an opportunity to flash custom ROMs and take nandroid backups. You can change the fundamental look and functionality of your device after rooting. Today, we will see how to install TWRP recovery and root Galaxy Tab E.
Samsung devices are very lucky as they have a simple and unified tool called Odin which will help you flash the firmware. You can use Odin tool to flash recovery, radio or the entire firmware if you wish. XDA developer ashyx has made an unofficial TWRP 3.0.2-1 recovery for your Galaxy Tab E. It supports both Qualcomm models (SM-T377P, SM-T560NU) and Spreadtrum models (SM-T560(Y/W), SM-T561) of the Tab E. Once the TWRP is flashed on your device, you can simply flash the SuperSU Zip to gain root access on your device.
Grab the below files and follow the tutorial to install TWRP recovery and root Galaxy Tab E.
Prerequisites
- Download Odin tool: Odin3_v3.10.6.zip
- Install the latest Samsung USB drivers on your PC.
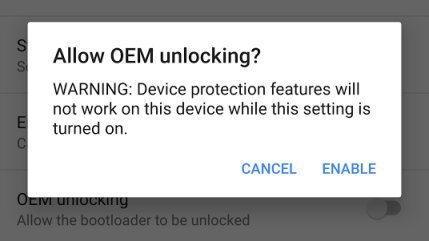
- Go to Settings » About phone » Build number and tap it 7 times to enable Developer options on your device. Then go back to Settings » Developer options and enable USB Debugging and OEM unlocking (if available).

- Make sure your Galaxy Tab E has more than 50% battery left before you proceed with the tutorial.
- Backup your device storage, Contacts, SMS, etc. using Google Sync service or any third-party app.
Downloads
Qualcomm models SM-T377P/SM-T377R4 / SM-T560NU
Spreadtrum models SM-T560 / SM-T561(Y/M)
SuperSU
How to Install TWRP Recovery on Galaxy Tab E
- Download the Odin Zip and extract it on your PC. Also, download the TWRP (.tar) file and place it in the same folder where you extracted Odin.
- Boot into download mode. To do this:
- Power off your device and wait until it’s completely turned off.
- Press and hold Power + Home + Volume Down buttons together.
- When you see the warning screen with an exclamation sign, press the Volume up key.
- Double-click the Odin3 vx.xx.exe file. This will open an Odin window.
- Connect your Samsung device to the computer using the USB cable provided by the OEM.
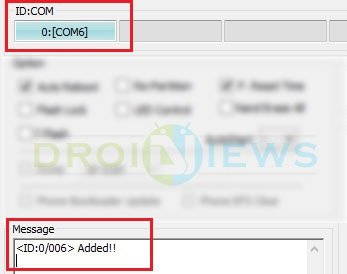
- As soon as you connect the device the ID:COM port on Odin will turn Blue or Yellow depending on the Odin version. You’ll also see “Added!!” message to indicate successful connection.

- Now click the AP button in Odin. Navigate to the TWRP recovery file and select it.
- In the options section, make sure that only the F. Reset Time box is checked and everything else is unchecked. Make sure Auto Reboot is unchecked.
- Click the Start button in Odin to start the installation which might take a few seconds.
- A successful Odin flash is indicated by PASS! or RESET! message.
Don’t reboot your device after flashing the TWRP recovery. Follow the below process to root your device.
How to Root Galaxy Tab E
- Boot into recovery mode. To do this:
- Power off your device.
- Press and hold Power + Home + Volume Down buttons together and when you see the blank screen, press Power + Home + Volume Up buttons to reboot into recovery mode.
- While in TWRP, transfer the downloaded SuperSU Zip to your device in MTP mode.
- Choose the Install option from the recovery menu and flash the SuperSU zip from the file manager.
⇒ Note: If TWRP prompts to “install SuperSU now,” click Do not Install. Just flash the SuperSU Zip to root your device. - Once the flashing process is complete, reboot the device.
If you like to have systemless root on your device, follow the below-linked tutorial to root your device using Magisk.
That’s it. You have successfully installed TWRP recovery and rooted your Galaxy Tab E.


Stuck during Android start, Optimizing apps of 242. T-mobile sound start up plays ahead of its logo into Samsungs start up logo
It’s stuck at the SetupConnection step. I’ll let it run for a few hours and see if it’ll eventually get pass that.