It hasn’t been a week since the release of the Samsung’s new Galaxy Tab S3 and the developers at XDA have an unofficial TWRP for it. Yes, it is still in the testing phase and there are some kinks to be fixed. But isn’t it obvious for such an early release? However, if you are eager to flash stuff or root your tablet then rest assured as this TWRP gets the job done.
A huge thumbs up to ashyx and suzook of XDA. They have put a lot of hard work in developing this. I have also left a link to the original post down at the end in case you want to check out the original thread or support the devs.
Prerequisites
- Download Odin v3.10.7 and extract the files in a new folder.
- Download and install Samsung USB Drivers on your PC.
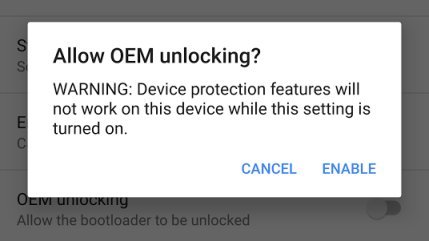
- Navigate to Settings» Developer Options and enable OEM unlocking.
- TWRP recovery for Samsung Galaxy Tab S3 – SM-T820 | SM-T825
- Latest SuperSU [.zip] file (Transfer the file to external SD card)
- Download the boot image patcher and transfer the file to external SD card: no-verity-no-encrypt_ashyx.zip
Don’t Miss: Download Samsung Galaxy Tab S3 Stock Wallpapers (QHD)
Steps to Flash TWRP Recovery on Tab S3
- Power off your tablet (To do so hold the Power button for a few seconds and select power off).
- Now, press and hold Power + Volume Down + Home.
- A warning message will be displayed, press Volume Up to enter into Download mode.
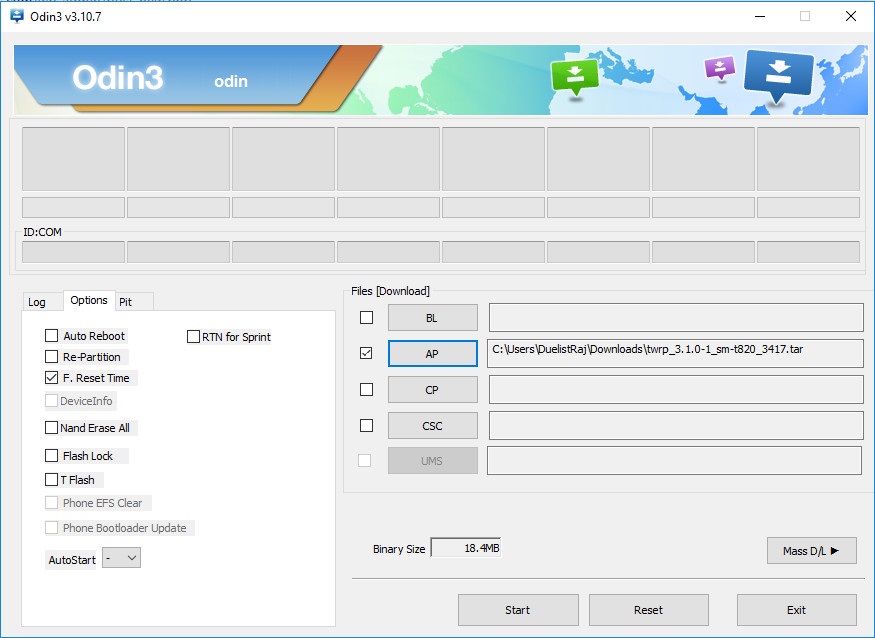
- Next, open Odin on your PC.
- Under the Options tab uncheck Auto Reboot.
- Now, click on the AP button and load the respective TWRP file.
- Next, click on Start.
- After flashing the recovery immediately boot into recovery (To do so hold Power + Home + Volume Down).
- When the screen goes blank quickly release the Volume Down button and hold the Volume Up button (Make sure not to release Power + Home while doing this).
That’s it! The device should now enter TWRP recovery.
The Tab S3 enforces dm-verity. Any modifications or even mounting the system will put the device into bootloop. To prevent this TWRP recovery will ask whether you want to keep system as ‘Read only’ or ‘Allow modifications to the system’. However, If you select Read only then the device will flash TWRP recovery at every boot. If you select the latter than you need to flash boot image patcher in order to disable dm-verity.
Editor’s Pick: How to Fix File Permissions on Android Devices- A Beginner’s Guide
Steps to Root Samsung Galaxy Tab S3 and Disable dm-verity
- Boot into TWRP recovery (To do so hold Volume Up + Home + Power at the same time until the screen flashes).
- Next, click on Wipe.
- Then, select Format Data and type yes to confirm (This will format the Internal Storage and disable dm-verity until next boot. Make sure to backup your important data).
- Then, from TWRP’s main menu select on Mount.
- After that, mount Data by clicking on it.
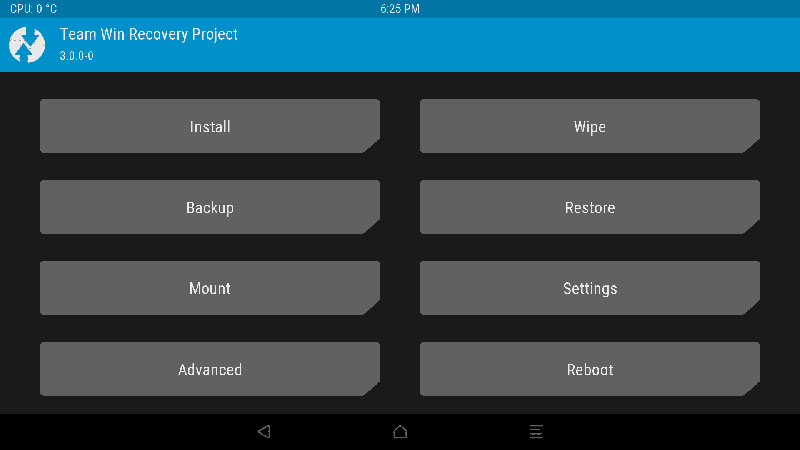
- Now, from the TWRP’s main menu click on Install.
- Navigate to the directory where you placed the SuperSU.zip file.
- Click on it and swipe right to flash it.
- Again, navigate to the directory where you placed the no-verity-no-encrypt_ashyx.zip file.
- Click on it and swipe right to flash it.

- Now, head back to TWRP’s main menu.
- Finally, click on Reboot» System.
In case you don’t want to root your tablet then skip steps 6, 7 and 8. That’s it, guys. If you have any query or issue related to this post then do let me know in the comments section below. Here is a link to the original thread in case you want to check out all the features, device tree, and change logs.

can i root galaxy tab s2 after updating to 7.0
Yes.
Here’s the CF-Root file for:
SM-T820: https://download.chainfire.eu/1066/CF-Root/CF-Auto-Root/CF-Auto-Root-gts3lwifi-gts3lwifixx-smt820.zip
SM-T825: https://download.chainfire.eu/1065/CF-Root/CF-Auto-Root/CF-Auto-Root-gts3llte-gts3lltexx-smt825.zip
OK, Thanks
Hi, I’ve got a SM-T825, when my device boots into recovery it says (below the RECOVERY BOOTING…) “Set Warranty Bit: recovery” instead of going into the main TWRP menu, even though I’m pretty sure it was a successful flash.
Hi, please flash the latest TWRP image and try again: https://www.androidfilehost.com/?fid=673368273298952403
I believe that’s done it! The ~70MB file ending in AQD6 worked for me, thanks!
Try this:
Reboot into TWRP
Wipe> format data
flash the no-verity zip file first
then install the SuperSU zip.
Let me know!
Hi, I am now in a boot loop without connection to TWRP recovery anymore. Could somone help me please?
Hi, where did things go wrong?? Were you able to successfully flash the TWRP??
How did you fix it?