Google Pixel smartphones are undoubtedly the best Android smartphones in the market now. Loaded with the best of Google apps and services, the Pixel and Pixel XL smartphones offer the best Android experience ever. However, Android users can’t resist the urge to root their device and install custom ROMs. We have already covered how to root your Pixel smartphone, you can find it at the below link.
TeamWin recovery team has finally developed TWRP for Pixel smartphones but there are few hiccups. The Google Pixel smartphones are a bit hard to fiddle due to new partition layout implemented by Google. The current TWRP build is still in alpha release and it doesn’t do well with SuperSU. So, if you’ve already rooted your Pixel smartphone, installing the TWRP will break the root. However, you can simply regain root on your Pixel smartphone by flashing the latest SuperSU v2.78 SR4.
Must Read: 40+ Google Pixel Tips and Tricks
Installing the TWRP on Pixel and Pixel XL is a bit different than the usual flashing. We will temporarily boot the TWRP image on your device first and then we will install the recovery using a flashable file. Grab the required files from below and follow the tutorial to install TWRP on Pixel and Pixel XL devices. Before we begin, make sure that you have unlocked the bootloader on your device. If you didn’t do that already, click the below links for detailed tutorials.
- How to Unlock Bootloader on Google Pixel and Pixel XL
- How to Unlock Bootloader on Verizon Google Pixel and Pixel XL
Prerequisites:
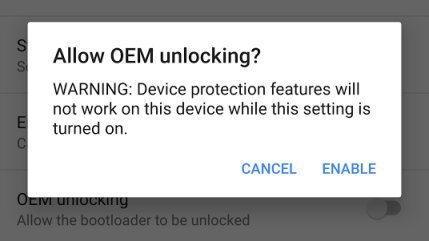
- Go to Settings> About phone> Build number and tap it 7 times to enable Developer options on your Google Pixel. Then go back to Settings> Developer options and enable USB Debugging and OEM unlocking.

- Download the Minimal ADB and Fasboot Setup and install it on your computer.
- Backup important files on your device to a safe place just as a precautionary measure.
- Make sure you have enough charge on your device before starting the process.
Downloads:
Google Pixel (Sailfish):
Google Pixel XL (Marlin):
SuperSU
Root & Install TWRP on Pixel and Pixel XL
- Download the TWRP fastboot image for your device from the above section. Transfer the image to the same folder where you have installed ADB & Fastboot files.
- Download the TWRP flashable zip and SuperSU file and transfer it your Pixel smartphone.
- Connect your Pixel smartphone to the PC.
- Navigate to the folder where you’ve extracted the ADB and Fastboot files and open a command prompt by pressing Shift + Right click on any empty space inside the folder and select Open command window here from the context menu.
- Use the below command to reboot your device to bootloader/fastboot mode.
adb reboot bootloader
- Now, temporarily boot your device into TWRP recovery using the below command. (Choose the command based on your device)
For Pixel (sailfish):

fastboot boot twrp-3.0.2-0-alpha1-fastboot-sailfish.img
For Pixel XL (marlin): fastboot boot twrp-3.0.2-0-alpha1-fastboot-marlin.imgYour Pixel smartphone should now boot into TWRP recovery.
- In TWRP menu, select Install » TWRP installer zip file that we have transferred earlier. You have now successfully installed the TWRP recovery on your device.
- Reboot your device to make sure everything’s okay. You’ll notice that you’ve lost root on your device.
- In the command prompt, use the below command to reboot your device to recovery mode again.
adb reboot recovery
- In TWRP menu, flash the SuperSU v2.78 SR4.zip file just like you flashed the TWRP zip in Step 7. This will root your device again.
- Finally, reboot the device.
That’s it. You have successfully installed TWRP on your device without losing the root access.


Join The Discussion: