Galaxy S7 was recently launched by Samsung as a successor to Galaxy S6. Galaxy S7 is similar to its predecessor in many ways, you would find minor changes in the design but there are major improvements in the internals of this device. The SD card slot returns in the Galaxy S7, it is now IP68 water resistant and it is slightly thicker than Galaxy S6 to pack in some extra battery and remove the camera bump at the back of the device.
Today we will guide you to install TWRP custom recovery on your Galaxy S7. This guide will only work for the Exynos variant of Galaxy S7. Users of Snapdragon variant would have to wait a little more for a working TWRP or any other custom recovery as they come with locked bootloaders by carriers. Though there have been circulations that T-Mobile is in talks with Samsung about unlocking bootloaders on their carrier. But you never know when that may happen if it happens at all. Well till then wait is all you could do.
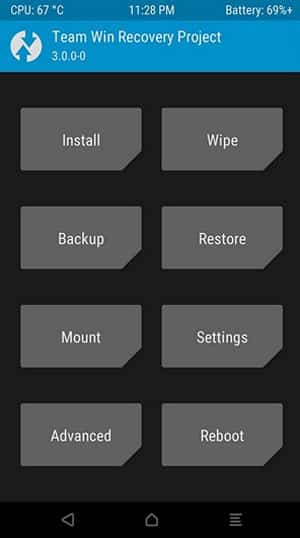
You must be familiar with TWRP if you are already into the rooting game, but if you are new at it let me clear things for you. TWRP or TeamWin Recovery Project is a custom recovery that provides many functions that are not available on your stock recovery. It can be used to flash ROMs, Mods, make nandroid backups, restore backups, wipe data or any other partition on your device. TWRP is a powerful tool that helps developers and Android power users to make their life easier.
Warning: Using this guide will trip your Knox counter and your device’s warranty will be void. So proceed at your own risk. Also, make sure you backup all your device data before proceeding with the steps to follow.
Things You Will Need
-
ODIN
Software used to flash firmware and other files on Samsung devices| Link
-
TWRP (TeamWinRecoveryProject)
Custom recovery we will be flashing on Galaxy S7 | Link
-
Samsung Drivers
USB drivers required being installed on your PC so that ODIN can detect your device
-
SuperSu
Download this file if you want root access on your device| Link
-
dm-verity and force encryption disabler
Download this file if you don’t want root access on your device| Link
Steps To Follow
Step 1. On your phone enable Developer Options, to do so open Settings app, then open About Phone and then tap Build Number 7 times.
Step 2. Open Settings>Developer options and enable OEM Unlock.
Step 3. Download Samsung USB drivers from the link given above and install them on your PC. You may skip this step if your PC already has Samsung drivers installed.
Step 4. Download the TWRP recovery from the link given above. Make sure you download the .tar format of the recovery and not the img format.
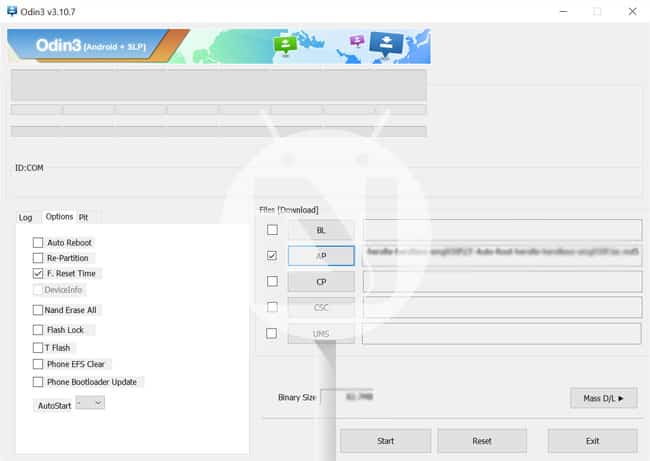
Step 5. Now download Odin3_v3.10.7.zip from the link given above. Extract the zip file on your PC using 7zip or any other unzipping tool. Now open Odin3 v3.10.7.exe, you will see a new window open as shown below.
Step 6. Now power off your device and boot your device into Download mode. To do so, press and hold Volume Down + Home + Power buttons simultaneously for few seconds. You will get a warning on your device, press Volume up button to confirm the warning this, will boot your device into Download mode.
Step 7. Now connect your device to your PC using a Usb cable. On connecting your device to our PC you will get a Added message in the log of Odin and you will see a blue button.(as shown below)
Step 8. Press AP button in Odin, this will open a window for browsing the firmware file. Navigate to the .tar file you downloaded and press OK. Go to Options tab in Odin and make sure Re-partition and Auto Reboot is NOT ticked, only F. Reset Time should be checked.(as shown below)
Step 9. Now press Start button and wait for the process to finish. You will get a success message in the log of ODIN and a green box saying PASS would appear.
Step 10. Now press and hold Volume Up + Home + Power buttons for few seconds. This will boot the freshly installed custom recovery TWRP.
Step 11. Now you will reach the screen asking you if you want to allow system modifications. Swipe right to continue. Keep in mind this will trigger dm-verity and you won’t be able to boot your device until you install SuperSU or dm-verity and force encryption disabler on your device.
Note: If you want to root your Galaxy S7 just flash the SuperSU file it will take care and make your system bootable. On the other hand, if you don’t want to root your device you will need to flash ‘dm-verity and force encryption disabler’ in order to make your device bootable. You only need to install one of these files in order to make your system bootable.
Step 12. Select Wipe option and then swipe to format data on your device.
Step 13. Now download and copy the SuperSU zip file or the ‘dm-verity and force encryption disabler.zip’ from the link given above and copy it to your device. Make sure you are still TWRP recovery, you will need to copy the file while you are still in TWRP.
Step 14. Now install the zip file you copied by selecting Install option in TWRP and then browse for the SuperSU zip file or dm-verity and force encryption disabler.zip and then swipe to confirm the installation.
Step 15. Reboot your device to System and then wait for it to boot up.
Congrats! you have successfully installed TWRP custom recovery on your Galaxy S7.
Need help? Leave us your queries in the comments section below we will try our best to resolve your issues.
Looking for this? Root Galaxy S7 (G930F) and S7 Edge (G935F) using CF Auto Root


Join The Discussion: