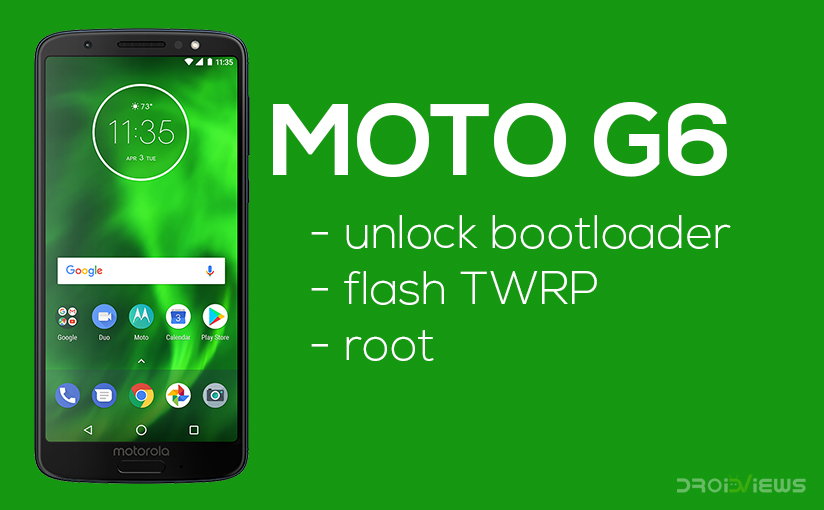
Motorola’s answer to the budget market this year was the Moto G6, a device that soon turned out to be a great option for those looking for an affordable yet promising smartphone. Even though the Moto G6, like all of its previous incarnations, got a special release in markets like India, the international bit of the company has an edge over the likes of companies like Xioami, Oppo or Vivo. Built from a sandwiched glass design, the Moto G6 sure is one of the more prettier devices to pick up, even in late 2018. However, the one factor that’s been turning so many heads is the fact that it comes with an almost stock build of Android.
I know, I know, going by the company’s awful track record for software updates, it only feels dumb for someone to whitelist this very smartphone over the many other offerings just based on the lust for timely software updates and security patches, but there is no doubt that the Motorola family has also received a partially biased treatment from our developer folks, who thrive hard and port the best mods and custom ROMs you’ll ever see! In such a case, it only makes sense for you to go ahead and try sideloading all of these interesting and quirky features onto your device!
If you, in fact, are looking for a place to get started with exploring the immensely deep world of Android customization, then we have got you covered! Although it might seem ponderous for you to go through all the steps that are holding you back from achieving ultimate control over your smartphone, it isn’t half as difficult as it seems, and we are here to make it even simpler. Read on to learn how you can unlock your device’s bootloader, slap a custom recovery on it, and finally break the chains by rooting it!
Note :
Although this method will work for all the variants of the Motorola Moto G6, the ones that have been confirmed are listed below :
- XT19252
- XT19253
- XT19254
- XT19255
- XT19256
We do not recommend you attempt the following guide on models which have not been mentioned above.
Prerequisites
- To start off, make sure you have the latest version of ADB and Fastboot installed on your computer. If you don’t, then follow our guide to quickly install ADB and Fastboot on your PC.
- Enable OEM Unlocking on your Moto G6. This can be done by first enabling Developer Options by navigating to Settings > About Phone, and tapping Build Number 7 times. Head back to the Settings menu, navigate to Developer Options and check to enable OEM Unlocking.
- The process of unlocking the bootloader will not only void your warranty but will also erase all of your data, including your internal storage. We recommend you take a full backup of your device before proceeding. For an easy way to back up your entire smartphone, check out our top picks for backing up your Android smartphone.
- Lastly, ensure your phone is charged at least up to 60% battery to prevent any unforeseen shutdowns in the midst of the process.
Downloads
TWRP
Boot Images
- XT1925-2 – XT1925-2_no-verity-boot.img
- XT1925-4 – XT1925-4_no-verity-boot.img
- XT1925-5 – XT1925-5_no-verity-boot.img
- XT1925-6 – XT1925-6_no-verity-boot.img
Encryption-Disabler Modified for ALI
Magisk
Steps to Unlock Bootloader on Moto G6
- On your computer, navigate to the ADB and Fastboot folder and launch a command prompt window (right click while holding down shift).
- Make sure you have all the drivers necessary installed, and connect your Moto G6 to the computer.
- Type in the following command to ensure connection :
adb devices
- If everything is good, you should see your device’s serial number in a second or two. Now, proceed to booting your phone in the bootloader mode by entering the following command :
adb reboot bootloader
- Type or copy/paste the following command in the cmd window:
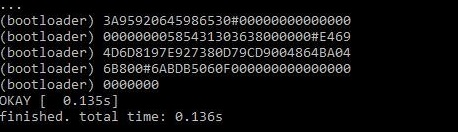
fastboot oem get_unlock_data
You’ll get a return string in the command window. Copy it down.
- Paste the copied string in the Notepad and remove the spaces if any.
- Now open the Motorola website. Sign in with your Google account or Motorola ID.
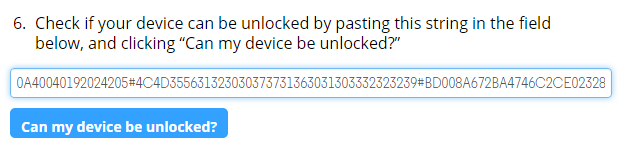
- Now paste the copied string into the text field and then click “Can my device be unlocked?” button.
- You’ll see a “REQUEST UNLOCK KEY” button at the bottom of the page. Check the “I Agree” option and hit the button.
- You’ll receive a mail to the registered Email ID with the unlock key.
- Now issue the following command in the cmd (replace “UNIQUE_KEY” text with the 20-character unlock key:
fastboot oem unlock UNIQUE_KEY
- This will unlock the bootloader on your device and format your device in the process.
- Once it’s completed, reboot your device and you’re done.
That’s it. You’ve successfully unlocked the bootloader on your Moto G6!
Install TWRP Recovery and Root Moto G6
- Reboot your device in the bootloader mode once again, and connect it to your computer.
- Download the TWRP image as mentioned above, and boot into this recovery by entering the following command
fastboot boot MotoG6-ali-TWRP.img - You will see your device boot into the recovery mode. If prompted, Swipe to confirm modifications. Now, we need to make a backup of your current stock boot image to prevent any hassles in the future. To do so, issue the following command in the command prompt window :
adb pull /dev/block/platform/soc/7824900.sdhci/by-name/boot stockboot.img
adb pull /dev/block/platform/soc/7824900.sdhci/by-name/recovery stockrecovery.img
-
Reboot your device in bootloader mode once again.
adb reboot bootloader
- Flash the no-dm-verity file you had downloaded prior to this process.
fastboot flash boot <insert-boot-image-name-here>.img
- Finally, you may proceed to flash TWRP Recovery on your system partition by entering the following command :
fastboot flash recovery MotoG6-ali-TWRP.img -
Reboot your device into the recovery mode. TWRP should ask you for a password, just dismiss it.
- Swipe to allow system modifications once again, and tap on Wipe, Format Data, and type yes. This will wipe your entire internal storage. Navigate to Advanced > ADB Sideload, and swipe to get your device ready.
- Download the verity-disabler and once again flash it using ADB on your computer. This step is to prevent force encryption while booting up, and to preserve your new recovery partition after every new boot.
adb sideload Force_Encryption_Disabler_For_ALI_Oreo_v2.zip /tmp
- At this point, sideload the Magisk file you had downloaded to gain complete root access on your Moto G6.
adb sidleoad Magisk-v16.6.zip /tmp
- Take a deep breath and reboot your Moto G6.
Great job! You’ve succeeded in flashing TWRP recovery as well as rooting your Moto G6! What’s next for you? Feel free to surf around our enormous library of tweaks, tricks, modifications and ROMs to spruce up your Android experience on an entirely new level!
source: xda

Join The Discussion: