A few months ago the was released the Nougat update for the Moto G4 and G4 Plus. These devices were the first one to receive Android N update. This was good news for the users. However, for the developers, the scene was a bit different. Since the Nougat update had been released for the Moto G4 Plus the developers had to find another way to root the nougat ROM. They simply can’t use the method they used to root the device on Marshmallow.
Thanks to doomed151 of XDA. Because of him, the Moto G4 Plus users can root their updated Android N ROM without much of a hassle. So what is the method? Let me tell you it’s not that hard. Keep on reading to find out.
Prerequisites
- An Unlocked Bootloader.
- Download Fastboot files and extract it to the ADB folder (Tip: If ADB folder does not exist then create it)
- Download TWRP recovery and extract it to the same ADB folder
- Then, download the phh’s SuperSU (an OpenSource SELinux-capable SuperUser) and copy it in the device’s Internal Storage.
- Make sure USB debugging enabled you can enable it from Settings> Developer options.
- Make sure to download the ElementalX kernel if on NPJ25.93-11/12/14 (non-soak test nougat) firmware and copy it to the device’s Internal Storage.
Changes to Make
- Open the SuperSU.zip file you downloaded earlier.
- Look for the file config.txt and open it.
- Change the default text,
eng verity crypt
to
eng noverity nocrypt
and save the file.
Note- If you are using 7-zip to work with the archives then it will ask you whether you want to update your archive or not. Just click on Yes and the archive will be updated.
Steps to Install TWRP on Moto G4 Plus Running Nougat
- Power off your smartphone.
- Then, boot into bootloader mode (Press and hold Volume Down + Power until droid logo).
- Connect your smartphone to the PC via USB cable.
- Next, navigate to the ADB folder and open it.
- In the ADB folder, hold Shift + Right Click» Open command window here.
- In the command prompt, type adb devices (This will confirm your device is attached to the PC via ADB)
- Type the following command in the command prompt,
fastboot.exe flash recovery twrp-3.0.2-0-athene.img
and hit enter (This will install TWRP recovery on your device).
- After the process is completed, unplug your device.
- Then, select Recovery from the bootloader (Use Volume buttons to navigate and Power Button to select).
After a few seconds, your device will boot up into TWRP recovery.
Follow and execute steps 2,3 and 4 only if on NPJ25.93-11/12/14 (non-soak test nougat) firmware. Also make sure to backup the stock kernel before proceeding further.
Steps to Root Moto G4 Plus on Android Nougat
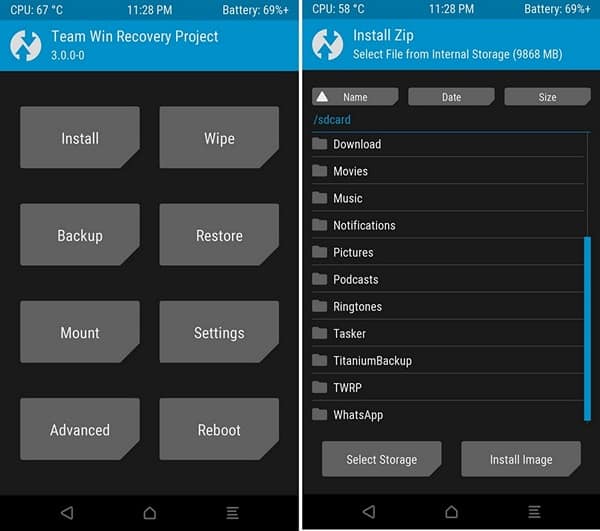
- After the TWRP has successfully booted, click on Install.
- Navigate to the directory where you placed the ElementalX.zip file.
- Click on it and swipe right to flash it.
- After that, go back to the TWRPs main screen.
- Click on Install.
- Navigate to the directory where you placed the SuperSU.zip file.
- Then, Click on it and swipe right to flash it.

- Next, go back to TWRPs main screen.
- Finally, select Reboot» System (To boot your device into the System).
- At last, download and install the phh’s SuperSu from the Google Play Store.
- Update the SU binary if asked (Just follow the on-screen instructions).
Download the Root Checker app from the Google Play Store to verify root.
[googleplay url=”https://play.google.com/store/apps/details?id=com.joeykrim.rootcheck”/]That’s it, guys. Those were some few steps which when executed perfectly will root your Moto G4 Plus on Nougat Stock ROM. If you have any queries related to this post please let me know in the comments section below. I will be happy to help.


Join The Discussion: