The Galaxy A9 Pro is a new semi high-end smartphone from Samsung that was launched back in March this year with Android 6.0.1 Marshmallow firmware installed out of the box. Galaxy A9 Pro is a good looking phone that goes with the OEM’s new design language displayed first with the release of the Galaxy S6/S6 Edge.
On the hardware side, the Samsung Galaxy A9 Pro sports a 6.0-inch full HD (1080×1920 px) Super AMOLED display with a pixel density of 367ppi, Qualcomm MSM8976 Snapdragon 652 chipset, 4 GB RAM, 32 GB internal storage and a microSD slot that takes up to 256 GB card, a 16 MP sensor for the main and a 8 MP sensor for the secondary camera. The most impressive thing about the A9 Pro, however, is its Non-removable Li-Ion 5000mAh battery that promises long power backup.
If you own the SM-A910F model of the Galaxy A9 Pro and are looking for a reliable tutorial for flashing the stock firmware on your device manually, our step-by-step detailed guide will help you do so. Thankfully, the first firmware for the phone is available now and that’s why it’s probably the best time for such a tutorial. By installing the stock firmware on your phone, you can unroot it, fix a boot-loop and restore it to factory status. Of course, there could be a plethora of reasons why one might need to flash the official ROM.
Warning
While the procedure of installing the stock firmware on Samsung device is easier and safer than performing the same action on devices by other OEMs, it might still prove risky of you do not go through the preparations and follow the steps carefully.
Getting Prepared
- Download Odin tool and extract the zip file: Odin3 v3.10.7.zip
- Download and install Samsung USB drivers or Kies on your computer.
- Enable USB Debugging on your Galaxy A9 Pro.
- Take a backup of your all data stored on the internal storage of your phone.
- Make sure that your phone has at least 60% battery juice left on it.
Download Galaxy A9 Pro SM-A910F Firmware
(More firmware will be added as they become available. The firmware provided below can be flashed on any SM-A910F.)
Malaysia: XME-A910FXXU1APF8-20160623110858.zip
Vietnam: XXV-A910FXXU1APF8-20160623194300.zip
Install Marshmallow Firmware on Galaxy A9 Pro SM-A910F
You can use the steps described below to install any version of the official firmware on your Galaxy A9 Pro. You can find a more detailed tutorial on installing the stock firmware on Samsung devices here.
- Unzip the .zip file that contains the firmware with .tar.md5 extension.
- Run Odin on your Windows PC as an administrator.
- Turn off your Galaxy A9 Pro. Now press and hold the Volume Down + Home + Power buttons for 2-3 seconds. When you see the warning screen with the yellow exclamation sign, press the Volume Up key to enter the Download Mode.
- Connect your phone to your PC using the stock USB cable that came with your phone.
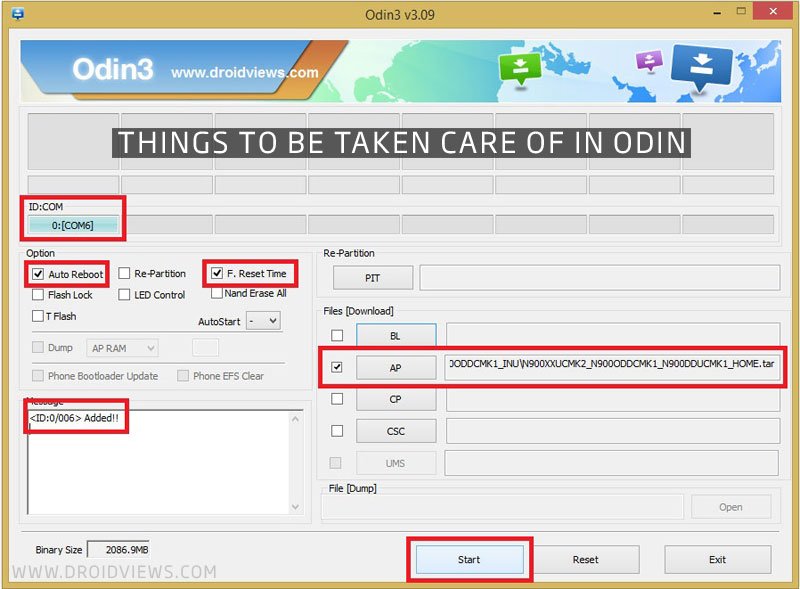
- Wait until the ID:COM port on Odin turns blue. It’s the indicator that shows your phone has been connected successfully.
- Now click the AP button on Odin. If you are using an older version of Odin, click PDA button instead.
- Navigate to the firmware folder and select the file with .tar.md5 extension.
- Click the Start button on Odin and wait until the firmware is installed.

- Finally, you’ll see PASS! message on Odin and then your Galaxy A9 Pro will reboot automatically.
All you need to do now is to disconnect the USB cable and wait till your phone boots up. Enjoy the newly installed firmware on your Samsung Galaxy A9 Pro!
Fixing Bootloop, Phone Overheating, and Battery Drain
In case your phone doesn’t get past the boot screen or does not boot normally even after 5 minutes (maximum), you should try to perform a data factory reset using the steps given in the following tutorial:


Join The Discussion: