If you have landed this page, you must be one looking for a tutorial to install stock firmware on Google Pixel. By following the steps described below, you’ll not only be able to restore Google to stock firmware by flashing the factory images but also unbrick your Pixel device. Even if your Google Pixel is stuck on the boot screen with bouncing dots, installing the factory images will fix it.
Must Read: 40+ Google Pixel Tips and Tricks
It’s really a nice thing that Google uploads every single build of firmwares for Nexus and Pixel devices. It means that it’s easy to get the desired factory image package for your Google Pixel. All you need to do is to download the stock firmware, make a few preparations and flash the images using the flash-all.bat file provided in the package, or simply flash them one-by-one using fastboot commands.
Also read:
Restore Google Pixel XL to Stock / Flash Factory Images
Disclaimer
We’ve tried to describe the installation steps in detail and correctly. However, a good tutorial requires an attentive follower to yield good results. Therefore, you’re supposed to make all preparations, download the required files before proceeding. If you’ve some doubt or you get into a problem, do not hesitate to ask. Good luck!
Getting Prepared
So, as I stated above, here’re a few things that must be taken care of before you head over to the installation procedure.
- Make sure your Google Pixel has an unlocked bootloader. If you own the Verizon-Google Pixel, follow this tutorial to unlock the bootloader on the Verizon model. Verizon users are warned of the difficulty they may have in re-rooting their Pixel if they restore to stock and take the latest update.
- Download the desired firmware or factory image for your Google Pixel (codename= sailfish): Click Here
- Unlocking the bootloader and restoring to stock will wipe your phone’s data, so backup your apps and data. If you don’t want your Pixel’s apps and settings to be wiped after flashing the factory images, do this: extract the download firmware zip file, edit the flash-all.bat file with NotePad++, and remove the -w from the script.
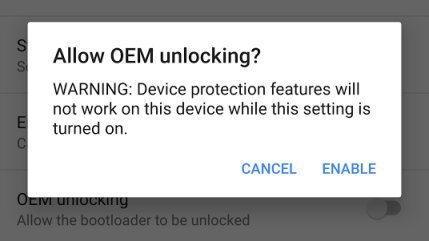
- Go to Settings> About phone> Build number and tap it 7 times to enable Developer options on your Google Pixel. Then go back to Settings> Developer options and enable USB Debugging and OEM unlocking.
- Download the Minimal ADB and Fasboot Setup and install it on your computer. Select the option to create a desktop shortcut. Please, keep the file installation path in mind as you are going to need that later.

- Also, install the latest Google USB drivers on your computer. If you don’t know how to install naked USB drivers, see the instruction here.
- Make sure your phone’s battery is charged to at least 70% level.
Install Stock Firmware on Google Pixel
Having done the things told above, let’s begin with the firmware installation:
- Navigate to the Minimal ADB and Fastboot directory.
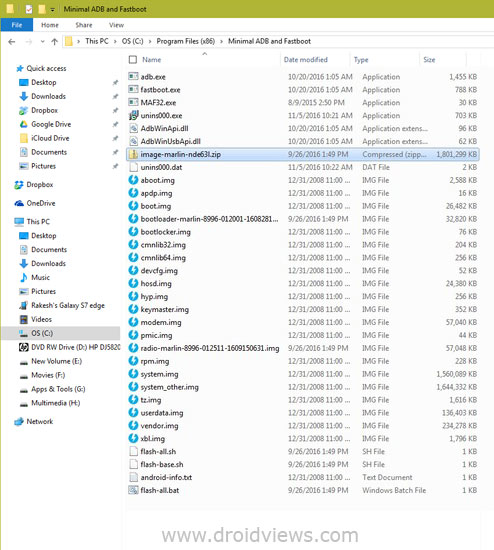
- Now extract the contents of the downloaded firmware zip file (sailfish-nde63h-factory-43ba5f81.zip) and copy the contents of the extracted folder to the Minimal ADB and Fastboot folder.
- Your fastboot folder should look like as shown below.
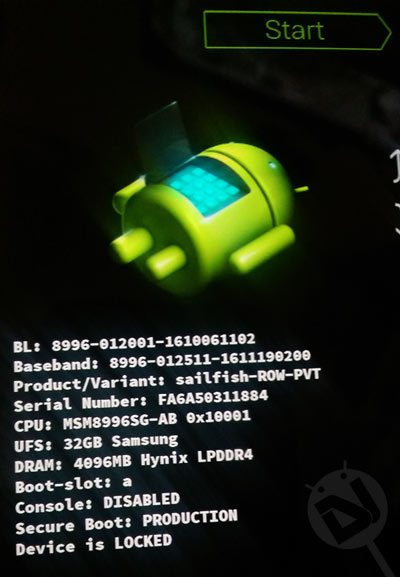
- Now power off your Google Pixel and boot it into the Bootloader Mode by pressing and holding the Volume Down + Power buttons for 2-3 seconds.
- Connect your phone to your computer using a USB cable.
- Now place the mouse pointer at an empty space inside the Minimal ADB and Fastboot folder window, and press Shift + right-click button the mouse and select “Open command window here” option to launch the command window.
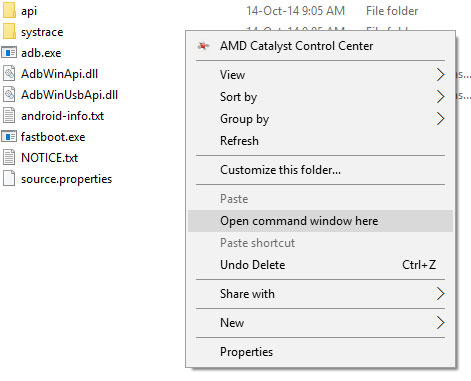
- A command window will pop up.
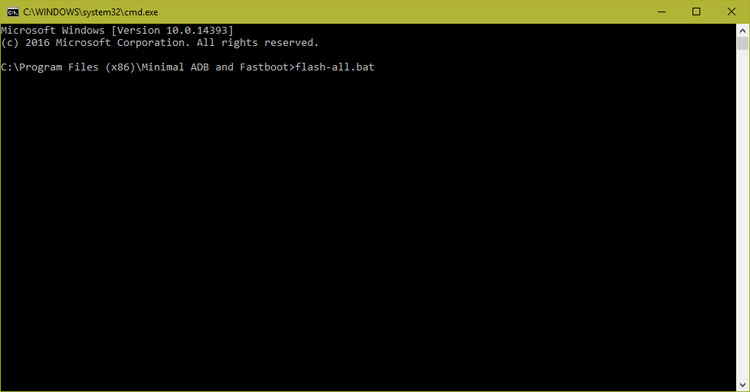
- Now type the following command in the command window and hit the Enter key.
flash-all.bat
- Doing so will initiate the installation.
C:\Program Files (x86)\Minimal ADB and Fastboot>flash-all.bat
target reported max download size of 536870912 bytes
sending 'bootloader_a' (32820 KB)...
OKAY [ 0.782s]
writing 'bootloader_a'...
(bootloader) Valid bootloader version.
OKAY [ 0.686s]
finished. total time: 1.468s
rebooting into bootloader...
OKAY [ 0.031s]
finished. total time: 0.048s
< waiting for any device >
target reported max download size of 536870912 bytes
sending 'radio_a' (57048 KB)...
OKAY [ 1.408s]
writing 'radio_a'...
OKAY [ 0.564s]
finished. total time: 1.972s
rebooting into bootloader...
OKAY [ 0.047s]
finished. total time: 0.047s
< waiting for any device >
target reported max download size of 536870912 bytes
archive does not contain 'recovery.img'
archive does not contain 'vendor_other.img'
wiping userdata...
Creating filesystem with parameters:
Size: 26663190528
Block size: 4096
Blocks per group: 32768
Inodes per group: 8192
Inode size: 256
Journal blocks: 32768
Label:
Blocks: 6509568
Block groups: 199
Reserved block group size: 1024
Created filesystem with 11/1630208 inodes and 146354/6509568 blocks
--------------------------------------------
Bootloader Version...: 8996-012001-1608281716
Baseband Version.....: 8996-012511-1609150631
Serial Number........: xxxxxxxxxxxxxx
--------------------------------------------
checking product...
OKAY [ 0.047s]
checking version-bootloader...
OKAY [ 0.047s]
checking version-baseband...
OKAY [ 0.047s]
sending 'boot_a' (26481 KB)...
OKAY [ 0.688s]
writing 'boot_a'...
OKAY [ 0.296s]
erasing 'system_a'...
OKAY [ 0.392s]
sending sparse 'system_a' 1/3 (523506 KB)...
OKAY [ 12.969s]
writing 'system_a' 1/3...
OKAY [ 4.594s]
sending sparse 'system_a' 2/3 (524279 KB)...
OKAY [ 13.054s]
writing 'system_a' 2/3...
OKAY [ 7.645s]
sending sparse 'system_a' 3/3 (512303 KB)...
OKAY [ 12.612s]
writing 'system_a' 3/3...
OKAY [ 5.298s]
erasing 'system_b'...
OKAY [ 0.359s]
sending sparse 'system_b' 1/4 (517263 KB)...
OKAY [ 12.609s]
writing 'system_b' 1/4...
OKAY [ 3.888s]
sending sparse 'system_b' 2/4 (514150 KB)...
OKAY [ 12.562s]
writing 'system_b' 2/4...
OKAY [ 4.395s]
sending sparse 'system_b' 3/4 (516790 KB)...
OKAY [ 12.559s]
writing 'system_b' 3/4...
OKAY [ 3.784s]
sending sparse 'system_b' 4/4 (96127 KB)...
OKAY [ 2.406s]
writing 'system_b' 4/4...
OKAY [ 0.985s]
erasing 'vendor_a'...
OKAY [ 0.205s]
sending 'vendor_a' (234277 KB)...
OKAY [ 5.517s]
writing 'vendor_a'...
OKAY [ 3.785s]
Setting current slot to 'a'...
OKAY [ 0.109s]
erasing 'userdata'...
OKAY [ 2.344s]
sending 'userdata' (138957 KB)...
OKAY [ 3.300s]
writing 'userdata'...
OKAY [ 1.314s]
rebooting...

finished. total time: 128.109s
Press any key to exit...
- When the installation is finished, you’ll be prompted to press a key. Do that.
- After that, your phone will reboot automatically. Since the first boot after flashing the factory images may take about 5-8 minutes, you need to wait patiently until your phone boots up normally.
- When you see the welcome screen, go through the necessary setup.
Done and congratulations! You have successfully restored you Google Pixel to the stock firmware of your choice.


Will this void the warranty? We have a glitchy Pixel – where the sound does odd things (no sound or just static) and it reboots randomly – will doing this procedure fix it?
No, it won’t void the warranty. The firmware is official. Yes, install the latest factory image to fix the issues.
I got to here:
Now type the following command in the command window and hit the Enter key.
flash-all.bat
Doing so did not initiate flashing of anything. Instead, I got ‘flash-all.bat’ is not recognized as an internal or external command, operable program or batch file. Any ideas?
Make sure you have launched the command window from within the very folder where all ADB and firmware images along with the “flash-all-bat” files are present.
See this: https://www.droidviews.com/wp-content/uploads/2017/03/open-command-window-here-droidviews.jpg