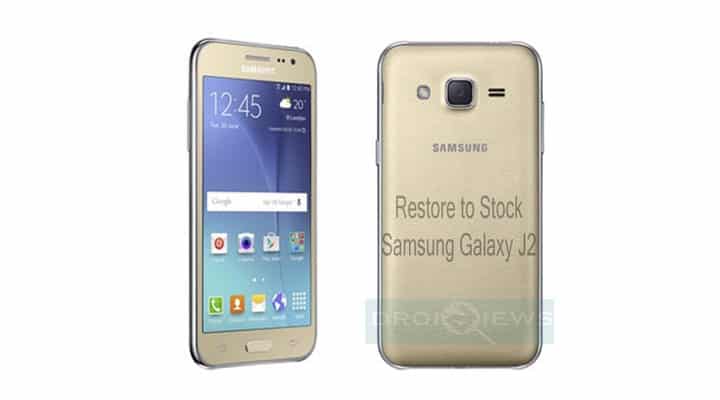
Samsung Galaxy J2 comes with some fine specifications and a reasonable price tag. The best thing about this device is that it comes with Android 5.1.1 firmware. As the device is new, there are chances that the device may receive Marshmallow update. However, it may take some time as most manufacturers release software updates to their flagship phones first. Even though the device may lack high-end hardware specifications, the Galaxy J2 seems a good fit for users looking for a budget phone.
Lollipop firmware has been listed below for the SM-J200G and J200GU variants of the Samsung Galaxy J2 device. This will take your firmware to build number J200GDDU1AOL4.
If you have for any reason rooted your device or modified the system, then chances are, the device may not receive any further updates over the air. In order to receive OTA updates, you will need to restore your device to stock firmware. If you own this device, then this tutorial will upgrade it to the latest available firmware.
To restore to stock, you need to install the complete firmware onto your device. This will restore everything to stock including the stock recovery. Hence, any changes to your device like root, custom recovery, and others will be lost. As it will perform a clean install, all your Apps and data will be wiped as well. A backup is highly recommended.
If you are new to the process then don’t worry, we have got you covered. To install the firmware, go through all the procedure carefully and make sure you have everything setup as per the requirements.
Requirements
- Make sure you have the perfect device and variant. This tutorial is suitable only for Samsung Galaxy J2 SM-J200G and J200GU variants. It will get your device to Lollipop 5.1.1 based J200GDDU1AOL4 and J200GUDXU1AOK1 firmware respectively.
- Make sure you have fully charged your Galaxy Tab 4 or at least up to 60% of the battery.
- Enable USB Debugging on your phone.android
- Make sure you have Samsung drivers installed on your PC.
- Download the 7zip software to extract the zip file to get the firmware file which is in .tar.md5 extension.
Download Section
Lollipop firmware for Galaxy J2 SM-J200G — Download | File: J200GDDU1AOL4_J200GODD1AOL4_INS.zip
Download | Download by Country or Carriers for J200G
Lollipop firmware for Galaxy J2 SM-J200GU — Download | File: J200GUDXU1AOK1_J200GUOLB1AOK1_CAM.zip
Download | Download by Country or Carriers for J200GU
Odin Software — Download | Odin3 v3.10.7
Backup Your Apps and Data
It is recommended that you backup your apps, contacts, messages, photos, videos and any other important data stored on the internal storage of your phone. Get some of our useful backup apps from the DroidViews archives. This will help you backup your device data easily.
Install Android 5.1.1 Lollipop Firmware on Galaxy J2
- Make sure you have downloaded the Lollipop firmware for your Galaxy J2. If it is a zip file, extract it on your PC to get the firmware file with .tar.md5 extension.
- Now turn off your phone and boot it into the Download Mode. To do this, turn off your device and then press and hold Volume Down + Home + Power buttons simultaneously for 2-3 seconds. When you see the warning screen with a yellow triangle sign, press the Volume Up/Down key to enter Download/Odin mode
- Download the required Odin.zip file and extract the file on your PC. You will get the Odin3_v3.10.7.exe file. Open it as the administrator to get to the Odin window.
- Connect your Galaxy J2 to the computer using the USB cable.
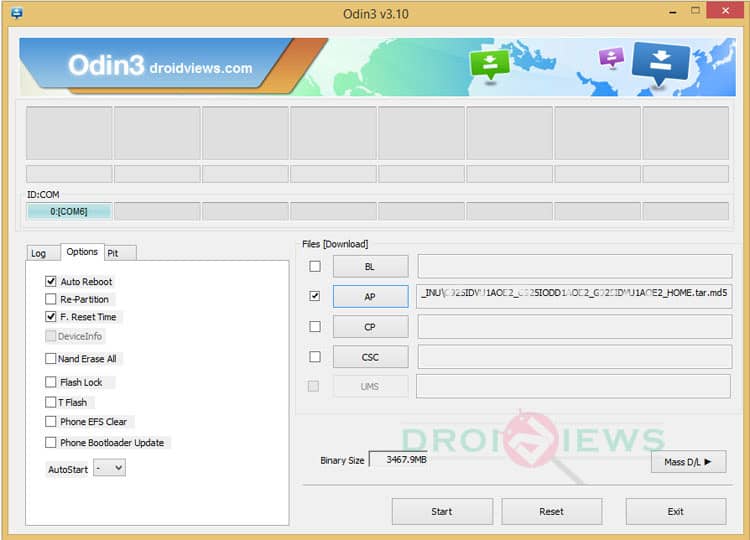
- When you connect the device, the ID: COM port on Odin will turn Blue. You’ll also see“Added!!” message to indicate successful connection.

- In case Odin does not detect your phone, you can troubleshoot the following:
- Reboot your phone and turn off USB Debugging and turn it on again.
- Try reinstalling the Samsung USB Drivers.
- Try changing the USB cable and connecting to other ports.
- Now click the AP button on Odin and add the firmware file (J200GDDU1AOL4_J200GODD1AOL4_INS.tar.md5).
- In the Options, make sure that only the Auto Reboot and F. Reset Time boxes are checked and everything else is unchecked. (Do not, in any case, check Re-Partition box)
- Before you proceed to firmware installation on Odin, make sure everything is set according to the screenshot.
- Now, click the Start button on Odin to start installation which might take a while for the firmware to install.
- Once you get a PASS! message on Odin, your device will restart. It’s the green signal that indicates a successful installation. In case you get a message like ‘Fail!’, make sure you go through all the requirements carefully.
Once you have successfully booted into the firmware, you can now enjoy your Lollipop firmware.
If you come across boot loop, then this may occur sometimes when you have installed a new firmware. To solve this, remove the battery (if removable) and then put it back again. Boot to Recovery by holding Volume Down + Home + Power. In Recovery, select “wipe data/factory reset” then select “Yes” This will delete all user data. Now Select Reboot to System. If you want a detailed tutorial for these steps, head over to the below link.
How to Perform Data Factory Reset on Samsung Galaxy Devices
For detailed guide on how to install firmware on Samsung Galaxy device, get to the following link:
Install Stock Firmware on Samsung Galaxy Devices Using Odin – Detailed Guide


this is bullshit, why join up and pay just for one download..
agree with you.
its not done fake odin not working with 7zip tar file extention
Fake Odin, really? How did you come to that conclusion? Can you describe the problem you are actually having?
Try using SP Flash Tool it works 100%