
Nexus 10 is a mighty device among the Nexus brotherhood in terms of size. Launched in the last quarter of 2012, the Nexus 10 came with the Android 4.4.2 Jellybean out-of-box but continued to receive the latest updates from Google, one of the privilege of being part of Nexus family. The Nexus 10 is now receiving the Lollipop update in the form of OTA update from Google which is good news for a 2-year old device.
The OTA updates started rolling today and many Nexus 10 users started receiving the OTA notifications from all over the world. However, a few Nexus 10 users might not see the OTA update on their devices as the OTA updates are rolling out gradually and it may take an hour to days for your device to pick up to the OTA wave.
If you’re curious about the Lollipop update and want to try it right now on your Nexus 10, then download the Nexus 10 factory image and install it manually. Follow the instructions carefully to successfully flash the Lollipop update using the automatic script given in the factory image package.
Warning
This guide is intended only for the Nexus 10, not for any other device. Be extra cautious when you choose the factory images as flashing wrong ones might result in a bricked device. You alone are responsible for any consequences that might occur during the process, we shall not be held responsible for any damage to your device.
Prepare Your Device
- Charge your Nexus 10 above 60% battery level to avoid shutdowns during the process.
- Backup your device storage, Contacts, SMS etc. using Google Sync service or any third-party app as the entire device will be wiped clean.
- Download and install latest Google USB drivers on your PC.
- Enable USB Debugging on your Nexus 10. Read our guide to get instructions on how to do so.
- Unlock bootloader on your Nexus 10. For guide: Click Here
Downloads
Nexus 10 mantaray Factory Image: Download
Fastboot file: Download
Install Lollipop Factory Image on Nexus 10
- Download and extract the fastboot file on your PC. You’ll get the following file:
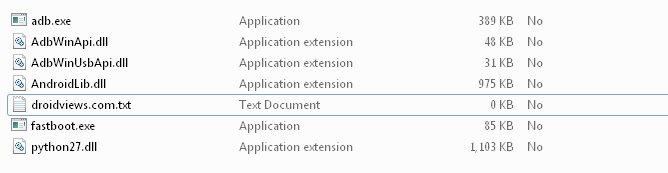
- Extract the mantaray-lrx21p-factory-ad2499ea.tgz file to the same folder where you extracted the adb-fastboot files. You’ll get another compressed file, extract it as well in the adb folder. Now you’ll get the following files:
- bootloader image
- flash-all.bat
- flash-all.sh
- flash-base.sh
- image-mantaray-lrx21p.zip
- Boot your Nexus 10 into bootloader mode:
- Power off your Nexus 10
- Press and hold the Volume Down + power button until you boot into bootloader mode.
- Connect your Nexus 10 to PC using a USB cable and make sure your device is detected. If not, return back once you installed proper drivers on your PC.
- Run the flash-all.bat/flash-all.sh/flash-base.sh script depending on your desktop OS.
- The script does everything, so just sit back and wait patiently. Once the process is completed, your Nexus 10 will automatically reboot to Lollipop.
The reboot might take a while, so don’t worry even if your Nexus 10 takes more than 5-10 minutes on first boot.
If you seem to notice an error like error: update package missing system.img while flashing the factory image, follow the below guide which covers the manual flashing of the factory image using fastboot commands.
Manually install Nexus factory images using fastboot commands
Share your Lollipop experience in the comments section below.


got it for s5?
No. You will have to wait.