A brief introduction for those who don’t know what the XperiFirm tool is. XperiFirm is a tool that lets the user download the current or latest firmware for all the Sony or the Sony-Ericcson smartphones and tablets that are running on Android. However, as the name suggests XperiFirm is mostly for the Xperia devices. This could be a pretty handy tool for Sony users especially if they are into development stuff and possess more than one device.
In reality, this tool is mainly meant for the users who have rooted their device or unlocked its bootloader or even both. People who have an unlocked bootloader must be aware that they don’t receive theirs as scheduled OTA updates. This tool can solve the problem for them. The XperiFirm tool is available for Windows, Mac and Linux OS too. Although the installation of the tool can get confusing at times primarily if you are new to this. This guide will mainly focus on setting up the environment, using the tool to update the firmware as well as full stock installation.
Setting up the XperiFirm Tool Environment
For Microsoft Windows
- .NET Framework 4.0 or newer if on Windows XP SP3
- .NET Framework 4.6 RC or newer if on Windows Vista/7
- Pre-installed on Windows 8/8.1/10
For Linux
- Enter the following commands one after another and hit enter,
$ sudo apt-get install mono-complete
then type, $ sudo cert-sync /etc/ssl/certs/ca-certificates.crt
finally, $ sudo certmgr -ssl -m https://software.sonymobile.com
- In the above command line execution, you will be asked twice to enter (Y/N). Enter Y both the times and make sure to hit enter after that.
- In order to launch XperiFirm, enter the following line of code,
$ mono XperiFirm.exe
For Apple OS X
- Download Mono for OS X and install it.
- Open Terminal and enter the following code,
$ mono XperiFirm.exe
Disclaimer: Flashing firmware using the XperiFirm tool does not void the warranty of the device. Neither the smartphone should possess an unlocked bootloader nor it should have root access. DroidViews recommends creating a backup in case something goes wrong. However, if you read and follow the instructions carefully then you will face no trouble.
Prerequisites
- In the Developer options, make sure USB debugging is enabled and OEM Unlocking is disabled (To enable Developer options, Navigate to Settings> About Phone> Tap Build Number 7 times)
- Navigate to Settings> Security> Enable Unknown sources
- Connect your device to the PC via USB cable (Make sure ADB, Fastboot and USB drivers are installed on the PC)
- Download FlashTool and install it.
- Download the latest XperiFirm tool.
Note- If you are having a problem while connecting your device then you will need to install the necessary drivers found in the directory C:\Flashtool\dirvers. Before proceeding further, make sure your device is connected to the PC and all the required device drivers mentioned are installed. I will be using the Xperia Z3 (D6603) to demonstrate in this tutorial.
Using the XperiFirm Tool
Understanding the Different Panes
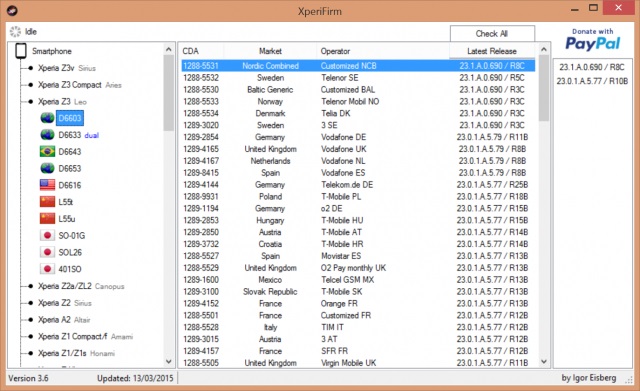
After the XperiFirm tool is open and running, you will see three panes. The left pane is where you will have to select your handset (Xperia Z3) and the model (D6603).
In the middle pane will be listed all the firmware of the device you have selected in the left pane. The middle panel will be divided into 4 columns, CDA (Sony Customization Number), Market (Region), Operator (Carrier) and Latest Release (Firmware Build Number).
Finally, the right pane which shows the firmware which is available for download for that particular region.
Steps to Download the Firmware Using XperiFirm Tool
- Use the left pane of the software and select your Smartphone and its model number from the listed device (For the model number, Navigate to Settings» About Phone» Model Number).
- After that, from the middle pane, select the firmware for your region and carrier option.
- Click on it and confirm to proceed.
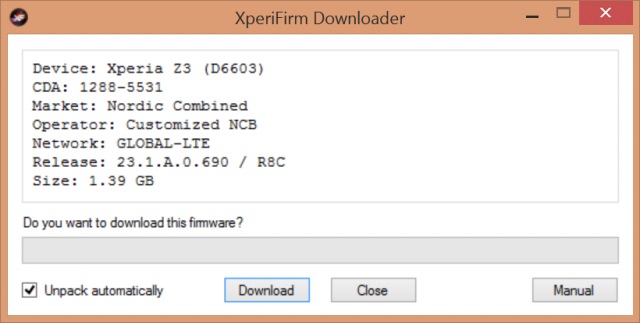
- Next, make sure Unpack Automatically is checked and then click on the Download button.
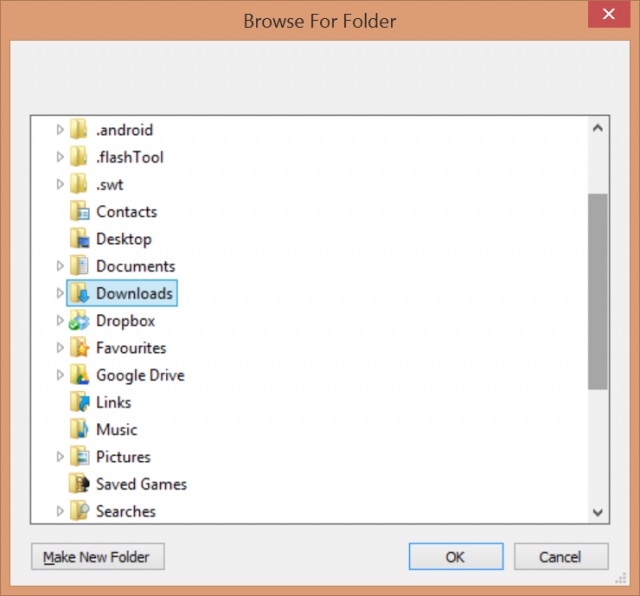
- Then, you will be asked to select a folder as a download location for the firmware (It is recommended to select a new or empty folder).
- After that, the firmware will begin to download (Make sure you note down the Market and Release of the firmware listed there, it will be used later).
- Once the download is complete, a message will pop-up saying Unpacked Successfully (Click on OK to proceed).
- Next, click on Close on the Download box and check for the firmware in the download location.
- Open the download location and look for the fwinfo.xml file and delete it (This is important or else the firmware will be corrupt).
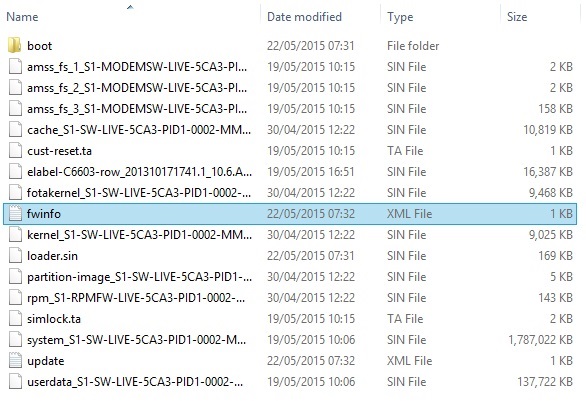
That’s it! You have the latest firmware for your smartphone. Step 9 is for users who have a fwinfo.xml file. If you didn’t see one then you can skip the step and proceed further.
Steps to Install FlashTool Drivers for Windows
- Open Run from the start menu (or use hotkey Windows + R) and type,
shutdown.exe /r /o /f /t 00and hit the Enter key (remember, this will restart your PC).
- When the PC boots into the startup settings screen, navigate to Troubleshoot» Advanced options» Startup settings» Restart.
- While the machine restarts press the F7 key on your keyboard (This will disable driver signature verification enforcement).
Now, you will be able to install the FlashTool drivers. Windows will pop-up a warning message saying that the driver is not signed. Just confirm the installation. After the installation has completed reboot your PC.
Steps to Create the Firmware Using FlashTool
- Once the FlashTool is up and running, navigate to Tools» Bundles» Create (A dialog box will pop-up named Bundler).
- Then, Click on the three dots next to the Select source folder.
- Next, navigate to the directory where the firmware files are located and select it (Click on OK and the folder list section of the bundler will be shown all the firmware files loaded).
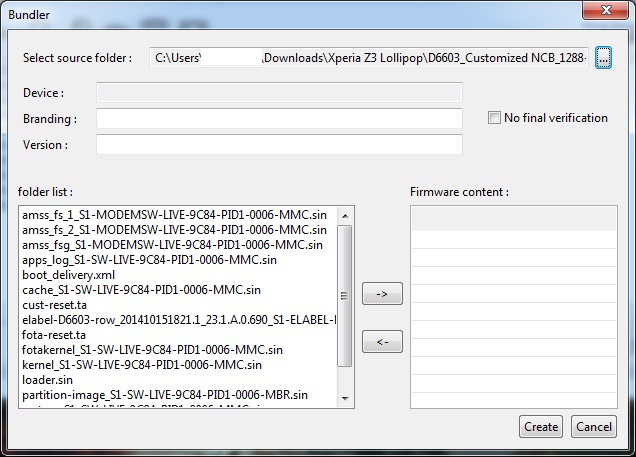
- Now, in the bundle dialog box double-click on the Device space.
- Then, select your device name and model number.

- Enter the Branding and Version of the firmware you noted down earlier.
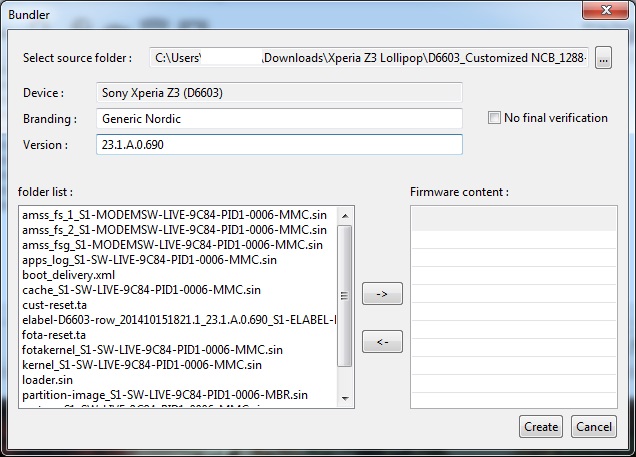
- After that, highlight all the files in the folder list (Control + A) and click on the right arrow (This will move the files in the Firmware content).
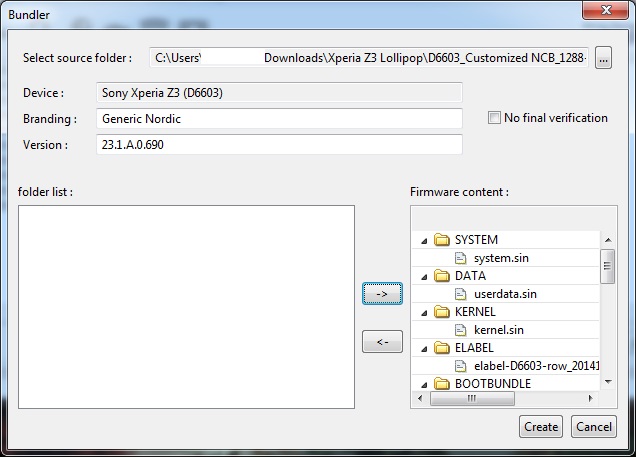
- Finally, click on Create.
That’s it! You FTF firmware will be created in a few minutes. Once the progress bar has completed you will be presented with a message as shown in the image. This proves that the FTF firmware file is created successfully.By navigating to the following directory C:\Users\(Your PC Name)\.flashTool\firmwares you can ensure the creation of your firmware.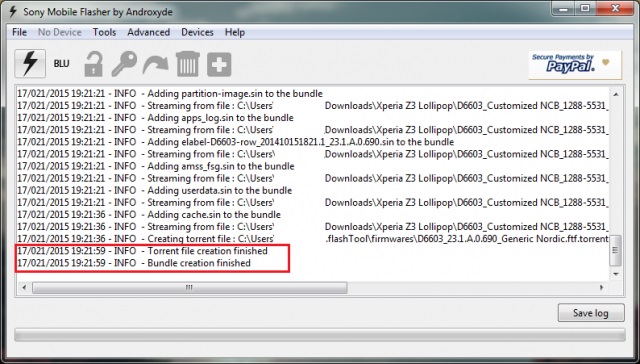
Steps to Flash the Firmware Using FlashTool
- Open the FlashTool and click on the lightning bolt symbol that says Flash device.
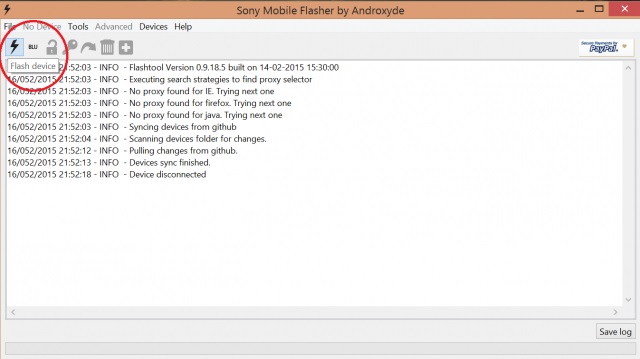
- Next, choose the Flashmode from the Bootmode chooser pop-up and hit Ok.
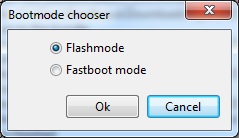
- After that, from the firmware pane select the Device, Version, and Branding which matches your created FTF firmware file.
- Uncheck Data in the Wipe pane if you want to retain your apps or data.

- Finally, click on Flash.
- Then, a pop-up shown in the image below will appear (This may take 60-120 seconds depending upon your PC).

- When the pop-up appears, unplug your device.
- Power it off.
- Finally, hold the Volume Down key while connecting the USB cable to the PC.
- Let go of the Volume Down button after the pop-up disappears and the flashing begins.
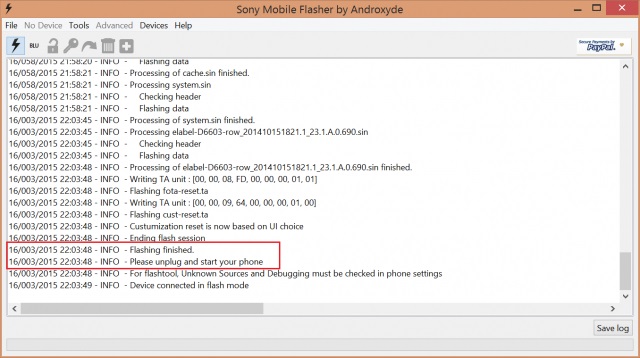
Press the back button mentioned in the pop-up is for older Sony Ericsson devices. Ignore it if you are using a device from the Xperia line. After the flashing process is completed you will be presented with a Flashing Finished note as shown in the image. Now, you can unplug your device from the PC. Power it on and wait for a few minutes. The first boot may take 5-6 minutes. For FAQ and Change Logs visit this link. Hope you have a happy and safe flashing.


Join The Discussion: