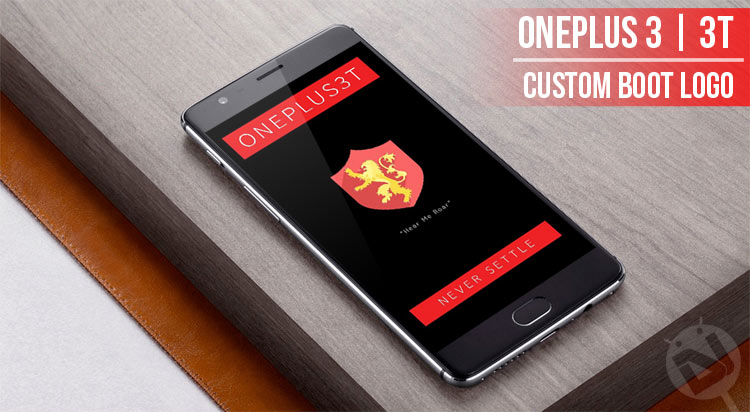
Boot logo, also known as the splash screen, is the first image that is displayed after powering on the device. This image that appears before the boot animation. A screenshot of boot logo of the OnePlus 3/3T is attached below. The default image is nice, absolutely no doubt about it. However, some people might not like it or might want to change or customize it. Why? The simple answer is because they can. The boot logo of the OnePlus 3/3T can be changed and the steps to do so are well described in this post ahead.
There are a lot of custom boot logos/splash screen. Displaying all of the images would have made the page slower and laggier for some devices to browse through. Therefore, only a few of them are displayed. However, links to download all the boot logos together and separately are given at the end of the post. Before moving ahead, special thanks to B!Gguy of XDA for the time and dedication he has put into the making of these boot logos. The boot logos are really good.
Also read: 10 OnePlus 3T Tips and Tricks
Features
- Modern Material Design UI (Crafted from scratch)
- High Quality
- Compatible with any ROM/Kernel
The preview images are in low resolution but the real boot images are in Full HD (1920×1080).
The boot logos contain several different themes like the Game of Thrones, Pirates of the Caribbean, Star Wars, Iron Man, Batman, and a lot more. Along with the boot logo, the Fastboot Mode image is also changed. Nice icing on the cake. However, these are not permanent and can be reverted back to the stock OnePlus 3/3T boot logo image. The default images are also provided in the zip file available at the end of the post. Enough waiting, let’s get started.
Related posts:
- How to Configure Alert Slider on OnePlus 3 and 3T
- 5 Best ROMs for OnePlus 3T
- Enjoy All Pixel Features on OnePlus 3/3T with Pixel Experience ROM
Note- A custom recovery like TWRP is needed for the process. Head to one of the following links to root and install TWRP on your OnePlus 3/3T:
Steps to Install Custom Boot Logo on OnePlus 3 & 3T
- Download your favorite individual zip file (Link given at the end of the post).
- Make sure the zip file is in your device’s Internal Storage.
- Power down the OnePlus 3/3T.
- Boot into recovery (To do so, hold the Volume Down + Power Button at the same time until OnePlus logo).
- Choose your preferred language (To do so, you can either tap on it or use the Volume Rockers to navigate and Power Button to select).
- Then, select recovery mode.
- After entering recovery mode, click on Install.
- Navigate to the directory where you placed the zip file.
- Select it and swipe right to flash it.

- Then, head back to TWRP’s main screen.
- Click on Reboot» System.
That’s it! This will definitely change the boot image. Now, there are two versions of the boot images available for download. Ones that come with the ONEPLUS 3T and NEVER SETTLE texts (check preview images) and the others that come without them, i.e., with image and quote only. So, download according to your preference. Same goes for the OnePlus 3.
Previews of the OnePlus 3T Boot Images
Downloads for OnePlus 3T
Boot logos with ONEPLUS 3T and NEVER SETTLE texts
Boot logos with image and quote only
Previews of the OnePlus 3 Boot Images
Downloads for OnePlus 3
Boot logos with ONEPLUS 3 and NEVER SETTLE texts
Boot logos with image and quote only
Wait there’s more to it. If you want to go crazy then you can set this boot logo to change randomly every time you boot. How? The process is a bit complicated and I have tried my best to simplify it. Read further to know about it. The ability to randomize the boot logos requires root access and works best with custom ROMs.
We will not be responsible for any damage to your device. Make sure to do a full backup before proceeding further.
How to Make Boot Logo Change Automatically
- Download the custom init.d script file from here.
- Place it in the /system/etc/init.d directory.
- Then, long press the file and click on the three dots and select Properties (I’m using Solid File Explorer).
- Select Attributes and make sure to grant it the following permissions.
- Owner- RWX, Group- RX, Global- RX (-rwxr-xr-x).
- Then make sure that the Owner is set to root and Group is set to shell (If not then click on Browse and set it).
- Now, create a new folder in the sdcard directory and rename it to bootlogo (The path should look like this- sdcard/bootlogo).
- Place the downloaded [.zip] files in sdcard/bootlogo (Note- Apart from the downloaded [.zip] files nothing else should be there in the folder).
That’s it! Reboot your device once or twice and you will see the magic. In case you land into any issues please do let me know in the comments section below. I will try to reply as quickly as I can. Feel free to leave a comment if it works, it helps us a lot.


Join The Discussion: