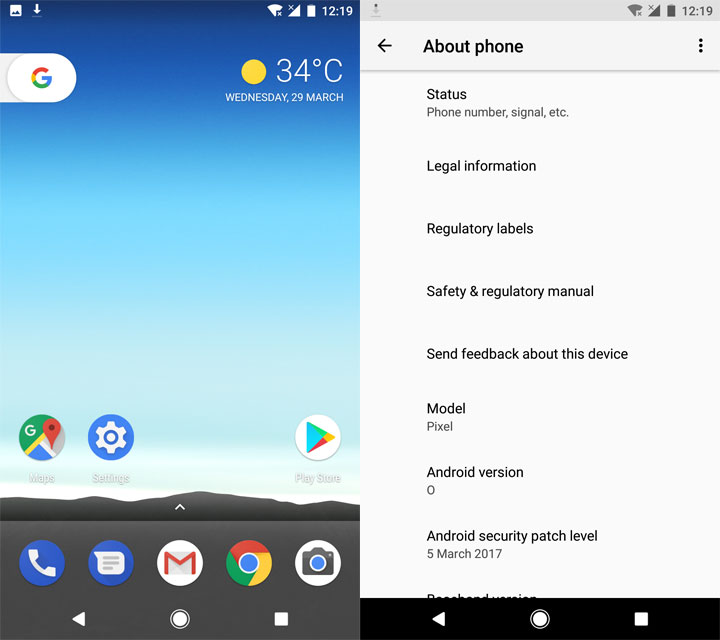
Google recently announced Android O, the next version of Android and the first developer preview is already available for download. The latest version concentrates primarily on notification management, power management and many other little tweaks and UI changes that enhance the user experience. It also comes with plenty of new APIs which the developers can make use of to provide a richer/better experience to the users through their apps. This is a detailed step by step guide on how to install the latest version of Android, Android O, on supported Nexus and Pixel devices.
Is your device supported?
As of now, the following devices have the latest version Android O Developer Preview available for download:
- Nexus 5X
- Nexus 6P
- Nexus Player
- Pixel C
- Pixel
- Pixel XL
Should you install it?
The fact that Google did not release this build through the already existing Beta channel (Android Beta Program) tells a lot. Yes, you will have to manually download/flash the system images onto your device. The first Developer Preview is strictly for developers only. Also, if you are a power user and know your way around Android and can’t wait for Google to release beta builds, go ahead. But be warned, not everything will work the way it’s supposed to, all the time.
Things to keep in mind:
- Flashing the developer preview will completely erase your device’s data. All the apps and data will be permanently deleted. Do make a backup before proceeding.
- Your device’s bootloader needs to be unlocked (if not, steps included in the below guide). Just a heads up that your device’s bootloader will be unlocked.
- Yes, you can downgrade to Android 7.0 anytime you want. But, again, that will reset your device completely as well.
- You must know your way around ADB and fastboot.
Setting up the environment:
As already stated above, this guide needs a working ADB/fastboot environment to work. If you don’t have it already on your computer, go through the below guides and set it up.
- Download Latest ADB SDK Platform-Tools (Win/Mac/Linux)
- How to Setup ADB and Fastboot on Windows within Seconds
- Easily Setup ADB and Fastboot on Mac, Linux and Chrome OS with Nexus Tools
Necessary downloads:
Head on to the Android Developer Website through the below link and download the respective file for your device.
Download Android O Developer Preview
Steps to Install Android O Developer Preview on Nexus and Pixel Devices:
Step 1: [Optional] If the bootloader of your device is locked, go to Settings > About Phone and tap on Build Number 7 times to enable the hidden Developer Options menu. Go back to Settings > Developer Options and tap on the OEM Unlocking option to enable it.
Step 2: On your computer, extract the contents of the Android O Developer Preview factory image inside a new folder called ‘Android’. Make sure all the files are present. Only extract the file you downloaded, no need further extract any compressed files. Below is a screenshot of extracted Developer Preview file for Pixel:
Tip: It is recommended to have the ADB and Fastboot files in the same folder as the above files to ensure a smooth installation. If you encounter any error messages like ‘Command not found’ try placing the ADB and Fastboot files in the same folder as Developer Preview installation files.
Step 3: The next step is to open a fastboot command window. Open the ‘Android’ folder. If you are a Windows user, Shift + Right-click on the empty space inside ‘Android’ folder and select the ‘Open command window here’ option. If you are a Mac user, open up Terminal, type “cd”, drag and drop the ‘Android’ folder inside the window, and then press enter.
Step 4: Reboot your device into bootloader mode. Follow the below key combination as per your device:
- Nexus 5X, Nexus 6P, Pixel and Pixel XL: Volume Down + Power button
Step 5: Connect your device to your PC/Mac using the USB cable. To make sure fastboot is working fine and your device is detected properly, type the below command and press enter on the command window:
fastboot devices
If your device is properly connected, you should see your Android device listed with it ID along with it.
If that doesn’t happen, restart your phone/PC/Mac and try again. That doesn’t work either? Check your ADB/fastboot installation.
Step 6: [Optional] If the bootloader of your device is not unlocked, run below commands in the command window:
fastboot oem unlock
Once you run the above command on your command window, check your phone. Use the volume keys to make your selection and use the power key to confirm your action. Once the procedure is completed, the device will reboot automatically. If it doesn’t, manually reboot it. Once your device is up, reboot your device into bootloader mode again and connect it to your PC/Mac.
Step 7: Now, run the below command to flash the Android N Developer Preview Factory image onto your device.
Windows: flash-all.bat
Linux: flash-all.sh
Mac: ./flash-all.sh
The script will automatically flash the complete contents of the latest Android O Developer Preview on your device.
target reported max download size of 536870912 bytes
sending 'bootloader_b' (32380 KB)...
OKAY [ 1.110s]
writing 'bootloader_b'...
(bootloader) Valid bootloader version.
(bootloader) Flashing active slot "_b"
(bootloader) Flashing active slot "_b"
OKAY [ 4.141s]
finished. total time: 5.254s
rebooting into bootloader...
OKAY [ 0.046s]
finished. total time: 0.047s
< waiting for any device >
target reported max download size of 536870912 bytes
sending 'radio_b' (57240 KB)...
OKAY [ 1.927s]
writing 'radio_b'...
OKAY [ 0.488s]
finished. total time: 2.417s
rebooting into bootloader...
OKAY [ 0.050s]
finished. total time: 0.052s
target reported max download size of 536870912 bytes
archive does not contain 'boot.sig'
archive does not contain 'boot_other.img'
archive does not contain 'recovery.img'
archive does not contain 'system.sig'
archive does not contain 'system.sig'
archive does not contain 'vendor.sig'
archive does not contain 'vendor_other.img'
wiping userdata...
Creating filesystem with parameters:
 Size: 26663190528
 Block size: 4096
 Blocks per group: 32768
 Inodes per group: 8192
 Inode size: 256
 Journal blocks: 32768
 Label:
 Blocks: 6509568
 Block groups: 199
 Reserved block group size: 1024
Created filesystem with 11/1630208 inodes and 146354/6509568 blocks
--------------------------------------------
Bootloader Version...: 8996-012001-1702151126
Baseband Version.....: 8996-012901-1702171013
Serial Number........: FA6A50311884
--------------------------------------------
checking product...
OKAY [ 0.050s]
checking version-bootloader...
OKAY [ 0.048s]
checking version-baseband...
OKAY [ 0.049s]
sending 'boot_b' (25797 KB)...
OKAY [ 0.900s]
writing 'boot_b'...
OKAY [ 0.263s]
erasing 'system_b'...
OKAY [ 0.402s]
sending sparse 'system_b' 1/4 (517746 KB)...
OKAY [ 20.808s]
writing 'system_b' 1/4...
OKAY [ 4.541s]
sending sparse 'system_b' 2/4 (515192 KB)...
OKAY [ 20.958s]
writing 'system_b' 2/4...
OKAY [ 6.959s]
sending sparse 'system_b' 3/4 (515688 KB)...
OKAY [ 22.363s]
writing 'system_b' 3/4...
OKAY [ 6.588s]
sending sparse 'system_b' 4/4 (242306 KB)...
OKAY [ 10.159s]
writing 'system_b' 4/4...
OKAY [ 2.309s]
erasing 'system_a'...
OKAY [ 0.432s]
sending sparse 'system_a' 1/4 (522429 KB)...
OKAY [ 21.326s]
writing 'system_a' 1/4...
OKAY [ 4.100s]
sending sparse 'system_a' 2/4 (517106 KB)...
OKAY [ 23.909s]
writing 'system_a' 2/4...
OKAY [ 4.197s]
sending sparse 'system_a' 3/4 (509060 KB)...
OKAY [ 22.912s]
writing 'system_a' 3/4...
OKAY [ 4.597s]
sending sparse 'system_a' 4/4 (372173 KB)...
OKAY [ 15.655s]
writing 'system_a' 4/4...
OKAY [ 2.945s]
erasing 'vendor_b'...
OKAY [ 0.150s]
sending 'vendor_b' (247696 KB)...
OKAY [ 8.352s]
writing 'vendor_b'...
OKAY [ 3.896s]
Setting current slot to 'b'...
OKAY [ 0.060s]
erasing 'userdata'...
OKAY [ 1.752s]
sending 'userdata' (138957 KB)...
OKAY [ 4.687s]
writing 'userdata'...
OKAY [ 1.296s]
rebooting...

finished. total time: 217.008s
Press any key to exit...
Alternative Way to Flash Factory images
Sometimes, there are chances for the above batch file to throw errors while executing. In that case, run the below commands one by one in the command window:
fastboot flash boot boot.img
fastboot flash recovery recovery.img
fastboot flash system system.img
Once the procedure it completed, the device will reboot automatically. If it doesn’t, manually reboot it by long pressing the power button.
Note: For more detailed instruction on flashing the factory images manually using fastboot, please read this or this tutorial.
Do keep in mind that the first boot will take longer than the usual time, do not panic, this is expected. If you are stuck in bootloop, try the above steps all over again.
In case if you don’t like the Android O Developer Preview or feel like it has too many bugs, you can always go back to the latest stable Android version, Android 7.1.2.
Let us know if the above method worked fine. Feel free to ask any question regarding any step above through the comment section below!


No problem!