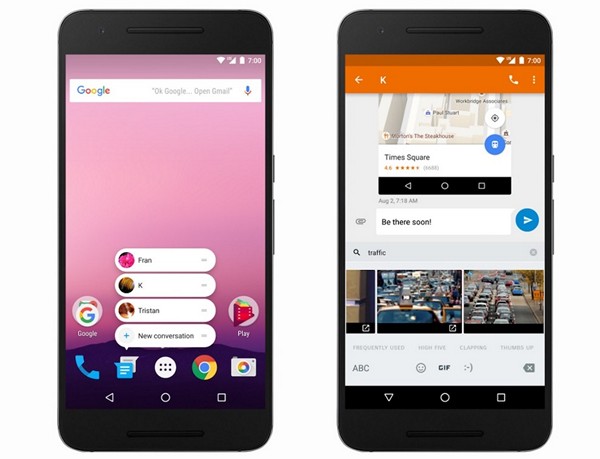
Google released the Android 7.1 Nougat Developer Preview a few days ago. The latest update to the Nougat release comes with some bug fixes and adds a few cool new features like app shortcuts. The Nougat 7.1 Developer Preview is also supposedly improving touch latency and battery life on the Nexus 6P and Nexus 5X.
If you have a Nexus 5X, Nexus 6P or a Pixel C, you can try out the Android 7.1 Nougat Developer Preview now. Follow the steps mentioned below to update to the latest Nougat Developer Preview.
Install Android 7.1 Nougat Developer Preview
There are two methods to install the Android 7.1 Nougat Developer Preview on your Nexus device. Let’s get started with the easier one.
Install via OTA Update
- To get started with installing the Developer Preview on your Nexus devices, you will have to enroll yourself in the Android Beta program first. Head over to the Android Beta program website and sign in with your Google account.
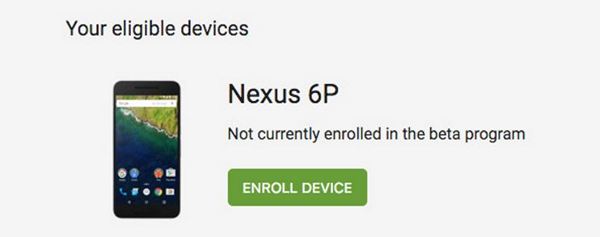
Note: You will have to use the same Google account that you use on your Nexus device. - Once you have signed in, you will find a list of your devices that are eligible for the Android Beta program. Click on the Enroll Device button. Once you do, you will see a pop-up window that displays the Terms and Conditions. Accept them. Now click on Join Beta.
 Note: If you have multiple eligible devices, you can choose to enroll one or multiple devices individually.
 - You will soon receive an Android update notification. Click on it to start downloading the Android 7.1 Developer Preview update.If you don’t receive the OTA update notification, you can check for updates manually as well. Go to Settings -> About -> System Updates and let the phone check for any available updates. If you still don’t see it, you can try to restart your device. This is generally not required.
Install via ADB
The second method to install the Nougat Developer Preview on your Nexus device is a little lengthier but recommended if you know how to deal with ADB.
To get started with this, you will have to download the Nougat Developer Preview image for your device from Android Developer’s Website here.
Note: Download the Factory Images, not OTA images.
- Next, make sure that your device’s bootloader is unlocked. If you haven’t unlocked the bootloader already, follow these tutorials for the Nexus 6P and Nexus 5X respectively.
- Now, you’ll have to reboot your device into fastboot. To do so, first power down the device. Now, press the volume up + down buttons and the power button until you sense a vibration. Now connect the device to your computer.
- Download and extract Minimal ADB in a folder you are comfortable with.
- Using 7zip, extract the downloaded Developer Preview image. You will have to do the extraction twice – the first time you will have to extract the .tgz archive and the second time, you will have to extract the .tar archive.
- Copy all the files to the ADB folder from Step 3.
- You should now be ready to begin the installation.If you’re on Windows, double-click on flash-all.batIf you’re on Linux, double click on flash-all.sh
- This will open a command prompt or terminal and start the installation process. As soon as it is complete, your device will reboot automatically.
- The first boot can take a while, so don’t panic.
Note:
If the flash-all.bat or flash-all.sh method does not work for you, you should try flashing the factory images using ADB and Fasboot commands. You can find a detailed tutorial on installing the factory images on your Nexus Device here.
At the moment, Google supports Nexus 6P, Nexus 5X, Nexus 6, Nexus 9, Pixel C, Nexus Player and General Mobile 4G (Android One). If you have one of these devices and still don’t see it in the list, go to Google Play settings and make sure you have not hidden it.


Join The Discussion: