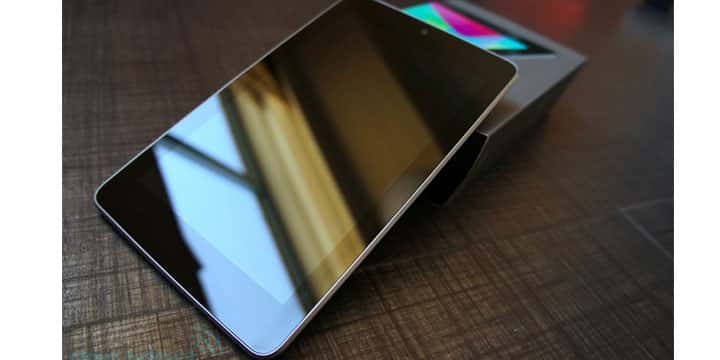
As seen earlier, Google has been rolling out Android 6.0.1 Marshmallow update to it’s Nexus devices. Though the OTA update isn’t big, weighing around 75 MB, it comes with some crucial security patches and stability improvements. Following the Nexus 6P and the Nexus 5X that received the update yesterday, other Nexus devices like the Nexus 9, and Nexus 7 have received the update earlier today.
Now here we are with the OTA installation method for the the Nexus 7 2013 WiFi and LTE (Mobile) variants. However, if you are looking for a clean installation using the factory image, then we have also included a tutorial on how you can successfully flash the factory image.
You can manually check the updates from the Settings app. Go to Settings> About Phone> Software Information/Updates. Tap the updates option and check if the update appear on your device. If you don’t see any action in there, then go through the methods listed below.
Before we begin verify which firmware you are coming from and flash the OTA accordingly. The MMB29K is the latest Android 6.0.1 Marshmallow firmware for the Nexus 7.
Warning: We at DroidViews won’t be liable for any damage to your device whatsoever. A full backup is highly recommended as it will wipe all of your app and system data. Reader’s discretion is advised.
- Nexus 7 2013 WiFi
- Nexus 7 2013 (LTE)
- MMB29K (6.0.1) for Nexus 7 2013 WiFi codename: razor
- Official Factory Image — Download | File: razor-mmb29k-factory-a39e7047.tgz
- MMB29K (6.0.1) for Nexus 7 LTE codename razorg
- Official Factory Image — Download | File: razorg-mmb29k-factory-44d21f0a.tgz
Method 1: Install Android 6.0.1 Marshmallow Update on Nexus 7 with Stock Recovery [OTA]
- Make sure you do not have any security updates available for your phone prior to Android 6.0.1 Marshmallow. If available, apply these updates to your phone.
- Download the OTA zip file from the download section for your device. Verify the build number you are coming from.
- Transfer the OTA zip file from your PC to your phone’s storage or SD card if applicable. Place the file where you can easily locate it.
- Now, you need to boot your Nexus device into Stock Recovery mode. To boot into recovery, restart your device and press the Volume Down button while booting up. Or you can try Step 3-4 in next method or refer to the note given below Method 2.
- Once your phone boots into Recovery Mode, Select Apply Updates from phone’s storage and navigate to the OTA file you just saved on your phone. Use the volume keys to navigate and power key to confirm the action.
- The installation process will start on your device and take a few minutes.
- Once the installation is completes, it will automatically reboot. Otherwise, go back and reboot to system
If after this update the system does not boot, a factory reset might just work. If this method works for you then you can enjoy your new firmware. However, if it fails or gives an error, then refer to method 2.
Method 2: Install Android 6.0.1 Marshmallow Update on Nexus 7 with adb sideload [OTA]
This is another method to install OTA updates. To make this method work, you need to setup adb environment on your PC. You need to sideload the updates manually to your system.
Prerequisites
- Set up ADB and Fastboot on your computer. You can install the full Android SDK package from Google through this link, or get the quick adb and fastboot installer from here. For Mac or Linux OS, click here.
- Install latest Nexus USB Drivers on your computer. This is important to detect the phone.
- Open Settings> Developer options and enable USB Debugging on your device. To enable developer options, tap the Build Number multiple times (approx. 7 times) in About Phone.
Installation Instuctions
- Make sure you have setup ADB and Fastboot environment on your PC. Download the OTA package and place the file in the same directory where the adb is installed.
- Power off your device and keep it unplugged from your PC.
- Boot into stock recovery. To do so, press and hold volume down and the power button for 5-6 seconds. (Refer to the note given below this method)
- Now on the next screen, select the stock recovery option which will boot you into the recovery.
- Once into the stock recovery, select the option apply update from adb.
- Now plug in your device to the PC using a USB cable.
- Navigate to the location where your adb and fastboot is installed on your PC. While the folder with adb and fastboot files is open, hold shift key on keyboard and right-click on an empty space and select “Open command window here” option to launch a command prompt window.
- Now check your adb connection by issuing the following command. It should return device information. Otherwise, you need to make sure your drivers are installed correctly.
adb devices
- Issue the following command to install the updates
adb sideload ota.zip - This will flash the ota update to your system. “ota.zip” is the name of the file. Make sure you either rename the file to “ota.zip” or type the name of the file exactly with proper extension.
- Once the installation completes, reboot to system.
For Mac or Linux users, setup adb and issue the “./adb sideload ota.zip” command without quotes.
Note to boot into recovery mode:
- Power off phone
- Press Vol Down + Power keys until you get into the select menu and then stop pressing buttons
- Vol Down to Recovery and press power
- When KO’d Droid appears, press and hold Power and quickly tap Vol Up keeping power pressed. As soon as the menu pops up release power
- Vol Down to update from ADB
- Plug into Windows PC or Mac
Now that you have installed the OTA update, you can now enjoy Android 6.0.1 Marshmallow on your device. If you want a clean installation then go through the factory image installation procedure.
Flash Factory Image For Android 6.0.1 Marshmallow Update on Nexus 7 [Full Firmware]
This procedure will flash factory image on the Nexus 7. It will perform a clean firmware installation and hence all your data and apps will be lost. So make sure you backup everything on your PC. Go through the prerequisites mentioned in the Method 2 and then proceed with the instructions below.
Installation Instructions
- Download the factory image from above and transfer it to your PC.
- Make sure you have setup ADB and fastboot on your PC. Also accept Always allow from this computer when you plug in the device for the first time to enable USB Debugging.
- Now power off your device and unplug it from your PC.
- Boot into the bootloader or fastboot mode. To do so, press and hold volume down and the power button simultaneously for 5-6 seconds. When you see the bootloader screen, connect your device to the PC using a USB cable.(Choose fastboot if option is available). Alternatively, you can also issue the following code while connected to the PC, to boot into the bootloader provided your device is turned and connected to PC. Open command prompt and issue the command.
adb reboot bootloader
- Now plug in your device to the PC and let the drivers install.
- Navigate to the location where you have placed the factory image file on PC and extract it to get files with .img.

- While the folder with the extracted factory image is open, run the flash-all.bat file on Windows PC and confirm the flashing process. Wait for the process to complete. If you use Linux or Mac OS, run the flash-all.sh file and follow the instructions.
- Once done, reboot the device normally. Once you see the new boot logo, that means the system has successfully been installed.
First boot may take a while, so be patient. If necessary, you may need to unlock bootloader on your Nexus 7 if the method fails.
For queries, comment down below. If we have helped you, then like and share us on social platforms. If you need help with other devices, let us know.


Join The Discussion: