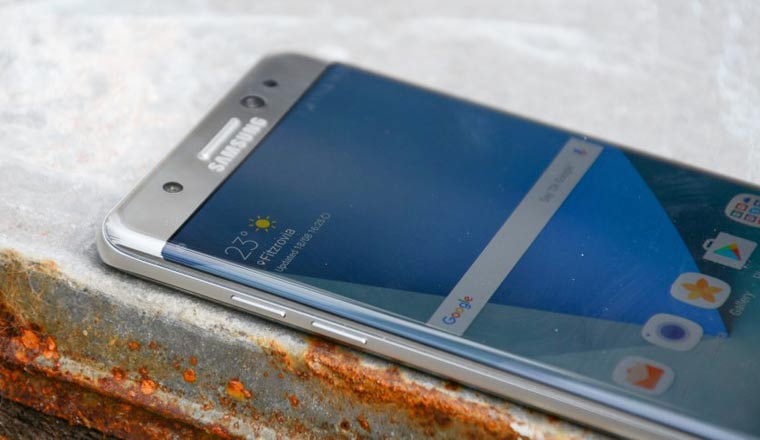
The Galaxy Note 7, the latest addition to Samsung’s Note lineup, is already out for a while now. The phone was released with Android Marshmallow based Grace UX and now the manufacturer has started pushing an incremental update for the device.
Along with other parts of the globe, the new update with build version N930W8VLU1APH1 is now being rolled by the Canadian carriers like Bell Mobile, Virgin Mobile, Rogers, Telus, Fido Mobile, Wind Mobile, Videotron, SaskTel, Koodo, EastLink, etc.
If you own the Canadian Galaxy Note 7 (SM-N930W8), and don’t know how to update Samsung devices or restore them to stock manually, this tutorial is just for you.
Disclaimer
The firmware installation described below is common for all Samsung Galaxy devices, but the firmwares are strictly meant to be installed on specific carrier variants of the Galaxy Note 7 SM-N930W8 only.
Before you jump to the installation steps below, make sure to read the entire tutorial first and make the necessary preparations beforehand. If you follow the procedure carefully, there is hardly any risk. However, if you are careless, or miss or skip any step, you’ll undoubtedly end up in a mess. Follow the tutorial at you own risk and don’t hesitate to clear your doubts if you have any.
Download Marshmallow Firmware for Note 7 SM-N930W8
Firmware details:
- OS Version: Marshmallow (Android 6.0.1)
- Country/Region: Canada
- Release Date: 18.08.2016
- PDA: N930W8VLU1APH1
- CSC: N930W8OYA1APH1
- Phone: N930W8VLU1APH1
As you can see above, the released firmware’s build version is N930W8VLU1APH1 and you can download it for your Canadian Galaxy Note 7 below.
Bell Mobile Galaxy Note 7 SM-N930W8: Link | Mirror
Virgin Mobile Galaxy Note 7 SM-N930W8: Link | Mirror
Rogers Galaxy Note 7 SM-N930W8: Link | Mirror
SaskTel Galaxy Note 7 SM-N930W8: Link | Mirror
Telus Galaxy Note 7 SM-N930W8: Link | Mirror
Koodo Mobile Galaxy Note 7 SM-N930W8: Link | Mirror
Fido Mobile Galaxy Note 7 SM-N930W8: Link | Mirror
EastLink Galaxy Note 7 SM-N930W8: Link | Mirror
Globalive Wind Mobile Galaxy Note 7 SM-N930W8: Link | Mirror
Videotron Galaxy Note 7 SM-N930W8: Link | Mirror
Things You Need
- Canadian Galaxy Note 7 SM-N930W8
- The stock USB cable that came with your phone.
- A Windows computer.
- If you own a Mac instead, you can use Heimdall or the Java version of Odin from here.
Getting Prepared
- Download the appropriate firmware for the Canadian carrier your Galaxy S7 is branded to from above and extract the zip.
- Download Odin 3.10.7 from here and extract the zip.
- Make sure you have the latest Samsung Kies or USB Drivers installed on your PC. In case you have Kies in your PC, make sure it’s closed while using Odin.
- Enable USB Debugging found under Settings> Developers options in your Samsung Galaxy Note 7. See the detailed tutorial here.
- Installing the stock firmware does not wipe any data or installed apps, but you should still backup them as a precaution.
- Also, your phone must have at least 60% battery juice left on it before you begin.
Install Marshmallow on Canadian Galaxy Note 7 SM-N930W8
Having taken care of the preparatory steps described above and downloaded the firmware, you’re all set to install it on your device. Just follow the easy steps given below.
- Open the Odin folder and launch Odin 3.10.7.exe as administrator.
- Now turn off your Galaxy S7 and boot it into the Download mode. To do so, hold the Volume Down + Home buttons together and then press the Power key. Keep the 3 keys pressed for 2-3 seconds and then you will see a warning screen with a yellow exclamation mark. Now press the Volume Up key to enter the Download Mode.
- Connect your phone to the PC using the USB cable.
- When your device is detected by the computer, the ID:COM port in Odin will turn blue and you’ll see “Added!” in Odin’s message box. In case Odin does not detect your phone, try reinstalling the USB drivers, rebooting the computer and trying a different cable.
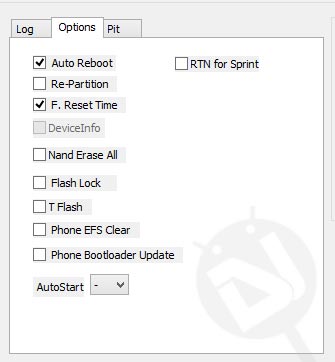
- Click the Options tab in Odin and make sure that only Auto Reboot and F. Reset Time options are selected.
- Now click the AP button in Odin and select the firmware file with .tar.md5 extension.
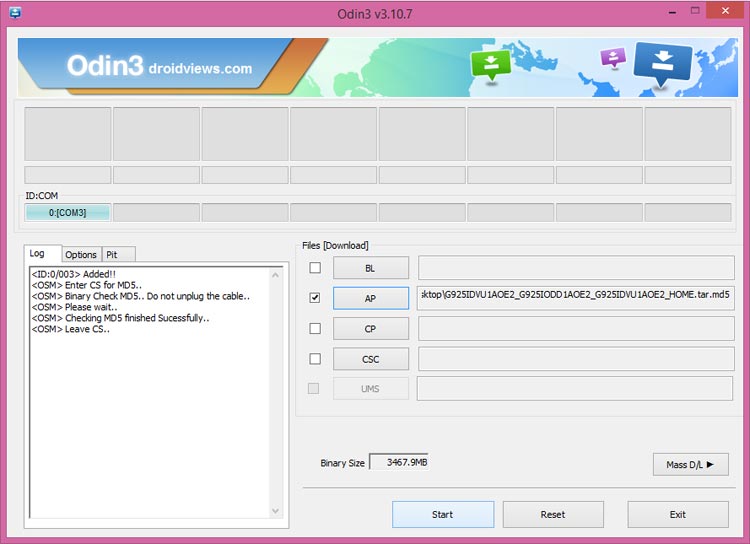
- Take a calm breath and click the Start button to trigger the installation.
- Now wait patiently as it might take 4-6 minutes for the installation process to complete.
- When the firmware is installed on your Galaxy Note 7, Odin will greet you with PASS! message to indicate a successful installation.
- It’s the time when your phone will reboot automatically. You need to be patient again because it sometimes takes a while until your device reboots.
Done! In case you get a FAIL! message in Odin, start from Step 1 again and make sure that you don’t commit any mistake. Sometimes, the device doesn’t get past the Samsung/carrier splash screen even after PASS! message in Odin. To fix this issue, perform a data factory reset via stock recovery. You can find the detailed tutorial for doing the same here.



Join The Discussion: