Huawei P9 and its big brother Huawei P9 Plus are two of the premium smartphones by the Chinese manufacturer and also the company believes that these two smartphones can provide a tough powerful competition to the rivals just like the galaxy and Note series phones from Samsung. The company’s coming into the premium smartphone market with these phones and it appears they’re going the correct path as each the phone’s features are very nice and also have a great specification.
In this tutorial, we will describe the steps to root Huawei P9 and P9 Plus and install TWRP recovery on these devices. Once TWRP is installed, you can flash the SuperSU zip to root your device. You’ll also need to decrypt your device, so you’ll need to format it. So, make sure to copy all the important files to a safe place. Before proceeding further, unlock the bootloader on your device to able to flash the TWRP image. You can find the in-depth guide from the below link.
Prerequisites
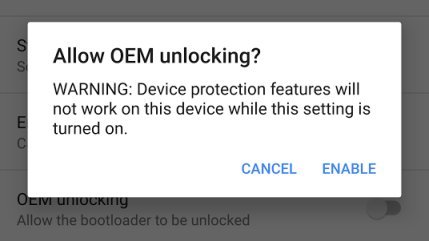
- Go to Settings » About phone » Build number and tap it 7 times to enable Developer options on your device. Then go back to Settings » Developer options and enable USB Debugging and OEM unlocking.

- Download the Minimal ADB and Fasboot Setup and install it on your computer.
- Install Huawei P9/P9 Plus smartphone drivers on your PC.
- Backup important files on your device to a safe place as unlocking the bootloader will format your entire device.
- Make sure you have enough charge on your device before starting the process.
Downloads
Download the required binaries, custom TWRP, and SuperSU files on your PC from below.
Steps to Root Huawei P9 and P9 Plus and Install TWRP
- Download the TWRP fastboot image from the Downloads section and transfer it to the same folder where you have installed ADB & Fastboot files. Rename it to twrp.img for your convenience.
- Connect your device to the PC.
- Navigate to the folder where you’ve extracted the ADB and Fastboot files and open a command prompt by pressing Shift + Right click on any empty space inside the folder and select Open command window here from the context menu.
- Use the below command to reboot your device to bootloader/fastboot mode.
adb reboot bootloader
- In fastboot mode, use the below command to check if your device is connected or not. It should return your device serial number if everything’s good.
fastboot devices
- Now, flash the TWRP recovery on your device with the below command.
fastboot flash recovery twrp.img
Don’t reboot your device now. Just enter the recovery mode from here.
- Once the recovery is flashed, remove the battery from the device and reinsert it. Press and hold the Power+Volume Down buttons until Huawei logo appears. Then release the power button for a second before holding it again to enter TWRP recovery.
- In TWRP recovery, it will ask you if you want to enable system modifications. Make sure to swipe to allow modifications or TWRP will be replaced in the next boot.

- Perform a factory reset by using the “Format Data” option under the Wipe menu in order to disable device encryption.
- From the TWRP main menu, reboot the recovery.
- Once you’re in TWRP again, copy the SuperSU zip to your device using MTP mode. At this step, don’t try to reboot your device or you’ll end up in a boot loop.
- In TWRP, click Install and flash the SuperSU zip that you’ve downloaded to permanently root your device.
- Finally, you can reboot the device from TWRP main menu.
That’s it. You’ve successfully installed TWRP and rooted your Huawei P9/P9 Plus
Read Next: How to Flash Zip Files without TWRP or Any Custom Recovery


can’t boot to twrp after flashing (cmd says all was OK), it boots to eRecovery…what a shame