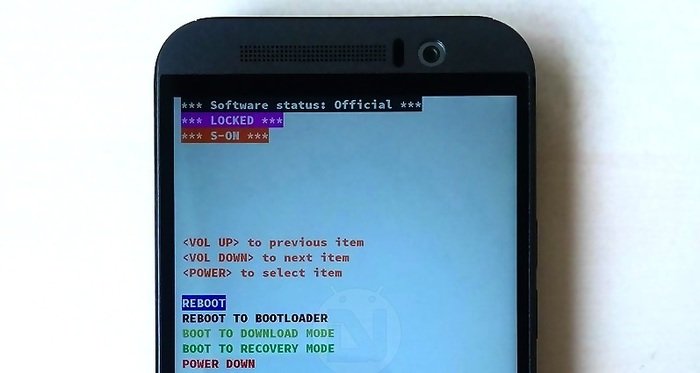
HTC is one of the smartphone manufacturers which is keenly determined to secure the software on their devices. Every HTC smartphone is shipped with a locked bootloader and comes with various security layer to detect any illegal and unauthorized software tampering. If you hold an HTC M9 in your hand, reboot to the bootloader mode and you’ll see Software Status at the top. It will be market as Official by default but will turn to Modified once you tamper with the device.
However, HTC can’t block the developers forever and soon there came many methods to change this status bit. But with HTC One M9, HTC has once again covered many rat holes and left a challenge to developers. Luckily, scotty1223 of XDA has succeeded in restoring the software status to Official but the process is a little complex than before. This method will be a bit hectic but nothing’s too hard to learn if we are determined, right?
We’ve recently covered an article on how to restore HTC One M9 to stock, you can find it from the below link:
In this method, you don’t need to install an RUU and lose everything on your device. You can simply and accurately fix the software status by going as deep as a machine level language which has crazy HEX codes. So, if you’re ready to bring back the Official status of your bootloader, follow the guide carefully.
Warning
The procedure described in this tutorial is considered risky and making even a single mistake in modifying the HEX code or executing the commands might brick your device. We are not responsible for any misfortunes, proceed with extreme caution and play safe.
Prerequisites
- Charge your HTC One M9 above 60% battery level to avoid shutdowns during the process.
- Download and install HTC USB Drivers on your computer. If you have installed HTC Sync, uninstall it temporarily to avoid any problem.
- Enable USB Debugging on your device.
- Set up ADB drivers on your PC or download and extract the ADB and Fastboot tool on your PC.
- Root your HTC One M9. If you haven’t rooted your device yet, follow this tutorial.
- Download and install HxD – Hex editor.
How to Restore Software Status to Official on HTC One M9
- Navigate to the folder where you’ve extracted the ADB and Fastboot files and open a command prompt by pressing Shift + Right-click on any empty space inside the folder, and select Open command window here from the context menu.
- Connect your device to the PC using a USB cable and make sure the device is detected by the PC. If not, reinstall the drivers on your device and try again.
- Now the first task is to get the P8 file from your device. So, execute the following commands in the command prompt one by one:
adb shell
su
Upon entering the su command, you may get a SuperSU request on the device, grant it.
dd if=/dev/block/mmcblk0p8 of=/sdcard/mmcblk0p8
exit
You should exit the adb shell by now and enter the windows command prompt. If not, type another exit command as shown below:
exit
- The P8 file is now in your SDcard, you can simply transfer it to your PC by executing the below command in the command prompt. The file will be saved in the same folder where you placed the ADB files.
adb pull /sdcard/mmcblk0p8
- Open the file with HxD editor and search for the 00408400 string. You’ll see something similar to the below code:

- An important step, be careful: The numbers 68 25 32 C6 are constant and not to be fiddled with. The fifth digit (location 00408404) is our tampered flag. This could be anything, but on M9 it’s usually a 10 or 08 but that’s not important, we just need to change it to a 00. So overwrite the existing value with a 00 and save the file as mmcblk0p8mod.img (mmcblk0p8mod is the name and img is the extension)
- Kindly be careful while following the previous step, even a single blank character would lead to a bricked device. So, carefully change the value to 00 and nothing else. After modification, you should have the code as below:

- Finally, you have to push the modified P8 file back to your device. To do this, first boot your device to bootloader mode using the below command:
adb reboot bootloader
- In fastboot mode, enter the following command to flash the modified P8 file to your device.
fastboot flash pg2fs mmcblk0p8mod.img
- To check if you’ve completed the quest, enter the below command to reboot the bootloader again:
fastboot reboot-bootloader
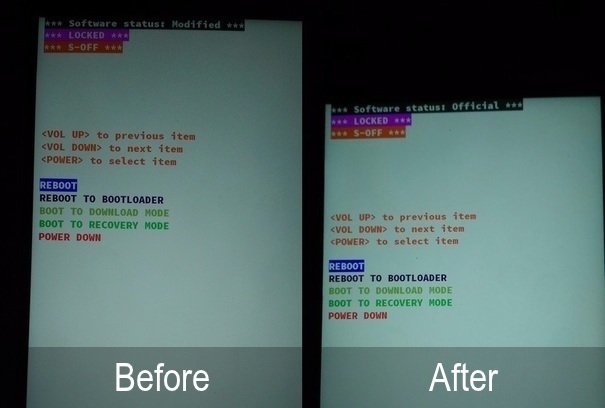
- You should now see *** Software status: Official *** at the top of your device’s bootloader.
It’s quite a process, right? But the end result is what you anticipated. We’ve laid out the steps as simple as possible but make sure you’ve followed everything carefully. Check the below picture for the before and after of your bootloader.
Let us know of any issues regarding the process in the comments section below.


shell@htc_hiau_ml_tuhl:/ $ su
/system/bin/sh: su: not found
yeah same here… exact same error message “FAILED (remote: 35: SD_PARTITION_NOT_SUPPORT pg2fs” any help would be great 🙂
Followed the directions but it didn’t work. Here is the result when I tried flashing back to my M9:
C:platform-tools>fastboot flash pg2fs mmcblk0p8mod.img
target reported max download size of 800000000 bytes
sending ‘pg2fs’ (24255 KB)…
OKAY [ 2.076s]
writing ‘pg2fs’…
(bootloader) HOSD CL#560065
FAILED (remote: 35: SD_PARTITION_NOT_SUPPORT pg2fs)
finished. total time: 3.089s