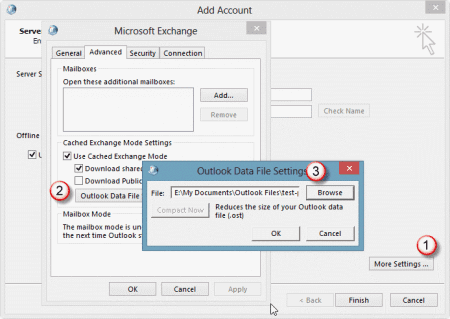
Outlook stores an offline storage table (.ost) file that keeps a copy of all Exchange, Outlook.com, or IMAP mailbox items on your local machine. The OST file allows you to access emails, compose messages, and change settings even if your system isn’t online.
In this post, we have discussed a few methods to move an OST file of an Exchange, IMAP, or Outlook.com account to a different PC or Outlook profile, Exchange, or Office365 account.
The default location of the OST file,
In Outlook 2007 and 2010, the OST is located at the folder location,
C:\users\YourUsername\AppData\Local\Microsoft\Outlook
In Outlook 2013, 2016, and 2019, you can find the OST at the following location,
C:\users\YourUsername\Documents\Outlook Files
Methods to Move OST File
As per Microsoft, you cannot import mail items from an offline Outlook data file (.OST). You must export all your Exchange servers, Outlook.com, or IMAP account email folders and mailbox items to PST file format via Outlook Import/Export wizard.
Then you can import the PST file into your new Live Exchange, Outlook.com, or IMAP account via Outlook PST import wizard.
Personal Storage Table or PST is an Outlook data file that is used to store backup mails and migrate Exchange, IMAP, and Outlook.com accounts to a different user account or PC.
Alternatively, you can use Stellar Converter for OST Technician software. The software helps export OST file directly to a different IMAP Outlook profile or Live Exchange account with 100% precision and integrity.
Method 1: Add ForceOSTPath Registry Value
The method helps relocate an OST file on a PC. It helps change the default OST location to user-desired location without any error.
When to Use:
- Follow the method when you want to change the default location of OST file on the same PC to a different volume or folder path
Steps to move OST file to a different folder path or volume on a PC:
- Press the Windows + R button, type regedit, and press ‘Enter’
- Navigate to
- Outlook 2016 Users
- HKEY_CURRENT_USER\Software\Microsoft\Office\16.0\Outlook
- Outlook 2013 Users
- HKEY_CURRENT_USER\Software\Microsoft\Office\15.0\Outlook
- Outlook 2010 Users
- HKEY_CURRENT_USER\Software\Microsoft\Office\14.0\Outlook
- Outlook 2007 Users
- HKEY_CURRENT_USER\Software\Microsoft\Office\12.0\Outlook
- Outlook 2003 Users
- HKEY_CURRENT_USER\Software\Microsoft\Office\11.0\Outlook
- Outlook 2016 Users
- Right-click on the Outlook sub key, choose ‘New’, and then click the Expandable String Value option

Figure 1: Add New Registry value
- Specify ForceOSTPath and click ‘OK’
Figure 2: Add registry value
- Right-click the ForceOSTPath and select Modify
- Specify OST file path for saving in the Value box. Click the OK button
- Close the registry editor window
Method 2: Via Outlook Import/Export Wizard
Outlook features an Import/Export wizard that helps export mailbox items to PST file format. Follow these steps to export OST mailbox items to Outlook importable PST file.
When to Use:
- Follow the method when you want to change the PC or want to move OST file data to a different Live Exchange, Outlook.com, or IMAP account.
- This method works only if your Exchange server, Outlook.com, or IMAP account on Outlook is accessible.
NOTE: This method does not export meta-data such as message rules, blocked lists, and folder properties to PST file format. Also, the method can’t convert an orphaned or inaccessible OST to PST.
Follow these steps to export PST via Outlook,
- Launch Outlook and go to ‘File>Open & Export>Import/Export’

Figure 3: Import/Export Outlook Data File
- Select ‘Export to a file’ and click ‘Next’

Figure 4: MS Outlook Import/Export Wizard
- Select ‘Outlook Data File (.pst)’ and click ‘’

Figure 5: Export OST to PST
- Select the mail account, click ‘Include subfolders’ checkbox and then click ‘Next’

Figure 6: Select Outlook Mail items for export
- Click ‘Browse’ to select a save location and then click ‘Finish’

Figure 7: Browse PST save location
You may enter a password to protect the exported PST file from unauthorized import. This step is optional. You may click ‘OK’ without entering the password.
Steps to Import PST in Exchange Server, Outlook.com, or IMAP Account on Outlook
- Open Outlook and sign in, if not already
In Outlook 2007 & 2003
- Click ‘File > Import and Export…’

Figure 8: Import-Export Outlook 2007 & 2003
- Select ‘Import from another program or file’ and click ‘Next’
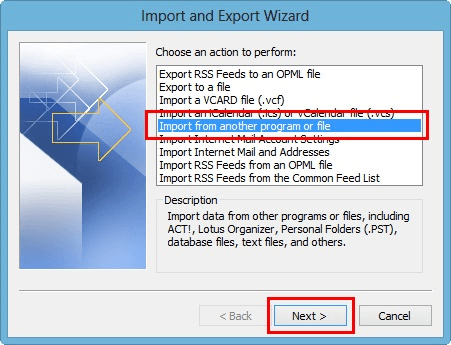
Figure 9: Import PST in Outlook 2007 & 2003
- Select ‘Personal Folder File (.pst)’ and click ‘Next’

Figure 10: PST Import Wizard Outlook 2007 & 2003
- Click ‘Browse’ and select the PST file

Figure 11: Browse PST file to import
- Choose the desired Outlook profile where you wish to import PST. Make sure to click on ‘Include subfolders’ checkbox and then click ‘Finish’

Figure 12: Select the mail folder
In Outlook 2010
- Go to File>Open>Import

Figure 13: Import option in Outlook 2010
- Select ‘Import from another program or file’ and click ‘Next’

Figure 14: Importing PST to Outlook 2010
- Select ‘Outlook Data File (.pst)’ and click ‘Next’
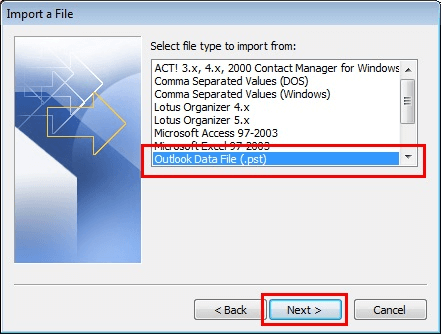
Figure 15: Outlook Import Wizard 2010
- Click ‘Browse’ to choose the PST file and click ‘Next’
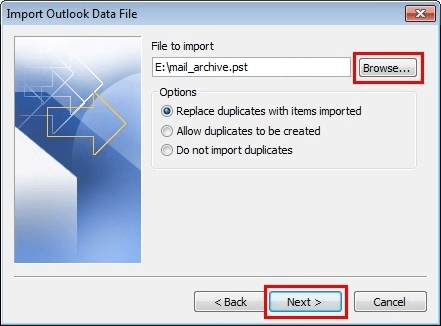
Figure 16: Browse PST file in Outlook 2010
- Select email profile, click the ‘Include subfolders’ checkbox and then click ‘Finish’
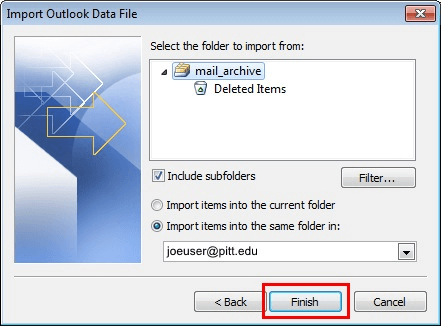
Figure 17: Select Email profile
In Outlook 2013, 2016, and 2019
- Go to ‘File>Open & Export>Import/Export’
- Select ‘Import from another program or file’ and click ‘Next’
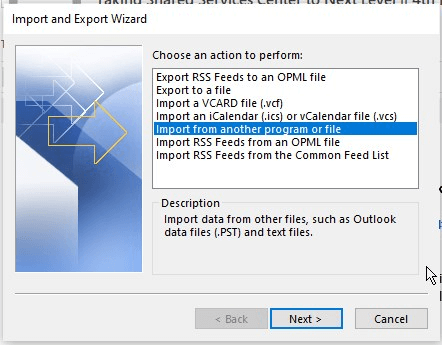
Figure 18: Import Wizard Outlook 2013, 2016, & 2019
- Click ‘Browse’ to choose the PST file and click ‘Next’
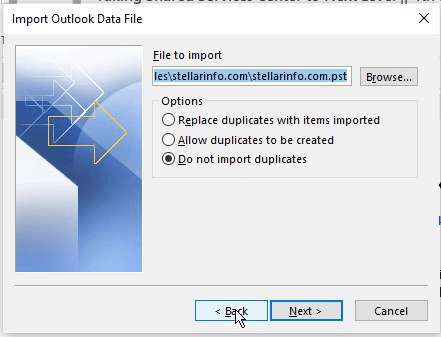
Figure 19: Browse PST to import
- Select Outlook profile and click ‘Finish’
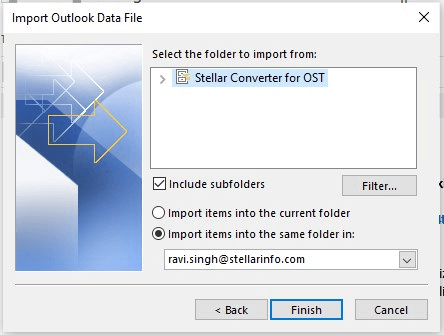
Figure 20: Select Email Profile
Method 3: Move Inaccessible OST File Directly to Live Exchange, Outlook.com, or IMAP Outlook Profile
OST converter tool such as Stellar Converter for OST comes handy when the OST file is inaccessible, orphaned, or you need to move multiple OST files to a different PC or Exchange, Outlook.com, or IMAP user account. It converts OST file to PST and other formats.
There are two editions of the software: Corporate and Technician. The Technician version also lets you export the converted OST mailbox items directly to the existing IMAP Outlook profile, Outlook.com account, or Live Exchange server.
Prerequisites:
- Microsoft Outlook Installation
When to Use:
- Follow this method when OST file isn’t accessible or Outlook doesn’t start. Also, when your Live Exchange or Outlook.com account is deleted and you want to move mail items from an orphaned OST to Live Exchange, IMAP, or Outlook.com account
Steps to move Exchange, Outlook.com, or IMAP OST file by using Stellar Converter for OST Technician,
- Install and launch Stellar Converter for OST software
- Click ‘Browse’ and choose the OST file
You may also select the ‘Batch Conversion’ option to convert multiple OST files to corresponding PST files.
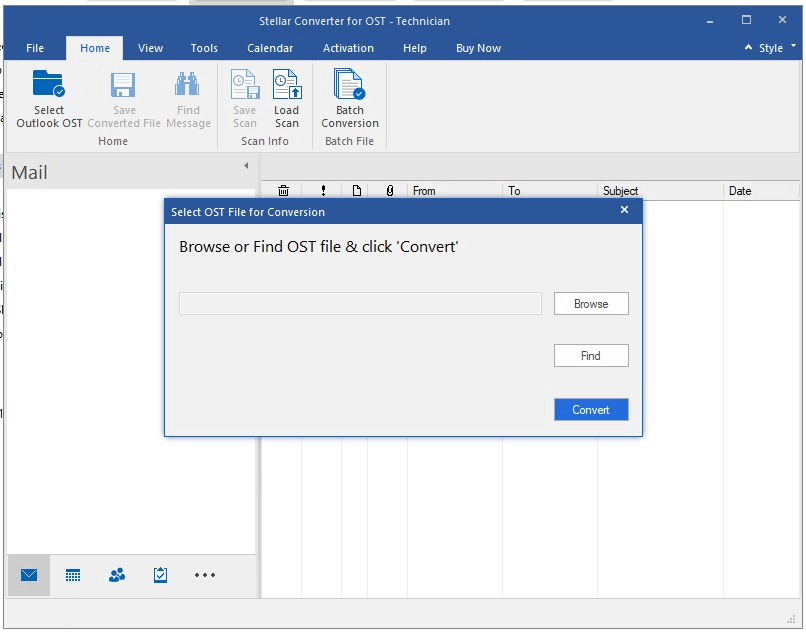
Figure 21: Choose an OST File
- Click ‘’ After conversion, a message box appears. Click ‘OK.’ Now you may click on a mail to see its preview before exporting
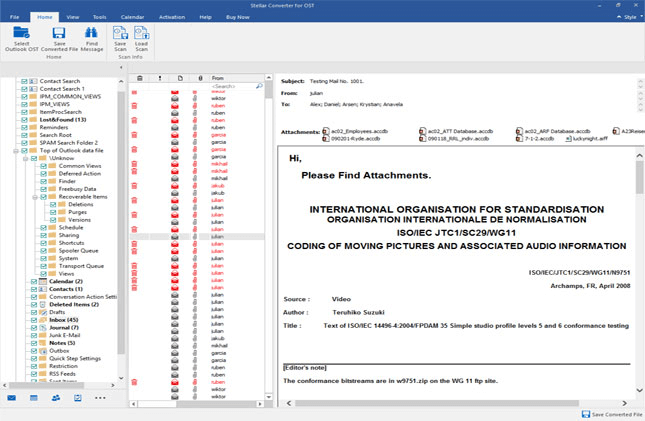
Figure 22: Preview mail items after the scan
- Click on the ‘Save Converted File’ button under the ‘Home’ tab

Figure 23: Save Converted File
- Choose PST, Live Exchange, Outlook.com, or Outlook Profile option to export OST file
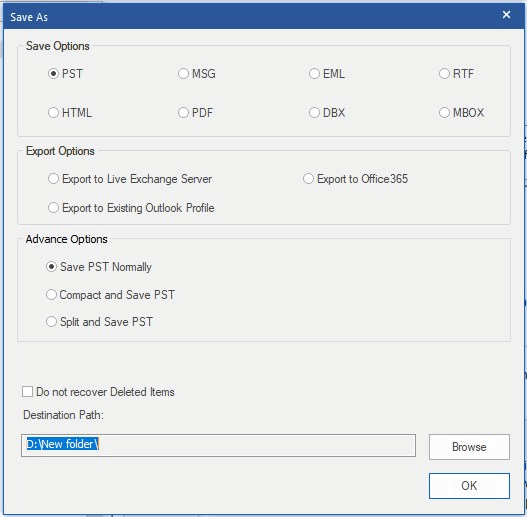
Figure 24: Select the desired export option
- If you’ve selected PST, choose a save location and click ‘OK’ to begin exporting mail items to PST file format. Then follow the steps mentioned above to import PST into new Outlook account.
- If ‘Export to Live Exchange Server’, or Export to Office365’, enter valid credentials to export the OST file.
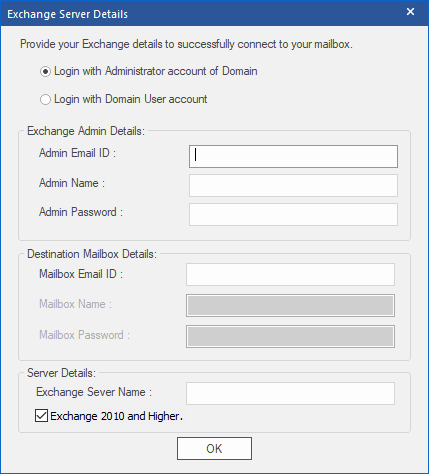
Figure 25: Enter Live Exchange Credentials
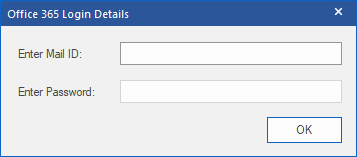
Figure 26: Enter Office365 Credentials
- If ‘Export to Existing Outlook Profile’, click ‘OK’ to select the desired profile on the PC and click ‘OK’ and ‘OK’ again to move OST file contents.
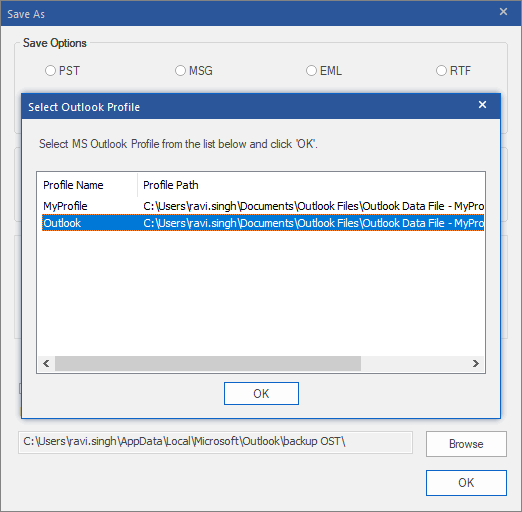
Figure 27: Select Outlook profile
Conclusion
Moving an OST file of an Exchange server, Outlook.com, or IMAP account on Outlook directly to a different user or PC is not possible without the help of a third-party tool. However, you may export OST mail items to PST to move all the mailbox items of OST file to new Live Exchange, Outlook.com, or IMAP account, which is discussed in this post.
The OST file is first converted into Outlook importable PST file format.
You may use an OST converter tool discussed in the post to export an OST file directly to your Live Exchange, Office365, or IMAP Outlook profile. It also helps migrate multiple OST files to corresponding PSTs in a few clicks, with 100% integrity and precision.
*This is a sponsored post

Join The Discussion: