ASUS a Taiwanese company recently launched its newest flagship in May 2016, ASUS Zenfone 3. This device packs a lot of great specs and features and is best in its class. The Zenfone 3 comes with Android M out of the box which runs on ASUS’s custom UI also known as Zen UI 3.0. Till now it is the latest from ASUS.
As we all know all the smartphones release OTA Updates which includes bug fixes, tweaks, improved performance, and battery life. Similarly, ASUS had its first Over The Air Update for the Zenfone 3 release a few days earlier. In this post, we will be talking about how we can get the update on your Zenfone 3 device.
Steps to Update Zenfone 3 (OTA)
- Check for updates on your device. To do so navigate to Settings> About> System Update.
- A pop-up with a headline of ASUS system update will appear.
- Click on yes and the update will start to download (Connect to Wi-Fi to avoid data charges).
- After the update has been downloaded click on the upgrade button (Make sure your battery is more than 60%).
That’s It! Just wait for the update to install and you will be all set to roll out. Booting may take some time so have patience.
Many times people brick their phones while rooting, flashing kernels and ROM’s. Reverting back to the stock firmware isn’t easy when your phone does nothing more than showing a dead droid logo. Further, in this post, we are going to revive that dead droid.
Prerequisites
- Enable USB Debugging on your phone by going to Settings> Developer options. In case you do not find the developer options, go to Settings> About> Software Information and tap the Build Number 7 times to enable it.
- Check for your device model and make sure it is ASUS Zenfone 3 ZE552KL (Z012D) [To do so navigate to Settings> About> Model Number)
- Keep the battery level of your Zenfone 3 above 60%.
- Intel USB Driver for Android
- ADB Fastboot Files
- Zenfone 3 Stock Firmware
Steps to Flash Stock Firmware on Asus Zenfone 3
Method 1:
- Download the firmware zip file from above or get your preferred firmware from somewhere else.
- Now place the downloaded firmware with a .Zip extension to your phone’s internal storage. Make sure not to copy the file in some folder or sub-folder.
- Then reboot your phone.
- When your Zenfone boots up, it’ll automatically detect the firmware file and it’ll prompt you to install the firmware.
- All you need to do is to tap the Install option.
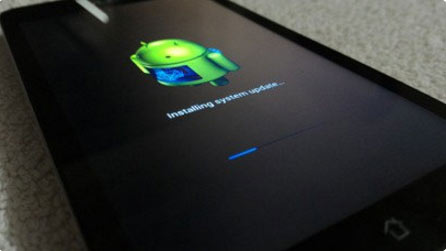
- Your device will then reboot and the installation process with start. While the process continues, you’ll see standing Android on the screen and it might take up to 30 minutes, so you need to wait patiently until it is completed.

- When the installation progress bar reaches 100% level, your device will reboot automatically and will halt on the Asus logo for 5-8 minutes. You’ll then be greeted by the message “Android is upgrading…”. Once the apps on your phone are optimized, you’ll be able to use the device. Done!
If the above method doesn’t work for you, try the one described below.
Method 2:
- Download your preferred firmware.
- Turn off your Zenfone 3.
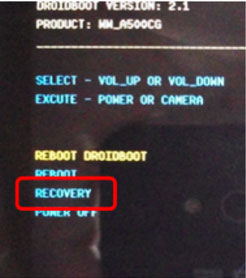
- Boot into the fastboot/bootloader mode by holding the Volume Up+Power buttons for a few seconds. Keep the buttons pressed until the Asus logo shows up and then release the Power key. Keep the Volume Up key pressed until you get into the Fastboot mode.

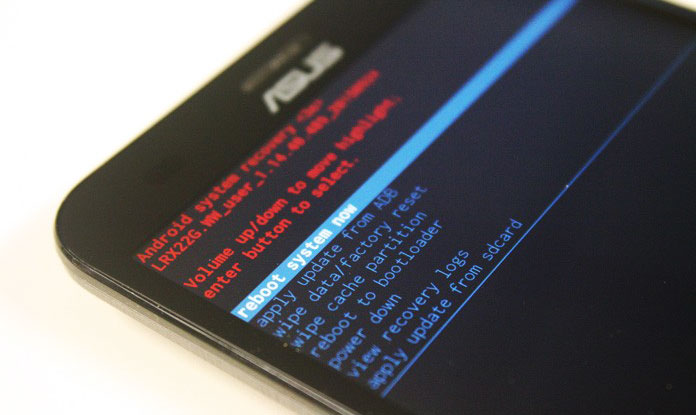
- Now highlight the RECOVERY option using the Volume Down key and select it using the Power button. Your device will enter the Recovery mode.

- Connect your Zenfone 3 through USB to your PC/laptop.
- Go to the ADB folder you downloaded earlier. Copy the downloaded firmware inside the folder.
- Now place the mouse pointer and press Shift key + Right click on the mouse and select ‘Open command prompt here’ option.
- Type check the connectivity between your device and computer, type the following command in the cmd window and hit the Enter key.
adb devices
- Then, type the following command in the command window. If the file name of the firmware you downloaded its different, replace the file name (italicized part) with the file name of the firmware.
adb sideload UL-ASUS_Z012D-WW-13.16.5.36-user.zip
- Then hit the Enter key on your keyboard.
- Wait until the process is complete.
- Reboot into the system.
- In case your phone is stuck on the boot screen/Asus logo after installation, reboot your device into the recovery mode and perform a data factory reset.
You fixed your device though you were the one to break it. If you have any queries related to this post feel free to ask us in the comments section below.
Read Also: Download Nokia Online Service Tool – Nokia OST 6.0.4 & 6.1.2


it says cannot read firmware name pls help me
Hi thanks for the guide. Can this be used to downgrade my firmware? or is this just for update? Thanks! 😀
Yes.
Awesome. Thanks! 😀