
Not exactly a month even, when CM11 M1 debuted bringing the taste of KitKat to your Nexus devices, stretching further to other devices by releasing nightlies throughout the previous month. Now, bringing presents for this New Year, CyanogenMod 11 M2 ROM release is taking place based on KitKat 4.4.2 KOT49H.
The announcement about this latest release was made earlier today on CyanogenMod’s website and Google+ social community, where the team has claimed to incorporate bug fixes, port old features and new features to the build. As for now the builds have already compiled and uploaded to the server for over 65 devices.
Indeed the features are remarkable, for other teams like ParanoidAndroid and AOKP are still working hard to port over again their major features, CyanogenMod went at quite a rate and brought almost all of its stuff to the latest release. The M2 snapshot brings in mostly bug fixes, a few of minor touch-ups regarding its features and of course new device additions like the Galaxy Nexus, which was sadly abandoned by the Google during the KitKat update.
Up with news, let’s guide you with Installing this snapshot on your supported Android device.
Make Preparations
- To Install CyanogenMod 11 M2 Snapshot ROM on your supported Android device, you’ll need your device to have a custom recovery setup on it. You can search out for your device under our rooting section for rooting it or you can simply search the blog.
- Enable USB Debugging
- Basic command line knowledge
Installation Instructions for CyanogenMod 11 M2 ROM
Its recommended to Install this with a complete wipe if you’re coming from another ROM or even an older 4.3 nightly to avoid any definite bugs and issues. You can either flash manually using the steps below or make use of inbuilt CM updater (Settings > About Phone) or make use of the CyanogenMod’s latest concept, CM Installer.
- Download the CyanogenMod 11 M2 Snapshot ROM zip and GApps zip.
- Connect your device to the PC via USB cable.
- Transfer the ROM and GApps zip files to a suitable location.
- Open a CMD window and type in the following command to reboot your device into recovery mode. You can do it manually too, if you’re well aware of the drill:
adb reboot recovery
- Once rebooted, disconnect the device.
- Using TWRP
- Tap on Wipe, then on Advanced Wipe. Select Dalvik, Cache, System, and Data. Swipe the button to start the wiping process
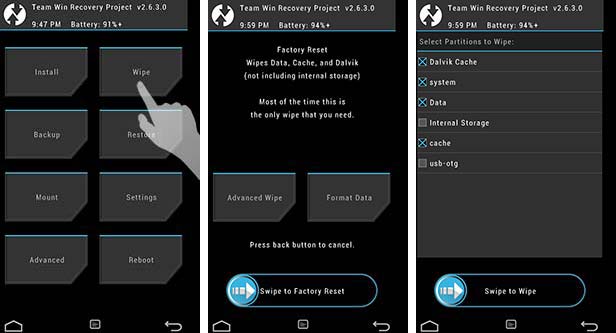
- Tap on Install, select the ROM zip file and swipe the button to start the flashing process.

- Go back to the main menu, tap on Install, select the GApps zip file and swipe the button to start the flashing process.

- Once done, tap on Reboot and then on System to reboot into your CM 11 ROM.
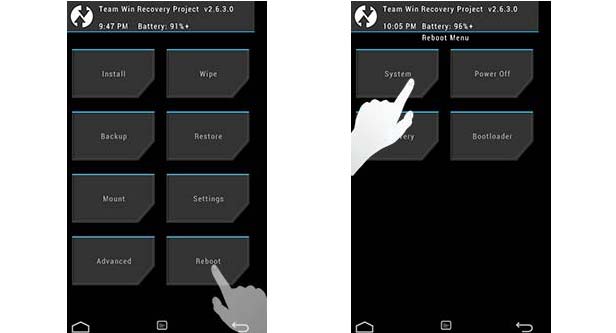
- Tap on Wipe, then on Advanced Wipe. Select Dalvik, Cache, System, and Data. Swipe the button to start the wiping process
- Using CWM
- Go to Wipe data/factory reset and select Yes – wipe all user data
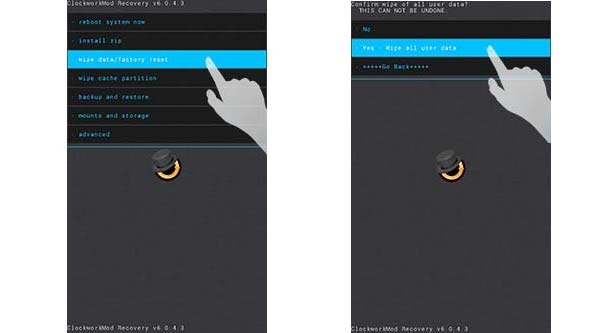
- Go to mounts and storage and then to format /system. Select Yes – format.
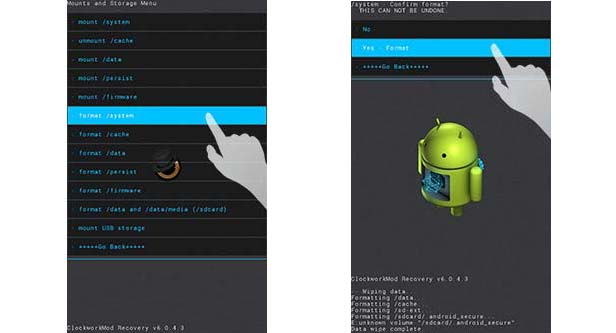
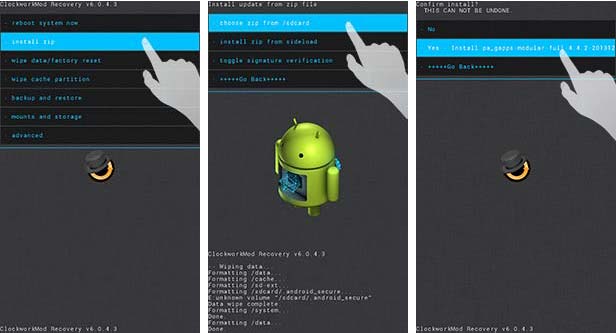
- Go to Install zip, then choose zip from /sdcard and select the ROM zip file.
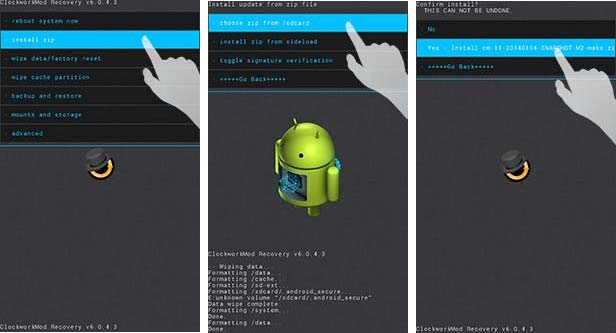
- Again. go to Install zip, then choose zip from /sdcard and now select the GApps zip file
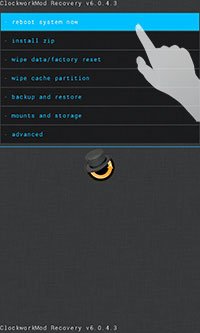
- Once the flashing part is done, go press on reboot system now to reboot your device into CM11 ROM.
- Go to Wipe data/factory reset and select Yes – wipe all user data
And hence, finally, you shall have your device relishing the fresh and new CyanogenMod 11 ROM based on KitKat, offering the least bugs to be used as a daily driver. Enjoy it! If you have questions or suggestions, post ’em here. Wait until next time when we bring more good stuff for you.
See Also: Install OTA Updates on via ADB Sideload & Recovery


Join The Discussion: